
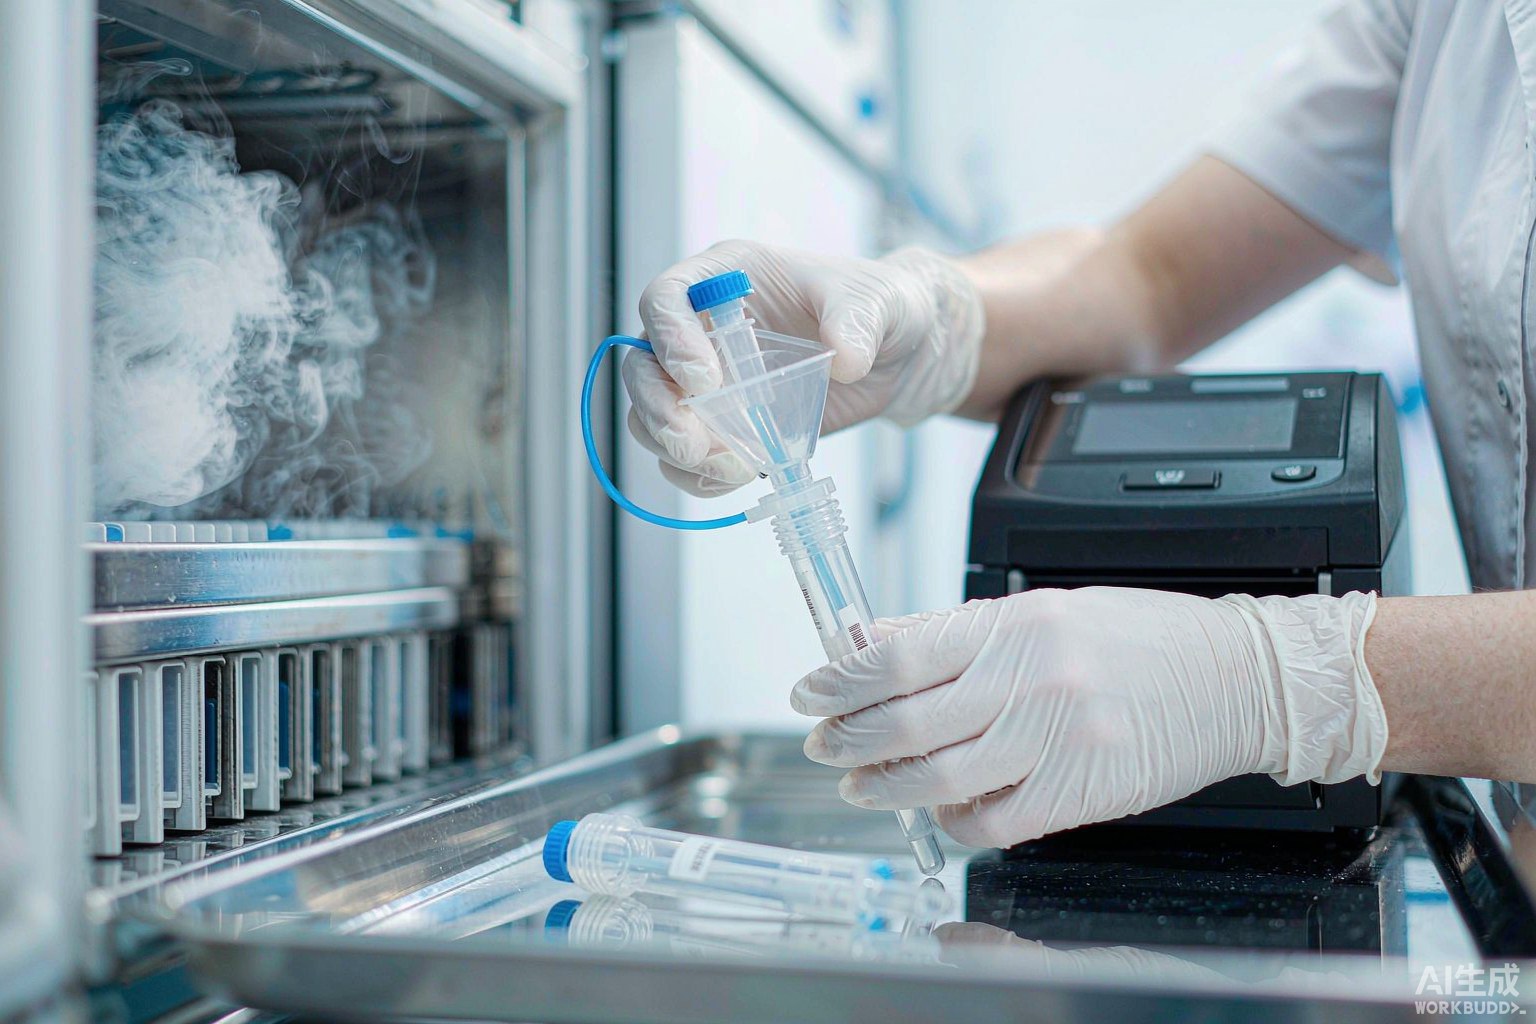

Applying the experience gained from standard cryovial labels directly to saliva collection tubes will miss half of the operating conditions. Standard cryovials typically go from centrifugation and aliquoting to storage within the same day as a continuous sequence, and the label faces a single low-temperature endpoint. The path of a saliva sample is entirely different—it is collected at the subject's home or at a sampling site, the tube contains a room-temperature stabilization solution, and it undergoes ambient or refrigerated delivery for several days to several tens of days before reaching the laboratory. Only after extraction or aliquoting does it enter long-term storage at -80 °C or even -196 °C. In other words, the same label must first withstand chemical attack and transport abrasion during the ambient segment, and then withstand shrinkage mismatch during the cryogenic segment.
The conclusion of this article is: for label selection on saliva collection tubes and oral swabs, the first determining condition is not the lowest temperature endpoint, but whether the "ambient stabilization solution attack window" and the "cryogenic storage window" can be covered simultaneously by the same label; the second determining condition is geometric feasibility—that is, whether the label can actually fit on this small curved surface and be reliably scan-readable; material grade ranks third. According to the requirements of ISO 20387:2018 for biobank operational processes, any break in identity information between these two windows will degrade a sample from a "usable biological resource" to "waste of unknown origin."
I. Conclusion First: Priority of the Three-Tier Determining Conditions
First tier: whether both windows hold simultaneously. The label must pass both the ambient stabilization solution contact test and the cryogenic storage test. A solution that holds at one end but fails at the other must be split into two labels or abandoned—it cannot be forced.
Second tier: geometric feasibility. First calculate the actual usable symbol width at the real position on the tube body, then decide whether to use a 1D barcode or a 2D code. This tier is a pure mathematical problem and does not depend on procurement experience.
Third tier: material grade. Material selection only becomes meaningful after the first two tiers are passed. Conversely, if a label has both temperature endpoints correct but the barcode cannot fit on a 16 mm outer diameter tube body, it is invalid for this sample chain.
The reason the three tiers must be evaluated in this order is that the first two tiers are veto items. The first tier determines whether the sample can be traced; the second tier determines whether this traceability information can be read by a machine. The temperature resistance of the material itself only becomes a positive factor after both are satisfied.
II. Why Standard Cryovial Experience Must Be Inverted Here
Saliva collection tubes are completely opposite to standard cryovials in four dimensions. Once these are listed, the practice of selecting materials based on experience naturally falls apart.
| Comparison Dimension | Storage-End Standard Cryovial | Saliva Collection Tube and Oral Swab |
|---|---|---|
| Primary service temperature | -80 °C or -196 °C, single endpoint | Ambient or 2 °C to 8 °C delivery segment, superimposed with -80 °C storage segment |
| Contact medium | Essentially dry, only briefly wet during condensation | Room-temperature stabilization solution present long-term inside the tube; residual spillover often occurs when opening |
| Motion state | Static storage | Continuous shaking and mutual friction during delivery |
| Label failure mode | Low-temperature shrinkage causes edge lifting | Print surface attacked causing barcode grade degradation, followed by edge lifting |
| Geometric constraint | Longer tube body, large usable area | Tube body mostly tapered or short straight cylinder, limited usable curved surface length |
The most easily overlooked row in this table is the fourth. The default failure mode in cryogenic scenarios is physical—edge lifting, curling, detachment; while the default failure mode in ambient stabilization solution scenarios is chemical—the printed content is first dissolved away or blurred, the barcode grade drops to unreadable, and at this point the label body may still be firmly attached. Different failure modes naturally require different material selection priorities.
III. First Window: Stabilization Solution Attack and Transport Abrasion in the Ambient Segment
The room-temperature stabilization solutions in commercially available saliva collection tubes are mostly alcohol-based or surfactant-based systems, used to prevent the collected epithelial cells from degrading or growing miscellaneous bacteria during delivery. The specific composition varies by product, and the collection tube instructions should be consulted during selection, but one point is common: these liquids have a certain swelling and penetration effect on thermal-transfer ribbon imprints and face stock coatings.
The failure path is typically a three-step progression. The first step is微量 minor spillover at the cap threads during transport, with liquid seeping to the label edge along the gap between the inner cap threads and the tube wall; the second step is preferential plasticization of the adhesive layer at the edge, producing micro-lifting at the 0.2 mm to 0.5 mm level; the third step is repeated friction between shaking tubes, and between tubes and box lining, tearing this micro-lift point into a notch. Once the start bar of the barcode is rubbed off, the entire code can no longer be read.
For this path, the effective countermeasure is not to make the adhesive stickier, but to hide the printed content. The self-laminating structure with a transparent tail is designed precisely for this: after printing, the transparent tail is folded over to form a physical barrier, and what directly contacts the external environment is the protective film rather than the ribbon surface. Among such structures, this article recommends T459 material, which is an ultra-thin polyester self-laminating film. The official material guide table checks all four temperature tiers—liquid nitrogen -196 °C, freezer -80 °C, hot water 100 °C, and autoclaving 121 °C—and also checks the cryovial and test tube columns, so a single material can cover both the ambient segment and the cryogenic segment.
If the process also involves automated aliquotting or cap-opening equipment, it is recommended to add a layer of safety margin: test incoming batches for peel strength per GB/T 2792-2014 and holding tack per GB/T 4851-2014, and retain the initial values; then perform a simulated transport test, shaking the tube under conditions similar to the actual delivery duration, and re-test the barcode grade per ISO/IEC 15416 or ISO/IEC 15415 after the test. Writing the "difference" rather than the "absolute value" into the work instruction is the only acceptance criterion in such scenarios that can withstand batch changes and supplier changes.
IV. Geometric Constraint: Whether a 1D Barcode Can Actually Fit
This section is pure arithmetic, but it is the section in this article that can most directly save money. The outer diameter of saliva collection tubes is commonly between 16 mm and 20 mm. When the barcode is arranged along the circumferential direction, the symbol width is limited by the circumference. Per ISO/IEC 15416, a quiet zone of no less than 10 modules must be reserved on each side of the symbol; at the same time, per official application guidelines, wrap-around labels in frozen environments require end-to-end overlap, so the truly usable symbol width is the circumference minus the quiet zones minus the overlap.
| Tube OD (mm) | Circumference (mm) | Quiet zone occupancy (mm) | Overlap reserve (mm) | Usable symbol width (mm) |
|---|---|---|---|---|
| 16 | 50.3 | 5.0 | 3.0 | 42.3 |
| 17 | 53.4 | 5.0 | 3.0 | 45.4 |
| 18 | 56.5 | 5.0 | 3.0 | 48.5 |
| 20 | 62.8 | 5.0 | 3.0 | 54.8 |
| 25 | 78.5 | 5.0 | 3.0 | 70.5 |
In the table, the quiet zone is calculated at a module width of 0.25 mm, 20 modules on both sides totaling 5.0 mm; the overlap is taken at the official minimum of 3.0 mm. Circumference is calculated as π times the outer diameter.
Substituting the four common encoding schemes into this table makes the conclusion clear. The Code 128 symbol width is calculated as (11N + 35) times the module width, where N is the number of data characters including the check character; in Code C mode, each character can compress two digits, while in Code B mode with mixed letters and digits, each character carries only one.
| Encoding Scheme | Character count N | Required symbol width (mm) | 16 mm tube | 17 mm tube | 18 mm tube | 20 mm tube | 25 mm tube |
|---|---|---|---|---|---|---|---|
| 14-digit numeric | 8 | 30.8 | 11.5 remaining | 14.6 remaining | 17.7 remaining | 24.0 remaining | 39.7 remaining |
| 19-digit numeric | 11 | 39.0 | 3.3 remaining | 6.4 remaining | 9.5 remaining | 15.8 remaining | 31.5 remaining |
| 13-character alphanumeric | 14 | 47.3 | 5.0 short | 1.9 short | 1.2 remaining | 7.5 remaining | 23.2 remaining |
| 16-character alphanumeric | 17 | 55.5 | 13.2 short | 10.1 short | 7.0 short | 0.7 short | 15.0 remaining |
The decision conclusion from this table is clear: on collection tubes with 16 mm and 17 mm outer diameters, as long as letters appear in the sample number, a 1D barcode along the circumferential direction is no longer feasible. The commonly seen 13-character code with a prefix such as "SL2026000123" is 5.0 mm short on a 16 mm tube and 1.9 mm short on a 17 mm tube—neither is a distance that can be sniffed out by layout tricks.
There are three solutions, listed in recommended order. The first and most thorough: change the number to pure digits and enable Code C double density, so that up to 19 digits can fit on a 16 mm tube. The second is to switch to Data Matrix; the same 13 characters require only 14 × 14 or 16 × 16 modules, which at a module edge length of 0.30 mm to 0.40 mm translates to an entire symbol including quiet zone of approximately 5.4 mm to 7.2 mm square—nearly 8 times smaller than the 47.3 mm required by a 1D barcode—and the symbol tail is completely unaffected by the curved surface, with built-in error correction. The third is to tighten the module width from 0.25 mm to 0.20 mm, scaling the required symbol width by 0.8×, so that a 16-character code on an 18 mm tube changes from infeasible to feasible; however, this path requires the printer to have sufficient resolution and ribbon transfer quality, otherwise symbol grade will fail before geometric conditions do.
There is another easily overlooked alternative location: the top surface of the cap. The top surface diameter of common screw caps is between 14 mm and 18 mm, with a usable area of approximately 154 mm² to 254 mm². A 5.4 mm to 7.2 mm square 2D code occupies only about 12% to 34% of this, leaving ample remaining space. If there is concern that the curved tube body interferes with scanning, the 2D code can be moved to the top surface as the primary code, with the tube body label retaining only human-readable identification fields.

V. Second Window: Thermal Shrinkage Mismatch and Overlap in the Cryogenic Segment
After the sample is extracted and aliquoted into storage, the label enters the second window. The failure mechanism in this segment is completely different from the ambient segment—not chemical attack, but thermal shrinkage mismatch.
The tube bodies of saliva collection tubes and aliquot cryovials are mostly polypropylene (PP), with a coefficient of linear expansion of approximately 100 to 150 per million per kelvin according to common engineering handbook ranges; polyester (PET) face stock is approximately 20, and nylon cloth approximately 80. The difference between these three is amplified under cryogenic temperature differentials: the tube body shrinks far more than the face stock, generating shear at the interface, and once this exceeds the creep capacity of the adhesive layer, peeling begins from the ends.
Taking the effective circumferential length of the label as 45 mm and conservatively taking the upper limit of 150 for the tube body, the table below calculates the mismatch amounts.
| Temperature span | Temperature difference (K) | Polyester face stock mismatch (mm) | Nylon cloth face stock mismatch (mm) | Reduction with nylon cloth |
|---|---|---|---|---|
| Ambient 20 °C to -80 °C | 100 | 0.59 | 0.32 | ~46% |
| Ambient 20 °C to -196 °C | 216 | 1.26 | 0.68 | ~46% |
Neither 0.59 mm nor 1.26 mm appears large, but they are relative displacements acting over a 45 mm length, translating to interfacial shear strains of 1.3% and 2.8% respectively—a magnitude already sufficient to trigger edge lifting. After switching to nylon cloth face stock, the reduction stabilizes at approximately 46%, which is why on small, rapidly cooling cryovials, nylon cloth structures are often more resistant to repeated temperature shocks than polyester film structures.
The official application guidelines also provide two hard requirements directly related to safety. First, labels applied to frozen tube surfaces require end-to-end overlap of no less than 3 mm; second, the purpose of the overlap is to tuck the free end under the label itself, not simply to wrap an extra loop. Per ISO 20387:2018 requirements for sample identification durability, these two points should be written into work instructions and checked batch by batch.
Another frequently underestimated factor is the retrieval cycle. If a sample in a -80 °C freezer is retrieved 12 times within a year, it accumulates 12 complete cycles from -80 °C back to ambient and then back to -80 °C. If only a single cryogenic static test is performed during acceptance, this type of fatigue is completely masked. It is recommended to include no fewer than 10 temperature cycles in the type test and to re-test the barcode grade after the cycles are completed.
VI. Material Comparison: Column-by-Column Screening per the Official Guide Table
By cross-referencing the two windows, geometric constraints, and mismatch amounts discussed above, a directly usable material list can be obtained. The table below is transcribed column by column from the official material guide table, and the checkmarks are based on that table.
| Material | Official description highlights | Liquid nitrogen -196 °C | Freezer -80 °C | Hot water 100 °C | Autoclaving 121 °C | Cryovial and test tube column | Positioning in this article's scenario |
|---|---|---|---|---|---|---|---|
| T629 | Nylon cloth label, easy to apply, high/low temperature resistance, good conformability | ✓ | ✓ | ✓ | ✓ | ✓ | First choice for primary cryogenic segment label; all four temperature tiers checked and all four application dimensions checked |
| T459 | Ultra-thin polyester self-laminating, protects printed content and provides a transparent viewing window for liquid level | ✓ | ✓ | ✓ | ✓ | ✓ | First choice for ambient transport segment; self-laminating film blocks stabilization solution attack on the print surface |
| T509 | Durable vinyl label, suitable for wrapping, good conformability, requires overlap in liquid nitrogen environments | ✓ | ✓ | ✓ | — | — | First choice for tube body wrap-around, but the official table does not check the cryovial and test tube columns for it |
| T429 | Ideal choice for labeling frozen surfaces; when applied to frozen tube surfaces, overlap at least 3 mm end-to-end | ✓ | ✓ | ✓ | ✓ | ✓ | Second choice for cryogenic tube body; overlap requirement most strictly enforced |
| T439 | 6-color cryogenic label with pre-printed color at top for quick differentiation of container types | ✓ | ✓ | ✓ | — | ✓ | Color-code management of sampling batches and sample types |
| T419 | Bright white PET material for cryovials and microcentrifuge tubes; officially positioned for resistance above -40 °C | — | — | — | — | ✓ | Only for ambient transport or return segments; cannot cover cryogenic tiers |
The row that most needs emphasis in this table is the last one. Any practice of treating the -40 °C tier as "can also barely be used down to -80 °C" is saving cost in the place where it should least be saved: once a label detaches inside the freezer, what is lost is not a piece of paper, but the entire provenance information of the sample and its qualification as traceable material under the ISO 20387:2018 and ISO 15189:2022 systems.
One clarification on terminology is also needed: the temperature markings in some product page titles on the site are not fully consistent with the tiers in the official material guide table. During selection, the official material guide table shall prevail, and other markings are for reference only; do not infer tiers from product page summaries in reverse.
VII. Encoding and Fields: Keeping the Number Intact Across Both Windows
After resolving whether the label fits, the next issue is the structure of the number itself. The information in the saliva sample chain can be divided into three groups of fields, each with a different purpose; mixing them together is the most common mistake.
Identity fields include the subject number and its check digit. This is the only part that remains unchanged across the entire chain. It is recommended to keep it purely numeric to enable Code C double density, reserving the valuable 1D space for the identity itself.
Process fields include the collection date, delivery receipt date, stabilization solution lot number, and receiver code. This information is basically no longer queried after the sample is stored, so it need not be squeezed into the 1D barcode; writing it into additional fields of the 2D code or backend records is more appropriate.
Location fields include the room, freezer, shelf, cryobox, and in-box coordinates. This group must be kept as variable information, because the sample's position within the freezer changes with consolidation and cleanup; fixing it in the tube body code creates long-term data debt.
A feasible implementation approach is: the tube body carries the identity 2D code plus a human-readable short code; the cryobox position carries location information and is updated synchronously when the box is moved; the two are linked through inbound/outbound records. For collection and transport consumables intended for in vitro diagnostic use, the controlled status of their identification documents can also be managed following the principles of ISO 13485:2016, ensuring that every field rule change has a version record.
VIII. Printing Consumables and Barcode Grade Acceptance
Small labels impose much stricter requirements on the printing system than large labels. Consumables and printing parameters should be fixed according to the following four points: First, resin-based ribbons are preferred. Stabilization solution contact is the norm in this scenario. Although mixed-base or wax-based ribbons perform well in ink absorption under ambient dry conditions, once they encounter alcohol-based or surfactant-based systems, the imprint edges will first spread. Second, printing resolution shall be no less than 300 dpi. A module edge length of 0.30 mm to 0.40 mm corresponds to approximately 3.5 to 4.7 printed dots at 300 dpi, allowing module edges to be clearly reproduced; below this resolution, the decoding margin of the 2D code will be consumed. Third, the symbol must have a quiet zone. No less than 10 modules on each side of a 1D barcode, and no less than 1 module on each side of a 2D code; these must not be trimmed for aesthetic reasons during layout. Fourth, acceptance by grade, not by visual inspection. 1D barcodes per ISO/IEC 15416, 2D codes per ISO/IEC 15415; both need to be re-tested once after simulated transport and once after no fewer than 10 temperature cycles.
It is recommended to allow more than 24 hours of curing time between printing and actual use. The adhesive layer of a freshly printed label has not yet completed final wetting; if applied to a small curved surface at this point, rebound stress will slowly lift the edges. Applying after curing results in noticeably more stable initial peel strength.
Finally, a boundary note: this article discusses identification solutions affixed to collection tubes, aliquot tubes, and associated containers, which belong to the variable information layer managed by the laboratory itself. Gas cylinder body color markings and gas pipeline identification colors belong to statutory and engineering domains, are the responsibility of the filling unit and pipeline engineering party, and are outside the scope of the products and services described in this article.
IX. Why Oral Swab Shafts Are Not Directly Labeled
The diameter of an oral swab itself is commonly around 2.5 mm, with a circumference of less than 8 mm. Even the smallest 2D code solution, including quiet zones, requires approximately 5.4 mm square, and with the necessary edge safety margin, this already exceeds the physical possibility of this circumference. As for the 30.8 mm 1D barcode, the gap is nearly four times, making it even less feasible.
The correct approach is to anchor the code to the carrier rather than the swab shaft. Specifically, there are three layers: the transport tube into which the swab is placed carries the primary 2D code identity; swabs of the same batch are managed by a unified color code or lot number on the outer packaging; and sampling records are backed up by a human-readable short code and paper forms. This ensures traceability of individual samples without making unnecessary process compromises on a 2.5 mm plastic shaft.
If the process truly requires differentiation at the individual swab level, an optional approach is to introduce pre-printed color blocks at the top following the T439 concept, using six colors to distinguish sampling batches or sample types, and leaving the specific number on the transport tube. The color block answers "which batch is this," and the 2D code answers "which one is this"—the division of labor is clear.
X. List of Six Common Misapplications
Based on the reasoning above, the following six practices are most common in the field and most easily overturned during acceptance:
1. Directly reusing the existing -80 °C cryovial solution, ignoring chemical attack during the ambient delivery segment, only to discover at storage that the barcode is already unreadable.
2. Forcing a number with a letter prefix into a 1D barcode on a small-OD tube, relying on repeated scanner retries to improve the success rate—this transfers process risk downstream.
3. Using -40 °C tier material as a cryogenic tier, on the grounds of "let's stick it on and see"—once this fails, the cost of re-sampling far exceeds the label price difference.
4. Performing only a single cryogenic static test without temperature cycling, thereby completely missing fatigue failure.
5. Trimming the quiet zone for aesthetics, or adding a ring of tape at the label edge to "reinforce" it—the latter actually creates a new thickness step and pushes the edge up further.
6. Printing with wax-based or mixed-base ribbon and applying to containers with alcohol-based stabilization solution, causing the imprint to be slowly dissolved away during delivery.
Recommended Products
For the label materials and application scenarios covered in this article, the following BradyLAB (BRD) products are available for selection reference (click to view specifications and request a quote):
- Lab005-629 25x15mm laboratory cryovial -196 °C liquid nitrogen nylon cloth biobank label (T629 material) (¥999/roll)
- Lab115-459 9.53+65x9.53mm biobank conical tube cryogenic cryovial PET self-laminating label (T459 material) (Price on request)
- Lab208-509 25.4x63.5mm wrap-around cryovial biobank thin tube label (T509 material) (Price on request)
- BRL-80-BK BradyLAB laboratory-specific cryogenic black resin ribbon 80mmx300m (Price on request)
FAQ
Q1: Do saliva collection tubes require labels resistant to -196 °C?
A: First look at the process. If the collected saliva is only used for short-term testing and does not enter long-term liquid nitrogen storage, then only the ambient and -80 °C endpoints need to be covered; only if the sample is to enter a population-cohort-level biobank for long-term gas-phase liquid nitrogen storage is the -196 °C endpoint required. However, unlike standard cryovials, saliva tubes must first pass erosion verification in the ambient stabilization solution segment—this step often determines whether the material is viable.
Q2: How should I choose between a 1D barcode and a 2D code?
A: First do the arithmetic in Section IV of this article. When the tube OD is 16 mm or 17 mm and the number contains letters, a 1D barcode along the circumferential direction is not usable, and Data Matrix should be selected directly; when the tube OD is no less than 20 mm and the number can be compressed to 14 digits or fewer, a 1D barcode is lower cost. Either way, quiet zones must be reserved around the symbol.
Q3: Why is nylon cloth face stock more recommended on small cryovials?
A: Because its coefficient of linear expansion is closer to that of the polypropylene tube body. Per the calculation in Section V of this article, over a 45 mm effective length and a 216 K temperature difference from ambient to -196 °C, the mismatch between polyester face stock and the tube body is approximately 1.26 mm, and for nylon cloth approximately 0.68 mm—a reduction of about 46%. The smaller the mismatch, the smaller the interfacial shear strain, and the less likely edge lifting is after cryogenic cycling.
Q4: Can the barcode be applied directly to the top surface of the screw cap?
A: Yes, and it is often the better choice. The top surface is mostly flat, eliminating scanning angle issues caused by curved surfaces; a Data Matrix including quiet zone is approximately 5.4 mm to 7.2 mm square, occupying only about 12% to 34% of a common 14 mm to 18 mm cap surface. Note that the top surface may be repeatedly touched by fingers when opening the cap, so a self-laminating structure is recommended.
Q5: Can -40 °C tier freezer labels be used down to -80 °C?
A: Not recommended. Per the official guide table, T419 is positioned for resistance above -40 °C; cryogenic tiers are not applicable, and neither the -80 °C nor the liquid nitrogen tier is checked. Another reason: "looks fine" after a single short-term test is not a validation conclusion—repeated frosting and re-condensation during retrieval will change the result.
Q6: How long does saliva sample delivery typically take? Should this period be considered?
A: It must be considered. Under room-temperature stabilization solution systems, the period from collection to laboratory receipt is often several days to several tens of days; this period is both the main window for chemical attack and the accumulation period for transport abrasion. It is recommended to perform simulated transport at the actual worst-case duration in the type test, rather than only static placement.
Q7: How should the acceptance document be written?
A: Retain initial in-storage values per GB/T 2792-2014 and GB/T 4851-2014, then grade per ISO/IEC 15416 or ISO/IEC 15415 at three time points: at print completion, after simulated transport, and after temperature cycling. Write the differences between the three time points into the work instruction as the unified comparison criterion for subsequent batch changes and supplier changes.