
Conclusion first: the order of selection decisions for reference materials and quality control materials
Conclusion first: When selecting labels for reference materials and quality control materials, the first criterion is not "can it withstand -80 °C," but whether the label can, on a curved surface only a dozen or so millimeters wide, fully carry all the fields required for metrological traceability, and whether it can avoid losing any link in the four-level transfer chain of "original vial → primary stock solution → secondary intermediate solution → tertiary working solution." There are three bases for the decision: first, ISO 17025:2017 requires that measurement results be traceable to specified reference objects through an unbroken chain of comparisons, and in reality the only carrier of this chain of comparisons is the number, lot number, and value-assignment date affixed to the container; second, stock reference solutions almost inevitably must be aliquoted by single-use amount, so one parent number will spawn a dozen to several dozen child numbers, and the coding space must be reserved before printing, otherwise there will be no numbers left when gradients are re-prepared the following year; third, reference materials are mostly 1 mL or 2 mL screw-thread vials or 0.5 mL microcentrifuge tubes, and after deducting the threaded section and the graduation viewing area, the effective labeling arc length often has only about 18 mm left. Within this width, both the number and the 2D code must fit, and symbol size calculation is more easily overlooked than the material itself—and is precisely the lowest-cost type of corrections rework.
Therefore, the most common failure mode of reference material identification is not "the label fell off," but "the information chain broke": the label is still intact on the vial, but it can no longer be read to determine which dilution level this vial is, when it was prepared, or how much shelf life remains. The approach adopted by BradyLAB (BRD) in biobank and laboratory low-temperature identification projects is to split reference material identification into three relatively independent objects—the original vial information layer (value-assignment information and opening records carried over from the certificate), the aliquot transfer layer (parent numbers spawning child numbers, concentration by level), and the short-term status layer (number of reconstitutions, same-day use information, and other content that changes with operations). The replacement frequency of the three is completely different, so they should also be selected separately according to their respective temperature endpoints, rather than trying to cover the entire process with one label.
It should be specially noted that BradyLAB (BRD) provides sample identification materials and printing solutions that laboratories can apply themselves, and does not provide or replace any legally mandatory identification (such as cylinder body color markings, gas pipeline identification colors, and flow direction markings); the latter are the responsibility of filling units and piping engineering parties. Chemical safety disclosure concerning the standard solutions themselves shall also be implemented separately in accordance with GB 15258 and the GB 30000 series.
I. Three special characteristics of reference material identification
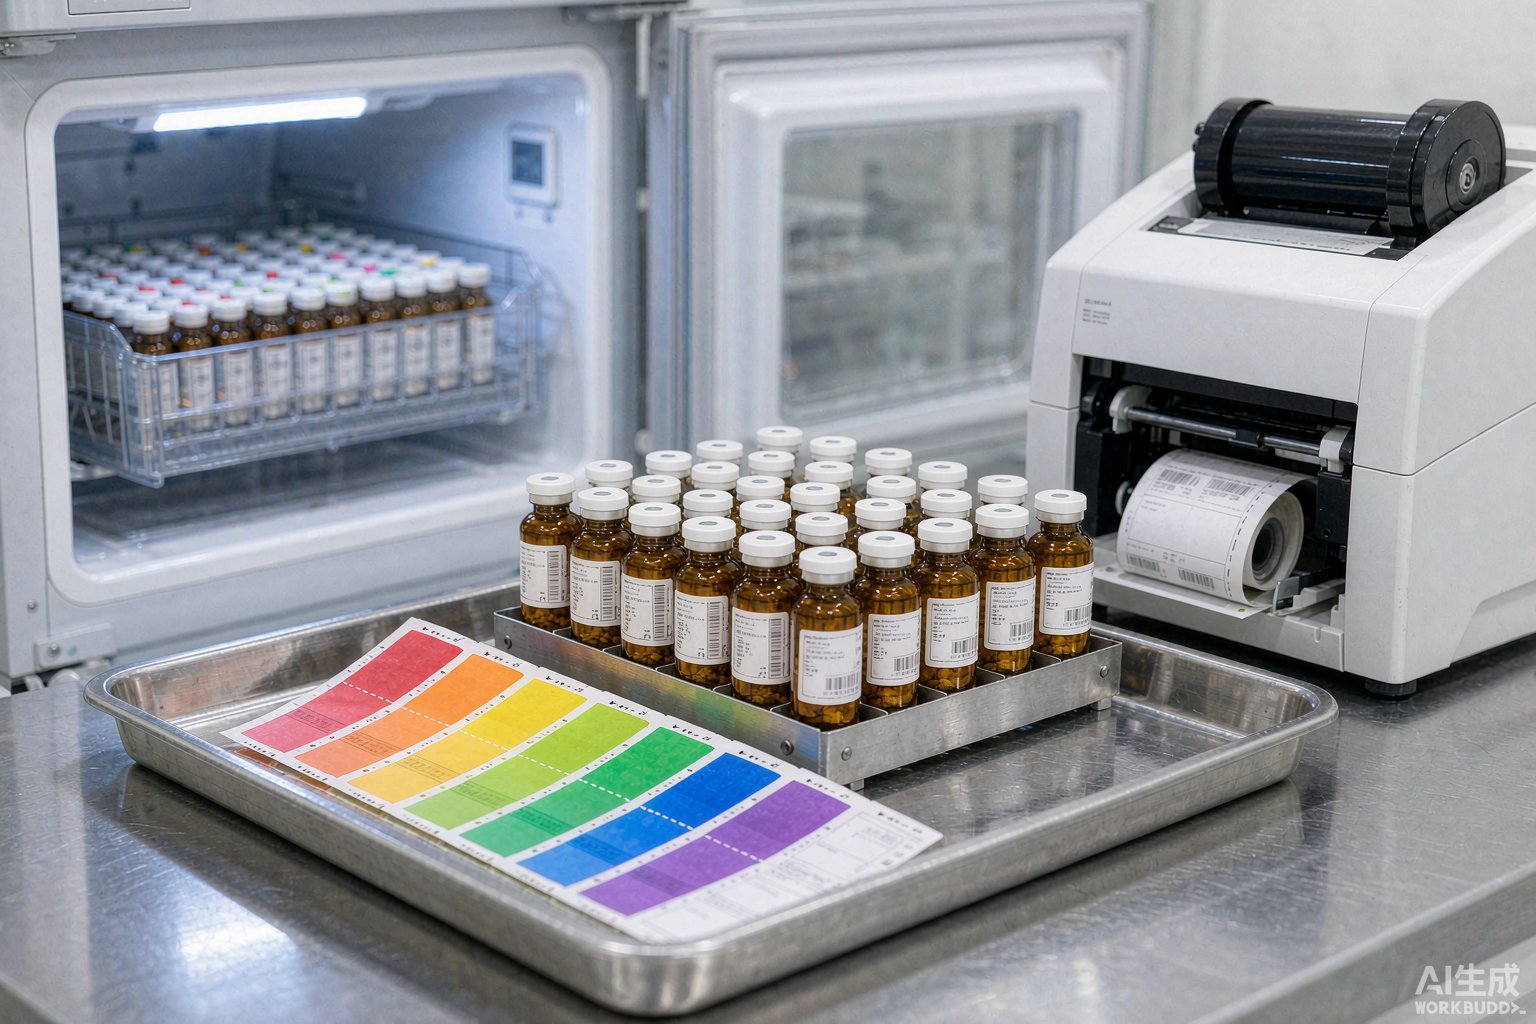
Managing reference materials as ordinary reagents is the starting point of identification chaos in most laboratories. Compared with conventional reagents, the identification requirements for reference materials differ in three essential ways.
First, the fields cannot be compressed. A reagent bottle label usually only needs the name, concentration, and opening date; whereas a label on a certified reference material container must simultaneously carry at least the certificate number, lot number, value and uncertainty reference, storage conditions, certificate validity period, opening date, and post-opening validity period. These fields are not redundant information: ISO 17025:2017 requires that technical records contain information sufficient to reproduce the work, and the absence of any one item may cause a completed traceability exercise to lose its probative force outside the calibration chain. The same applies on the medical laboratory side: ISO 15189:2022 requirements for calibration and quality control of examination procedures can be traced back to a specific batch of quality control materials; information that cannot fit on the label ultimately must be looked up in ledgers by people, and this step is precisely the one with the highest error rate.
Second, the number of derived numbers is large. After a certified reference material is received, it is usually first prepared into a stock solution, and then the stock solution is serially diluted into a working curve. Taking a six-level curve as an example, one parent number will simultaneously spawn the stock solution, intermediate solutions, and six concentration points, plus parallel aliquoted child vials; a single batch can easily exceed twenty child numbers. Such numbers must have their digit width designed into the print template in advance; otherwise, if the number of digits is insufficient, when the same curve is re-prepared the following year, one can only start over.
Third, there are three definitions of validity period. The certificate validity period, the post-opening validity period, and the validity period after reconstitution or dilution are not equivalent to one another; the latter two have almost no unified industry definition and are mostly specified by laboratories based on their own stability data. This requires the label to leave a "writable" position, or to reserve fields in the 2D code that can be written by a handheld terminal, rather than printing all three dates permanently at once.
II. Four-level transfer chain: relabeling is required at every level crossed
Splitting reference materials into a four-level transfer chain is the simplest way to plan fields and materials. The container form, storage temperature, and lifespan of each level are different, so each level requires an independent label and cannot be handled on behalf of the previous level.
| Transfer level | Typical container | Typical storage temperature | Required fields | Recommended material tier |
|---|---|---|---|---|
| Original vial (certified reference material) | Amber ampoule, 1 mL or 2 mL screw-thread sample vial | As specified in the certificate, commonly 2 °C to 8 °C or -20 °C | Certificate number, lot number, value and uncertainty reference, certificate validity period, opening date | Room-temperature to -40 °C tier (T419 / T329) is sufficient; the focus is readable area |
| Primary stock solution | 2 mL screw-thread cryovial, amber glass vial | -20 °C or -80 °C | Parent number, concentration and unit, solvent system, preparation date, validity period, preparer | Covering the -80 °C tier (T629 / T429 / T459) |
| Secondary intermediate solution | 1.5 mL cryovial | -20 °C or -80 °C | Derived number, concentration by level, dilution date, validity period, parent number | Same tier as stock solution; it is recommended to add pre-printed colors to distinguish levels |
| Tertiary working solution | 0.5 mL microcentrifuge tube, chromatography injection vial | Prepared as needed, short-term 2 °C to 8 °C | Number, nominal concentration of the day, preparation date, validity window | Room-temperature tier; prioritize small-size labels with high-density 2D codes |
The column in this table most easily overlooked is "parent number." Once this item is missing, when a deviation occurs, it is impossible to determine whether the problem lies in the stock solution or the intermediate solution, and the entire curve can only be re-prepared. The cost of writing it into the template is close to zero, but the troubleshooting cost after it is missing is measured in days.
III. Field list: what exactly should be left on a label
The field list below can be used directly as the design basis for print templates. Different laboratories have different scopes of reference materials, but whether the following ten fields have been evaluated one by one determines whether rework will be needed later.
| Field | Function | Common value format | Consequence if missing |
|---|---|---|---|
| Internal unique number | Unique correspondence between ledger and container | SRM-0264-A03 | Cannot locate a specific vial; multiple vials in the same batch are confused with one another |
| Parent number | Links the dilution chain | Parent number plus separator plus sequence number | Deviation cannot be attributed to a specific level |
| Certificate number and lot number | Entry point for metrological traceability | Certificate number plus Lot number | Loss of probative force for traceability |
| Concentration and unit | Calculate the next dilution ratio | 1.00 mg/mL | All concentrations in the entire curve become inaccurate |
| Solvent system | Judge volatility and compatibility | Methanol, acetonitrile, acid-containing aqueous phase | Compatibility misjudged during transfer; label soaked by solvent and fails |
| Preparation date | Start of validity period | Year-month-day | Validity period cannot be determined |
| Validity period or retest date | Basis for disposition at expiry | Year-month-day | Used beyond expiry without being noticed |
| Storage temperature tier | Constrains actual storage location | -20 °C, -80 °C | Room-temperature-tier vials mistakenly placed in the freezer tier |
| Preparer and reviewer | Responsibility traceability | Employee ID abbreviation | Responsibility chain broken; deviation investigation has no source |
| 2D code or barcode | Machine readability | DataMatrix, Code 128 | Inventory and handover can only be transcribed manually |
These ten fields cannot be arranged in ten rows on a label of ten square millimeters. In practice, the approach is layered processing: compress all rarely changing content (number, lot number, concentration, solvent) into the 2D code, and print the small amount of content that must be visually confirmed every day (expiry date, level code) in large, human-readable font. In this way, the 2D code occupies only an area of about 6 mm square, and the remaining area is left for a limited number of key fields. ISO 20387:2018 emphasizes that the durability of identification should match the retention period of the information it carries; the layered logic here is precisely the concretization of this principle in small-size scenarios: the 2D code carries the part for long-term retention, and the visual area carries the part that changes frequently.
IV. Material tiers: selection matrix of temperature endpoints and container geometry
Temperature endpoint is the first basis for material tiering. The following matrix is listed item by item according to the official material guide table. When selecting, first align the lowest temperature of your scenario in the "Official temperature tier" column.
| Material code | Official description and temperature tier | Applicable containers | Application points | Limiting steps |
|---|---|---|---|---|
| T629 nylon cloth label | Easy to apply, resistant to high and low temperatures, good conformability; fully applicable to all four tiers: liquid nitrogen -196 °C, freezer -80 °C, hot water 100 °C, autoclaving 121 °C | All locations in the laboratory requiring identification, including cryovials, Eppendorf tubes, microscope slides, conical tubes | Press firmly after conforming to curved surfaces; allow sufficient standing time before entering low temperature | The broadest-coverage tier; no obvious limitations observed |
| T459 self-laminating label | Ultra-thin polyester with a self-laminating structure with a transparent tail, protecting printed content and leaving a transparent window for observing liquid level; fully applicable to all four tiers: -196 °C, -80 °C, 100 °C, 121 °C | Conical tubes, cryovials, and cell-related containers | The laminate layer fully covers the print area; when wrapping, keep the window away from graduations | Not suitable for scenarios requiring repeated handwritten ink layers |
| T429 polyester freezer label | Ideal choice for identifying frozen surfaces; fully applicable to all four tiers: -196 °C, -80 °C, 100 °C, 121 °C | Cryovials, test tubes, and packaging identification | When applied to frozen tube surfaces, overlap the ends by at least 3 mm | Edges lift at low temperature when overlap is insufficient |
| T439 six-color pre-printed label | Top of label pre-printed in 6 colors for quick identification and classification of laboratory container types; applicable to three tiers: -196 °C, -80 °C, 100 °C | Cryovials, test tubes, and general consumables | Color position is the level code, with fixed semantics in the ledger | Not applicable to the 121 °C autoclaving step |
| T509 vinyl wrap-around label | Durable and long-lasting, suitable for wrapping, good conformability; applicable to three tiers: -196 °C, -80 °C, 100 °C | Thin tubes, ampoules, and other cylindrical surfaces | Requires end overlap when used in liquid nitrogen environments | Not applicable to the 121 °C autoclaving step |
| T419 bright white PET | Bright white PET material, used for cryovials and centrifuge tubes, resistant to environments above -40 °C | Room-temperature tier and -20 °C refrigerated/freezer tier | Wipe the vial body dry and press firmly before application | Not suitable for -80 °C ultra-low temperature or liquid nitrogen environments |
| T409 chemical-resistant label | Excellent chemical resistance and abrasion resistance; applicable to three tiers: -196 °C, -80 °C, 100 °C; not applicable to 121 °C autoclaving | Frozen or room-temperature bottles, test tubes | Low-temperature scenarios require end overlap; at room temperature nylon overlap is acceptable | Not applicable to autoclaving; no on-sale specification page on the site at present; for specific materials and specifications, refer to the product specification sheet, or contact the product manager for selection |
| T625 removable cloth label | Vinyl cloth label, repositionable, removable, no adhesive residue, reusable, room-temperature tier | Temporary status information at the room-temperature tier | Clean and dry before application; peel off slowly and flat when removing | Not applicable to freezing and ultra-low temperature steps below refrigerated temperatures |
One more point should be added: also in the -40 °C tier is T329 matte white PP adhesive; the two have similar positioning and neither is used for aliquoted samples at lower temperatures. The selection endpoint is actually quite simple—first ask how cold this vial will get at its coldest, cross out all tiers below that temperature, and then, within the remaining tier, choose the one with the smallest division according to container geometry.
V. Color code management of dilution gradients: print concentration levels as colors
It is normal for a dozen or more vials from a six-level dilution to appear in the same freezer. Distinguishing levels by having people read numbers character by character is far slower than reading colors, and far more error-prone than reading colors. The approach here is to fix the "level code" with pre-printed color positions: the top of the T439 label is pre-printed with six color positions, each corresponding to fixed semantics in the ledger, so laboratory personnel can tell at a glance which level they are holding.
| Color position | Suggested semantics | Applicable objects | Corresponding number format |
|---|---|---|---|
| Color position 1 | Original vial and primary stock solution | Amber ampoules, 2 mL screw-thread cryovials | Number prefix fixed as SRM plus two-digit sequence number |
| Color position 2 | Secondary intermediate solution | 1.5 mL cryovials | Number suffix plus M, and indicate the parent number |
| Color position 3 | Highest concentration point of the working curve | Injection vials, microcentrifuge tubes | Suffix C1, prepared as needed |
| Color position 4 | Intermediate concentration points of the working curve | Injection vials, microcentrifuge tubes | Suffix continues sequentially from C2 |
| Color position 5 | Lowest concentration point and blank of the working curve | Injection vials | Suffix LB, and indicate the matrix type |
| Color position 6 | Quality control materials and spiked recovery samples | Cryovials or injection vials | Suffix QC, and indicate the level number |
The specific six-color combinations are indicated on the product page and in the specification sheet; laboratories may assign semantics themselves before use and write them into standard operating procedures. Two reminders: first, once the color position semantics are determined, do not change them midway; otherwise, old and new batches will have the same color but different meanings, causing mistaken retrieval; second, color positions are only auxiliary identification and cannot replace numbers; machine reading is still based on the 2D code.
VI. Small-diameter containers: calculation of effective arc length and wrap overlap
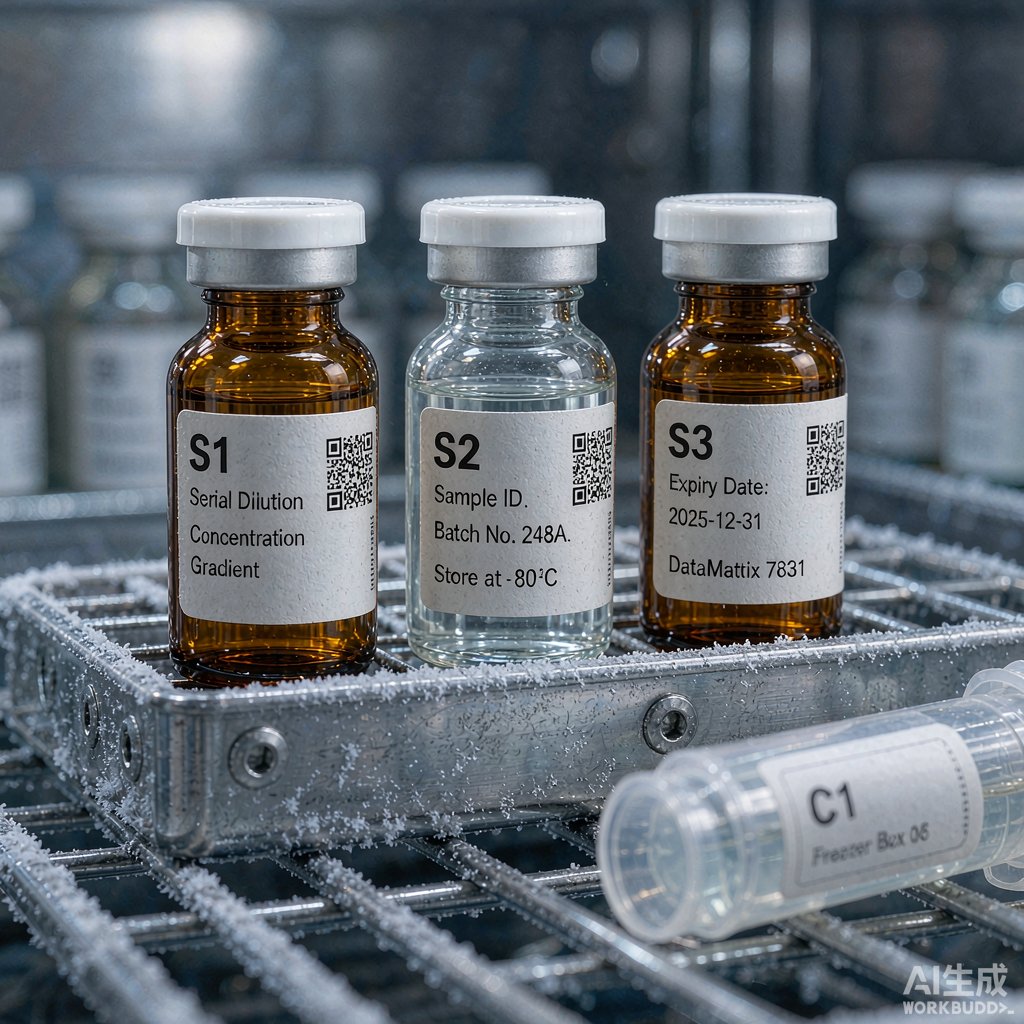
The most common geometric problem with reference materials is small outer diameter and even smaller usable arc length. According to the circumference formula, circumference equals outer diameter multiplied by pi, but the arc segment that can actually be labeled must also deduct the threaded section, grip area, and viewing window.
| Container | Outer diameter (approx.) | Theoretical circumference | Effective labeling arc length | Usable DataMatrix specification | Module size |
|---|---|---|---|---|---|
| 0.5 mL microcentrifuge tube | 8 mm | Approx. 25.1 mm | 10 mm to 12 mm | 12 × 12 | Approx. 0.9 mm |
| 1.5 mL cryovial | 12 mm | Approx. 37.7 mm | 18 mm to 20 mm | 18 × 18 | Approx. 1.1 mm |
| 2 mL screw-thread sample vial | 12 mm | Approx. 37.7 mm | 16 mm to 18 mm | 16 × 16 | Approx. 1.1 mm |
| Amber ampoule neck | 6 mm to 7 mm | Approx. 19 mm to 22 mm | Only enough to wrap one turn | Not recommended; use a 1D barcode or plain number instead | Not applicable |
Overlap is a hard constraint here: when T429 is applied to frozen tube surfaces, the ends must overlap by at least 3 mm; T509 also requires overlap when used in liquid nitrogen environments. Overlap consumes a segment of effective arc length, so in actual printing the overlap should be included before stepping down one symbol specification—if originally designed as 18 × 18, the net visible width after deducting overlap is often only about 15 mm, in which case one tier should be lowered rather than forced in. T509 has a wrap-around structure and is more suitable for slender cylindrical surfaces; T429 is more suitable for frozen flat surfaces; the two do not replace each other.
VII. Light-protective containers and organic solvents: the object is never only temperature
A considerable proportion of reference materials are prepared in methanol, acetonitrile, or acid-containing aqueous systems and are light-sensitive. These two points separately change two types of label choices.
First, solvent. When solvent evaporates or creeps up along the vial mouth, it soaks the label edge, causing the adhesive interface to be gradually displaced. In this case, priority should be given to placing the printed content under a self-laminating structure: the ultra-thin polyester plus transparent tail laminate of T459 is designed precisely for such working conditions; the laminate layer encloses the printed content, so when solvent intrudes from the edge, it first contacts the laminate rather than the ink layer. Its transparent window also preserves the ability to observe liquid level and precipitate, which is especially useful for stock reference solutions that need confirmation of whether they have evaporated to dryness or precipitated.
Second, light protection. Light-sensitive reference materials usually use amber glass vials, with narrow necks and short bodies, leaving very limited labelable area. In this case, large-area coverage of the vial body is not advisable; instead, narrow strip labels should be used as much as possible, leaving the light-protective function to the vial itself. If a larger readable area is indeed needed, the label can be applied to the top of the cap and a duplicate number added on the side wall; the cost is that opening torque will repeatedly shear the label edge, in which case T629 nylon cloth label with better conformability should be selected. If the solvent used falls within the scope of hazardous chemicals, safety disclosure on the original container must still be set separately in accordance with GB 15258 and the GB 30000 series; the label solution has no authority to replace it.
VIII. Aliquot system and freeze–thaw cycles: numbers must follow the small vials
Stock reference solutions are usually aliquoted by single-use amount, prepared into a dozen or so portions at one time, to avoid repeated freezing and thawing of the entire vial. This has a direct implication for identification: each aliquot must generate a new independent number, rather than a dozen portions sharing the same number.
A practical numbering rule is "parent number + separator + two-digit sequence number + date segment." It has three advantages: the sequence number width is fixed, so sorting will not become disordered; with a date segment, batch age can be seen directly at retrieval; retaining the parent number ensures that any vial can be traced upward to the stock solution and certificate at any time. If a handheld terminal is used for scanning, a "number of reconstitutions" item should also be retained in a writable field, automatically prompting disposal once the laboratory-defined upper limit is exceeded (most laboratories use a limit of no more than three times).
The matching material selection also matters: temporary status information at the room-temperature tier is suitable for T625 vinyl cloth labels, which are repositionable, leave no adhesive residue, and leave no backing after removal; however, aliquot tubes that actually enter -20 °C or -80 °C must return to materials covering the corresponding temperature tier, and T625, as a room-temperature-tier material, is not used for this layer. Splitting "variable shallow information" and "deep information that must be retained long-term" onto two labels is the most convenient engineering solution in this scenario.
IX. Printing and ribbon matching: keeping the 2D code on small labels readable
Reference material labels are small in size, so the impact of the printing step on readability is amplified. Three recommendations: first, measure 1D barcodes according to ISO/IEC 15416 and 2D codes according to ISO/IEC 15415, and grade by taking the lowest value among the individual items; at acceptance, do not only check whether it can be scanned, but also whether the grade is stable; second, symbols must not cross the wrap overlap seam, as crossing will cause local tensile deformation and lower the symbol grade; third, the ribbon must match the material; laboratory-specific low-temperature ribbons such as BRL-110-BK should be used together with the corresponding polyester labels, and the ribbon model, print darkness, and print speed must be adjusted together, not just one of them.
In addition, two indicators are commonly used for incoming acceptance of adhesive performance: peel strength refers to the test method of GB/T 2792-2014, and holding tack refers to the test method of GB/T 4851-2014. In reference material scenarios, these two indicators are mainly used for batch consistency comparison; what truly determines field performance is often still whether the application process (rewarming, drying, pressing, standing) is executed properly. Doing the process right is usually more effective than simply pursuing higher adhesive indicators.
X. Implementation SOP for reference material identification (twelve steps)
- First define the coding rule: parent number, separator, two-digit sequence number, date segment; fix the digit width once and for all.
- Sort out the transfer levels: clarify how many levels there are from the original vial to the working curve, and the container and storage temperature of each level.
- Confirm the carrier of the ten fields item by item: whether they go into the 2D code or the visual area; leave no default values.
- Screen materials according to the lowest temperature endpoint, and cross out all tiers below that temperature.
- Calculate the container outer diameter and effective arc length, and determine the symbol specification after deducting overlap.
- Determine the color position semantics and write them into standard operating procedures, with color positions corresponding one-to-one to level codes.
- Select the ribbon matching the material and print three trial samples.
- Perform barcode quality grading on the trial samples: ISO/IEC 15415 for 2D, ISO/IEC 15416 for 1D.
- Conduct a round of low-temperature cycle prediction: complete freezing and rewarming according to the actual scenario, and observe whether edges lift.
- If necessary, use the peel strength method of GB/T 2792-2014 and the holding tack method of GB/T 4851-2014 for incoming comparison.
- Establish retrieval registration: scan and write on each retrieval, automatically updating the remaining validity period.
- Expiry recovery: dispose of expired items according to procedure, and simultaneously close the number in the ledger to avoid secondary activation.
XI. Six types of high-frequency failures and troubleshooting
| Phenomenon | Direct cause | Verification method | Disposition |
|---|---|---|---|
| Multiple vials in the same batch confused with one another | Child numbers were not generated with aliquoting | Check the total number of ledger numbers against the actual number of vials | Supplement the numbering rule and rebuild the ledger correspondence |
| Dates do not match after reconstitution | Three validity period definitions mixed in the same field | Check the three dates separately: certificate, opening, and reconstitution | Split the fields; keep only the nearest expiry date in the visual area |
| 2D code cannot be read | Module size too small or crossing the overlap seam | Measure grade according to ISO/IEC 15415 or 15416 | Lower the symbol specification; avoid the seam in print position |
| Entire batch edge lifting after entering low temperature | Material tier lower than the actual temperature endpoint | Check the official temperature tier of the material | Switch to a material covering the -80 °C and liquid nitrogen tiers |
| Label content rubbed off by solvent | Ribbon does not match material or no laminate added | Check ribbon model and print parameters | Switch to low-temperature ribbon; switch to self-laminating structure |
| Entire batch scrapped with no evidence | Retrieval records missing; cannot prove not expired | Check retrieval registration and cold chain records | Establish scan registration with automatic expiry prompts |
Finally, one premise for judgment: no matter how well the application process and material tier are done, if the person retrieving the vial cannot know the remaining validity period within ten seconds in front of the freezer, the value of the entire identification system is still close to zero. Putting the "expiry date" on the first line of the visual area is the most cost-effective action in this scenario; its cost is only one template adjustment.
Recommended Products
For the reference material and quality control material identification scenarios covered in this article, the following BradyLAB (BRD) products can be used for selection reference (click to view specifications and request a quote):
- Lab038-629/25.4X9.53+Φ9.53样本库B499液氮标签适用i5100/IP300(Request a Quote)
- Lab084-439/30x15mm样本库冻存管聚酯标签低温生物样本库分类标签(Request a Quote)
- Lab121-459/66.68x15.24mm实验室锥管低温冻存管PET自覆膜标签(Request a Quote)
- Lab167-509/40x25mm缠绕式冻存管彩色分类标签实验室细管液氮标签(Request a Quote)
For more materials and specific applications, please contact the product manager for selection.
FAQ
Q1: Is it enough for a reference material label simply to withstand -80 °C?
Not enough. Temperature resistance is only one of three decision dimensions, and often not the first one to decide. The core contradiction in reference material identification is information volume: complete traceability fields must fit on a very small label, and one parent number must spawn dozens of child numbers, while such containers, after deducting the threaded section and graduation area, usually have only about eighteen millimeters of effective arc length left. In actual failure cases, entire batches re-prepared due to missing fields or insufficient number digit width are far more common than detachment due to insufficient material temperature resistance. The correct decision order is: first define fields and numbering rules, then check temperature endpoints, and finally calculate arc length and 2D code symbol size.
Q2: Can concentration and validity period all be put into the 2D code, with only a number printed on the label?
Technically feasible, but not recommended. Information in a 2D code can only be obtained after scanning, while retrieval actions usually occur in front of the freezer or beside the centrifuge, where the operator needs to complete the judgment within ten seconds. A reliable practice is layering: compress rarely changing content such as number, lot number, concentration, and solvent into the 2D code, and print the two items that must be confirmed every time—expiry date and level code—in large font. In this way, even if a handheld terminal is temporarily not at hand, the most basic safety judgment can still be completed.
Q3: Can a DataMatrix be printed on a 0.5 mL microcentrifuge tube? Will it be too small?
Yes, but one tier down. Taking the outer diameter of a 0.5 mL tube as about 8 mm, the theoretical circumference is about 25 mm; after deducting the threaded section and grip area, the effective arc length is about 10 to 12 mm, allowing a 12 × 12 specification with a module size of about 0.9 mm. This size places high demands on print resolution and symbol quality; at acceptance, grade should be measured according to ISO/IEC 15415, not merely whether it can be scanned. If a stable grade truly cannot be produced, fall back to a 1D barcode or plain number and put the complete information back into the ledger.
Q4: Can T419 be used for stock reference solutions stored at -80 °C?
No. T419 is a bright white PET material, officially rated for environments above -40 °C, i.e., suitable for refrigerated and room-temperature steps not lower than -40 °C; it is not suitable for -80 °C ultra-low temperature freezers, nor for liquid nitrogen environments. If stock reference solutions need to be stored at -80 °C, materials covering that temperature tier should be selected,