
Conclusion first: for NMR tube and liquid scintillation vial label selection, the decision order is "solvent contact → tube wall curvature → temperature tier," not temperature first. The reason is straightforward: these two container types are used at room temperature or under refrigerated conditions most of the time. What actually causes label failure is swelling and penetration of the adhesive layer and face stock by deuterated solvents and scintillation cocktails (toluene/xylene-based), plus edge lifting and print skipping at the two extreme curvatures of 5 mm and 28 mm. Only when long-term low-temperature archiving is required does the temperature tier rise to become the second constraint. Selecting in this order minimizes rework such as "edges curl after three days and barcodes can no longer be scanned."
The Lab series from BradyLAB (BRD) for laboratory cryogenic and solvent-resistant labels covers multiple constructions, from fine-tube wrap-around to self-laminating protection, and primarily serves clinical laboratory departments of medical institutions, CDC sentinel sites, innovative drug R&D laboratories, and biobanks. This article breaks down these two "niche but high-error-rate" container types: first calculate geometry, then assess solvents, and finally determine material and ribbon.
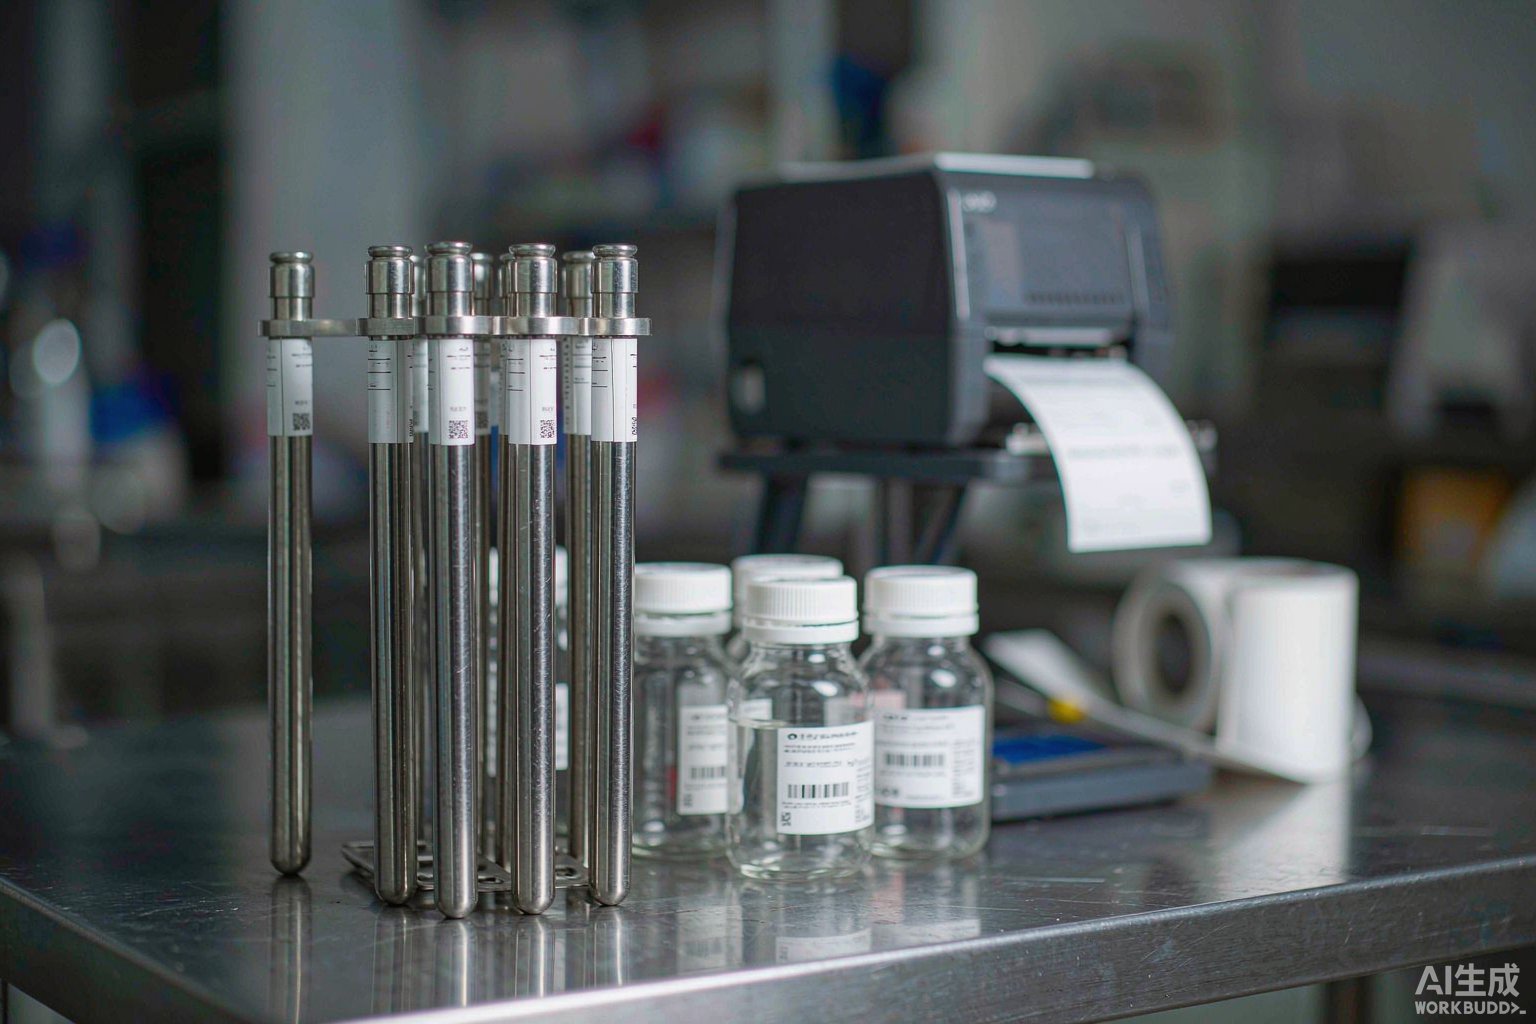
1. Failure Modes: Why NMR Tubes and Scintillation Vials Differ from Cryovials
The typical failure of cryovials is low-temperature embrittlement and adhesive glass transition, with temperature as the dominant variable; industry discussion also concentrates on the -80 °C and -196 °C tiers. NMR tubes and liquid scintillation vials are completely different: their failures come from three directions, and none is strongly related to temperature.
The first is solvent penetration. NMR samples are dissolved in deuterated reagents, commonly deuterated chloroform (CDCl₃), deuterated dimethyl sulfoxide (DMSO-d6), heavy water (D₂O), deuterated methanol (CD₃OD), and deuterated acetone. Among these, CDCl₃ and DMSO are strongly polar/strongly solvating solvents. Residue along the tube wall during sample loading and droplets clinging to the outside of the sampling needle keep label edges exposed to solvent vapor and liquid film for extended periods. Liquid scintillation vials are even more typical: traditional scintillation cocktails use toluene, xylene, or trimethylbenzene as the main solvent, with fluors such as PPO and POPOP; residue at the vial neck threads is almost impossible to avoid completely.
The second is curvature-induced edge lifting. A standard 5 mm NMR tube has an outer diameter of only about 5.0 mm, so the radius of curvature is extremely small. On such curvature, the edges of ordinary flat labels are continuously subjected to peel stress generated by the face stock's own rebound, and lifting begins from the middle section within days. 10 mm tubes are slightly better but still fall within the high-curvature range. Conversely, a 20 mL liquid scintillation vial has an outer diameter of about 27–28 mm, so curvature is not the problem; the problem is that the threaded section and shoulder curvature prevent continuous coverage by a flat label.
The third is slow swelling from long-term contact. NMR samples are often stored at room temperature for weeks to months, while scintillation vial archive samples may be stored refrigerated and protected from light for even longer. On this timescale, the adhesive layer reaches a certain equilibrium with solvent vapor, manifesting as adequate initial tack but markedly reduced peel strength after two weeks. This type of failure is most easily misdiagnosed as "poor adhesive," when in fact the solvent was not treated as the first variable during selection.
2. Geometry First: Wrap-Around Arc Length of 5 mm NMR Tubes and 28 mm Scintillation Vials
The first step in selection is always geometry. Label width must not exceed the container's wrap-around arc length, otherwise self-overlap is inevitable; label height is limited by the length of the straight cylindrical section and must not press onto threads, the shoulder, or the graduation area.
| Container type | Typical OD | Circumference / wrap-around arc length | Recommended label height | Application method |
|---|---|---|---|---|
| 5 mm NMR tube (thin-wall borosilicate glass) | 4.95–5.00 mm | Approx. 15.7 mm | 12–20 mm | Wrap one full turn around the tube wall, overlap at least 3 mm |
| 10 mm NMR tube | 9.90–10.00 mm | Approx. 31.4 mm | 15–25 mm | Wrap one full turn with overlap; keep overlap away from barcode area |
| 20 mL liquid scintillation vial (glass) | Approx. 27–28 mm | Approx. 85–88 mm | 20–30 mm | Flat application on straight cylindrical section; avoid threads and shoulder |
| 20 mL liquid scintillation vial (HDPE plastic) | Approx. 28–30 mm | Approx. 88–94 mm | 20–30 mm | Flat application; account for slight body taper and low surface energy |
| 7 mL scintillation vial | Approx. 20–22 mm | Approx. 63–69 mm | 15–22 mm | Flat or semi-wrap application both acceptable |
One frequently overlooked conversion: the effective width available for printing a barcode is not equal to the label width. Wrap-around labels lose 3–5 mm to the overlap section, and 1–2 mm of quiet zone must be reserved at each end. Therefore, on a 5 mm NMR tube, the actual usable barcode width is usually only 8–10 mm. This dimension determines the symbology choice in Section 9—not every symbology will fit.
3. Solvent Contact Surface: Three Attack Pathways of Deuterated Reagents and Scintillation Cocktails
Breaking solvent contact into three pathways makes the assessment much clearer.
Pathway one: direct contact. During sample loading and sampling, the outer wall of the tube mouth and the threaded section of the vial neck are covered by solvent liquid film. This pathway attacks the label's edges and overlap seam, because liquid always penetrates the adhesive layer along the edges first. The countermeasure is to keep label edges at least 3 mm away from the threaded section and to wipe with anhydrous ethanol before application, allowing full evaporation before attaching.
Pathway two: vapor penetration. A scintillation vial is a sealed container, but saturated toluene or xylene vapor always exists in the headspace; when the cap is opened, it diffuses outward and forms condensation on the label backing. The same applies to capped NMR tubes. This pathway attacks the entire adhesive interface and is largely independent of how firmly the label is applied; it depends on the barrier properties of the face stock itself and the solvent-resistant formulation of the adhesive.
Pathway three: cleaning and wiping. NMR tubes and scintillation vials undergo solvent cleaning or even ultrasonic cleaning before reuse. If labels must remain readable after cleaning, they must be selected against a dual standard of "solvent resistance + abrasion resistance," not temperature resistance alone.
In BradyLAB's official material guide, the material explicitly stated to have excellent chemical resistance and to withstand xylene and H&E staining processes is T424, with applicable temperature tiers of liquid nitrogen -196 °C, hot water 100 °C, and room temperature, and it must be printed with BRS series ribbon; within the same family there is also T409, officially described as having excellent chemical resistance and abrasion resistance. These two materials are the primary references for strong solvent contact scenarios. For specific available specifications, refer to the product datasheet and contact the product manager for selection.
4. Material Selection Matrix: Four Temperature Tiers × Two Container Types
Cross-referencing the four temperature tiers in the official material guide (liquid nitrogen -196 °C / freezer -80 °C / hot water 100 °C / autoclave 121 °C) with the two container types yields the matrix below. Check marks in the table come strictly from the official material guide table; tiers not checked should not be written into procurement specifications.
| Material code | Material description (official wording) | Applicable temperature tiers | NMR tube suitability | Scintillation vial suitability |
|---|---|---|---|---|
| T509 | Durable vinyl wrap-around label, good conformability; requires overlap when used in liquid nitrogen environments | Liquid nitrogen -196 °C / freezer -80 °C / hot water 100 °C | First choice for wrap-around; high curvature on fine tubes | Usable for semi-wrap, but should not cover threads |
| T459 | Ultra-thin self-laminating label with clear tail; protects printed content and provides a clear window for observing liquid level | Liquid nitrogen -196 °C / freezer -80 °C / hot water 100 °C / autoclave 121 °C | Tube diameter is relatively fine; laminated section prone to lifting | First choice for vial body; laminate resists solvent wiping |
| T429 | Cryogenic flat identification material; overlap at least 3 mm when applied to frozen tube surfaces | Liquid nitrogen -196 °C / freezer -80 °C / hot water 100 °C / autoclave 121 °C | Usable for low-temperature archiving; overlap required | Usable for flat application on vial body |
| T629 | Nylon cloth label; easy to apply, withstands high and low temperatures, good conformability | Liquid nitrogen -196 °C / freezer -80 °C / hot water 100 °C / autoclave 121 °C | Best conformability on fine tubes | Optional for general scenarios |
| T439 | Six-color pre-printed cryogenic freezer label; pre-printed color at top for quick differentiation | Liquid nitrogen -196 °C / freezer -80 °C / hot water 100 °C | Suitable for color-coded classification scenarios | Suitable for batch color-code management |
| T419 | Bright white material for cryovials and microcentrifuge tubes; withstands environments above -40 °C | Room temperature / above -40 °C | Suitable for room-temperature sample testing scenarios | Suitable for refrigerated, light-protected archiving |
| T329 | Matte white PP pressure-sensitive cryogenic freezer label | Room temperature / above -40 °C | Room-temperature archiving; cost-sensitive scenarios | Economical choice for refrigerated archiving |
The row most easily misused in this table is the -40 °C tier. Once samples are to enter a -80 °C freezer, they can no longer remain at the -40 °C tier; T419 and T329 are positioned in the official guide for environments above -40 °C, and T429, T459, T629, or T509 should be used instead. Conversely, if samples are only at room temperature or 4 °C refrigerated, choosing -196 °C tier material is performance redundancy and not cost-effective.
5. Wrapping and Overlap: How to Apply Wrap-Around Labels on Fine Tubes Without Lifting
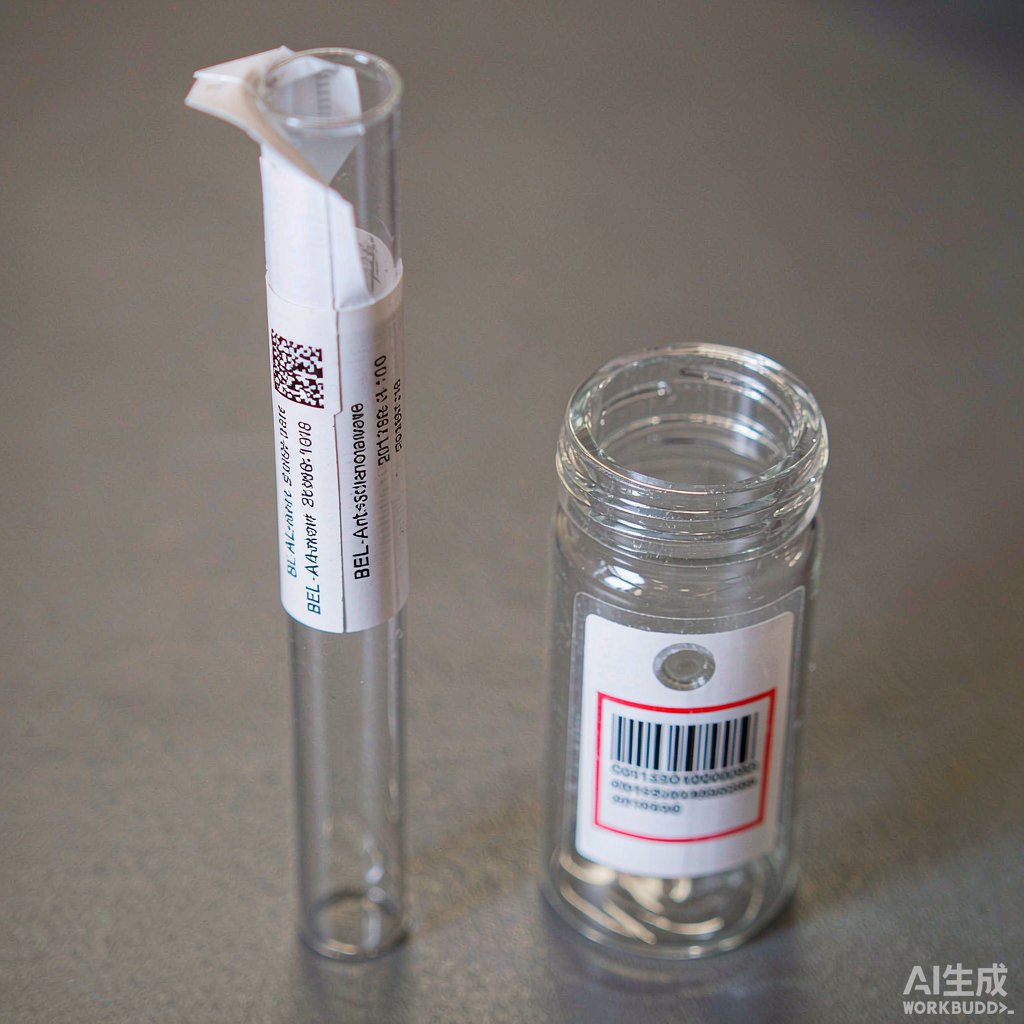
NMR tubes are the most typical application for wrap-around labels. In the official guide, T509 is described as a durable vinyl label suitable for wrapping with good conformability; its covered temperature tiers include liquid nitrogen -196 °C, freezer -80 °C, and hot water 100 °C, and overlap is required when used in liquid nitrogen environments. For 5 mm NMR tubes, wrapping matters not only for adhesion but also for allowing the label's own rebound force to cancel out along the circumferential direction rather than forming peel stress at the edges.
There are three key points for wrap application. First, starting position: choose the side of the tube wall without graduations or markings, and keep the wrapping direction consistent (clockwise is recommended) so that batch scanning later does not require searching for the code again. Second, overlap length of at least 3 mm, and the overlap section must press onto the blank area of the label rather than the barcode area; otherwise the barcode quiet zone is compromised, directly affecting ISO/IEC 15416 grade determination. Third, the tube wall must be degreased before application; NMR tubes often have silicone or mold-release residue on the surface from manufacturing. Wipe with anhydrous ethanol and wait for complete evaporation before attaching—initial tack will differ noticeably.
Note that the overlap section of a wrap-around label on a 5 mm fine tube is itself a thickness step. If the tube is subsequently placed into a rotor or holder, clearance must be checked to avoid the label being scraped. This is also why the recommended label height for NMR tubes should be kept within 20 mm—not because it cannot be applied, but because it may not fit.
6. Self-Laminating Structure and Clear Window: Protection Logic on Scintillation Vials
The logic for liquid scintillation vials is the opposite of NMR tubes. The vial body has a large diameter and low curvature, so flat application is entirely feasible. The real problems come from outside: wiping of scintillation cocktail, immersion in refrigerated condensate, and mutual friction during handling. In this case, self-laminating construction should be prioritized.
In the official guide, T459 is described as an ultra-thin polyester label with a clear tail self-laminating construction, protecting printed content and providing a clear window for observing liquid level. Two points here are particularly valuable for scintillation vials: first, self-lamination sandwiches the printed content between the face stock and the clear film, so solvent wiping acts on the film surface rather than the ink layer, and the barcode will not fade with repeated wiping; second, the clear window keeps the liquid level inside the vial visible, so scenarios requiring visual verification of volume before liquid scintillation counting do not require peeling off the label. Its temperature tiers cover liquid nitrogen -196 °C, freezer -80 °C, hot water 100 °C, and autoclave 121 °C.
If the scintillation vial is HDPE plastic, surface energy is low. Confirm at the selection stage that the adhesive system is compatible with low-surface-energy plastics, and after application press for 10–15 seconds and let stand at room temperature for 24 hours before use to allow the adhesive layer to achieve full wet-out.
7. Low-Temperature Archiving: When Is It Necessary to Go to -80 °C and Liquid Nitrogen Tiers
Not all NMR tube and scintillation vial samples require deep cryogenic temperatures. The criterion is simple: look at analyte stability and archiving duration. Only biological samples requiring long-term preservation and arbitration archive samples requiring repeated retesting need to go to -80 °C or even vapor-phase liquid nitrogen; short-term spectroscopic testing and counting archive samples are usually adequately served by refrigeration or -20 °C freezing.
The temperature boundary must also be emphasized here: the relationship between -80 °C and -40 °C is not linear but a watershed in adhesive formulation. Using -40 °C tier material at lower temperatures may show no problems in the short term, but after two to three freeze–thaw cycles, peel strength degradation becomes very obvious.
Once in the -80 °C and -196 °C tiers, the options converge to three directions. T629 is a nylon cloth label, officially described as easy to apply, resistant to high and low temperatures, and with good conformability; it is a full-scenario material checked across all four temperature tiers and covering multiple application columns including room temperature, microscope slides, cryovials/test tubes, and conical tubes—the most reliable general-purpose base for long-term archiving. T429 is a commonly used material for cryogenic flat identification, officially requiring at least 3 mm overlap when applied to frozen tube surfaces; it is also checked across all four temperature tiers and is used for flat solutions where laminated protection is not required.
If samples are stored only above -40 °C, the bright white material T419 is sufficient, and there is no need to go to deep cryogenic tiers; only when lower-temperature long-term archiving is confirmed should the material be upgraded one tier overall.
8. Printing and Ribbon: Thermal-Transfer Parameter Window
Labels for NMR tubes and scintillation vials should almost always be printed by thermal transfer rather than direct thermal. The reason is that direct thermal paper darkens or fades overall under solvent contact and low-temperature conditions, and its abrasion resistance is far lower than thermal transfer. For ribbon selection, the BradyLAB LAB laboratory-specific cryogenic ribbon (BRL series) is the standard matching option; resin-based formulations offer significantly better solvent and abrasion resistance than wax-based ones.
Small labels demand higher print precision than conventional labels. If the DataMatrix on a 5 mm fine tube is 10×10 modules with a module size of 0.25 mm, the symbol's physical size is only 2.5 mm; printheads at 300 dpi (approx. 0.085 mm/dot) and 600 dpi (approx. 0.042 mm/dot) will show grade differences. Set the parameter window as shown in the table below.
| Parameter | 5 mm NMR tube wrap-around label | 20 mL scintillation vial flat label | Notes |
|---|---|---|---|
| Print resolution | 600 dpi preferred; 300 dpi acceptable | 300 dpi sufficient | Smaller module size depends more on resolution |
| Print speed | 25–50 mm/s | 50–100 mm/s | Higher speed results in insufficient ink transfer |
| Print darkness | Medium-high, recommended 15–20 | Medium, recommended 10–15 | Too dark causes ink bleeding; too light reduces contrast |
| Ribbon type | Resin-based | Resin-based or mixed-based | Solvent wipe resistance requires resin-based |
| Barcode grade target | ISO/IEC 15415 grade C or above | ISO/IEC 15415 grade C or above | 15415 applies to 2D matrix codes |
| Peel force verification | GB/T 2792-2014 | GB/T 2792-2014 | 180° peel strength test method |
| Holding tack verification | GB/T 4851-2014 | GB/T 4851-2014 | Inclined ball tack or holding tack test |
9. Encoding and Scanning: Symbology Size Calculation on Small Diameters
The effective barcode width on an NMR tube is only 8–10 mm, and this constraint directly eliminates some symbologies. Code 128 carrying 12 characters at 0.5X magnification (module width approx. 0.5 mm) typically has a symbol width exceeding 20 mm, which cannot fit on a 5 mm tube; DataMatrix at 10×10 modules with a module size of 0.25 mm is only 2.5 mm, occupying about one-eighth the width of Code 128 for the same information content—a better solution for fine-tube scenarios.
However, DataMatrix also places higher demands on printing and reading equipment. Quality determination of 2D matrix codes applies ISO/IEC 15415, with grade C or above considered usable; 1D linear codes apply ISO/IEC 15416. If the laboratory's scanner supports only 1D codes, the more practical approach on NMR tubes is barcode plus human-readable short code in parallel: DataMatrix carries the full identifier, with a 6–8 digit short code printed alongside for manual verification. Scintillation vials have a large diameter and can accommodate both Code 128 and DataMatrix; prioritize the existing symbology in the biobank to avoid mixed codes.
Regardless of symbology, the quiet zone is non-negotiable. Quiet zone width generally must be no less than 10 times the module width; if the overlap section of a wrap-around label presses into the quiet zone, the grade will drop directly to F. This is also why Section 5 emphasizes that the overlap section must fall on the blank area.
10. Light Protection and Quenching: Effect of Label Color and Material on Liquid Scintillation Counting
Liquid scintillation counting relies on the scintillation cocktail converting radiation energy into photons, which are then collected by a photomultiplier tube. Any factor that intervenes in the light path causes quenching, among which color quenching is directly related to the sample's own color. The label is not inside the vial and theoretically does not participate in the light path, but two indirect effects must be considered.
The first is light protection. Scintillation cocktails produce photoluminescence under light exposure, raising background counts, so archive samples are typically stored refrigerated and protected from light. If the label face stock is translucent or uses a light-colored semi-transparent material, external light will partially pass through. Although the magnitude of impact is limited, it is not advisable to take the risk in low-activity sample measurements (such as ³H-labeled), and opaque face stock should be prioritized.
The second is label placement on the vial body. If the label covers the visible area of the vial wall, the operator cannot visually verify the liquid level, turbidity, or phase separation, and can only judge indirectly by opening the cap or weighing, increasing contamination and evaporation risk. This is also why self-laminating clear-window construction is worth prioritizing on scintillation vials—protection and observability can be achieved simultaneously.
11. Compliance Boundaries: Scintillation Cocktails Are Flammable Chemicals; Self-Applied Labels Must Not Obscure Original Container Information
Liquid scintillation cocktails mostly use toluene, xylene, or trimethylbenzene as the main solvent and are flammable liquids with irritant properties; their classification and labeling should follow the GB 30000 series "Specification for Classification and Labeling of Chemicals." One boundary must be strictly observed: sample identification labels applied by the laboratory may only supplement information and must not cover or replace the original supplier's chemical hazard label. The pictograms, signal words, and precautionary statements on the original container must always remain visible.
In practice, apply the self-adhesive sample label on the straight cylindrical section of the vial body, avoiding the front area where the original label is located; if the front of the container is fully occupied by the original label, apply on the back with at least 3 mm spacing and do not overlap. For samples of biological origin, relevant operations should be conducted in areas compliant with GB 19489-2008 "Laboratories—General Requirements for Biosafety"; for samples with biological hazard risks, warning signs may reference the graphical specifications of ISO 7010 W009.
Note: the nuclides used in scintillation cocktails (³H, ¹⁴C, etc.) are low-energy β nuclides, and their radiation safety management should follow relevant national regulations on radioactive isotopes and radiation-emitting devices. This is an independent management line from the label selection discussed in this article; labels do not serve a radiation warning function.
12. Application SOP: Ten Steps from Cleaning to Settling
Translating all the preceding judgments into actions, labeling of NMR tubes and scintillation vials can be executed in the following ten steps.
Step one: confirm the three scenario elements: solvent type and concentration, storage temperature tier, and whether long-term archiving is required. Step two: verify geometry: measure OD, calculate circumference, and confirm label width does not exceed the wrap-around arc length. Step three: select material: lock the material code and tier according to the matrix in Section 4. Step four: select ribbon and print parameters: resin-based ribbon, set according to the window in Section 8. Step five: surface preparation: wipe with anhydrous ethanol and wait for complete evaporation; plastic vials may receive plasma or primer treatment.
Step six: print and verify codes: perform a grade determination after printing; reprint the entire batch if non-conforming. Step seven: application: for NMR tubes, start wrapping from the ungraduated side, overlap at least 3 mm and avoid the barcode quiet zone; for scintillation vials, apply flat on the straight cylindrical section, avoiding the original container hazard label. Step eight: pressing: press firmly from center to edges with a fingertip or roller, maintaining pressure for 10–15 seconds. Step nine: settling: let stand at room temperature for 24 hours before use; for low-temperature scenarios, add a short verification at -80 °C or liquid nitrogen. Step ten: record: enter material code, lot number, application date, and operator into the sample management record, aligned with LIMS or biobank ledgers.
13. Acceptance and Periodic Re-Inspection
Labeling is not the end. A three-tier acceptance process is recommended. The first tier is immediate acceptance: after application and settling, perform a 180° peel force test (GB/T 2792-2014) and a barcode grade determination; both must pass for the batch to be accepted. The second tier is simulation verification: take three samples from the same batch, run through the complete temperature cycle and solvent contact process, and re-check after 48 hours for lifting, fading, and barcode readability. The third tier is periodic re-inspection: sample long-term archives every 6 months, focusing on edge condition and barcode grade degradation.
For laboratories undertaking testing or calibration tasks, the above verification records must be incorporated into the documented information control of ISO/IEC 17025:2017; medical laboratories correspond to the quality management requirements of ISO 15189:2022; if archive samples enter a biobank system, the traceability of sample identification should also meet the requirements of ISO 20387:2018 for sample and associated data management. These three standards do not specify which label to use, but all require that "identification remains readable throughout the entire lifecycle and traceable to the original data"—this is precisely the technical basis for the ordering of solvent, geometry, and temperature in this article.
Returning to the opening statement: for NMR tube and liquid scintillation vial label selection, put solvent and geometry first, with temperature only third. Following this order will significantly reduce rework rates and provide better assurance of long-term archive readability. For more materials and specific applications, contact the product manager for selection.
Recommended Products
For the label materials and application scenarios covered in this article, the following BradyLAB (BRD) products are available for selection reference (click to view specifications and request a quote):
- Lab121-459/66.68x15.24mm self-laminating cryogenic cryovial label (T459 ultra-thin self-laminating) (Quote/roll)
- Lab167-509/40x25mm wrap-around fine-tube liquid nitrogen label (T509 vinyl wrap-around) (Quote/roll)
- T629 Biobank -196 °C nylon cloth low-temperature-resistant test tube biobank label (¥999/roll)
- BRL-80-BK Borjer LAB laboratory-specific cryogenic ribbon 80mm×300m (Quote/roll)
FAQ
Q1: Can ordinary cryovial labels be used on NMR tubes?
Not recommended. Ordinary cryovial labels are mostly flat designs; face stock thickness and rebound force on 5 mm curvature will continuously generate peel stress, typically causing edge lifting within days. NMR tubes should prioritize wrap-around construction so that rebound force cancels along the circumference.
Q2: Why are self-laminating labels recommended for liquid scintillation vials?
Self-lamination sandwiches the printed content between the face stock and clear film, so solvent wiping acts on the film surface rather than the ink layer, and the barcode will not fade with repeated wiping; the clear tail also preserves an observation window for visual verification of liquid level and turbidity before counting.
Q3: Scintillation cocktails contain toluene and xylene—will the label dissolve?
There is a swelling risk, depending on the chemical-resistant formulation of the face stock and adhesive system. "Solvent resistance" should be treated as the first variable during selection; reference materials marked for chemical resistance in the official material guide, and perform a simulated actual-contact verification before use.
Q4: Should Code 128 or DataMatrix be used on 5 mm NMR tubes?
DataMatrix is preferred. For the same information content, DataMatrix occupies about one-eighth the width of Code 128, making it more suitable for the 8–10 mm effective barcode width; if the scanning equipment supports only 1D codes, switch to barcode plus human-readable short code in parallel.
Q5: If NMR samples are only tested at room temperature short-term, is -196 °C tier material needed?
No, that would be performance redundancy. For room temperature or 4 °C refrigerated scenarios, material above the -40 °C tier is sufficient and more cost-effective; only when entering deep cryogenic long-term archiving is it necessary to upgrade the material one tier.
Q6: Can self-adhesive labels cover the original container markings on scintillation vials?
No. Scintillation cocktails are flammable chemicals, and their classification and labeling follow the GB 30000 series; the pictograms, signal words, and precautionary statements on the original container must always remain visible. Self-adhesive sample labels may only supplement information and should be applied in avoidance areas with spacing.
Q7: How long after application can the labels be put into use?
It is recommended to let stand at room temperature for 24 hours to allow the adhesive layer to achieve full wet-out before use. If low temperatures are involved, add a short low-temperature verification to confirm no lifting and no barcode grade degradation before formal archiving.