
Bottom line up front: For labeling sterile test membrane filtration culture devices (closed membrane filters), the first selection criterion is not the specimen storage temperature, but the combination of "121 °C autoclaving" and "14-day dual-temperature humid incubation." Media, rinse solutions, and reusable filter components must withstand 121 °C saturated steam; cultures after testing must be autoclaved (commonly 121 °C, 30 minutes; refer to your laboratory's biosafety procedures) before cleaning or disposal; and inoculated culture devices must be held continuously for 14 days at each of two temperature ranges, 30–35 °C and 20–25 °C. The selection starting point is therefore to first check whether the "Autoclave 121 °C" tier is checked in the official material guide—only T629 (nylon cloth label), T459 (self-laminating label with clear tail), and T429 (overlap at least 3 mm when applied to cryovial surfaces) cover all four tiers simultaneously: LN₂ -196 °C, freezer -80 °C, hot water 100 °C, and autoclave 121 °C; two other products cover LN₂, freezer, and hot water but do not have the autoclave tier checked—they can be used for specimen containers and external culture device identification, but should not enter the autoclave with equipment; low-temperature freezer materials rated only for -40 °C and above cover neither the 121 °C tier nor the -80 °C specimen step. Defining both ends of the temperature chain first, then addressing geometry, coding, and printing, is the only way to avoid rework for this type of labeling.
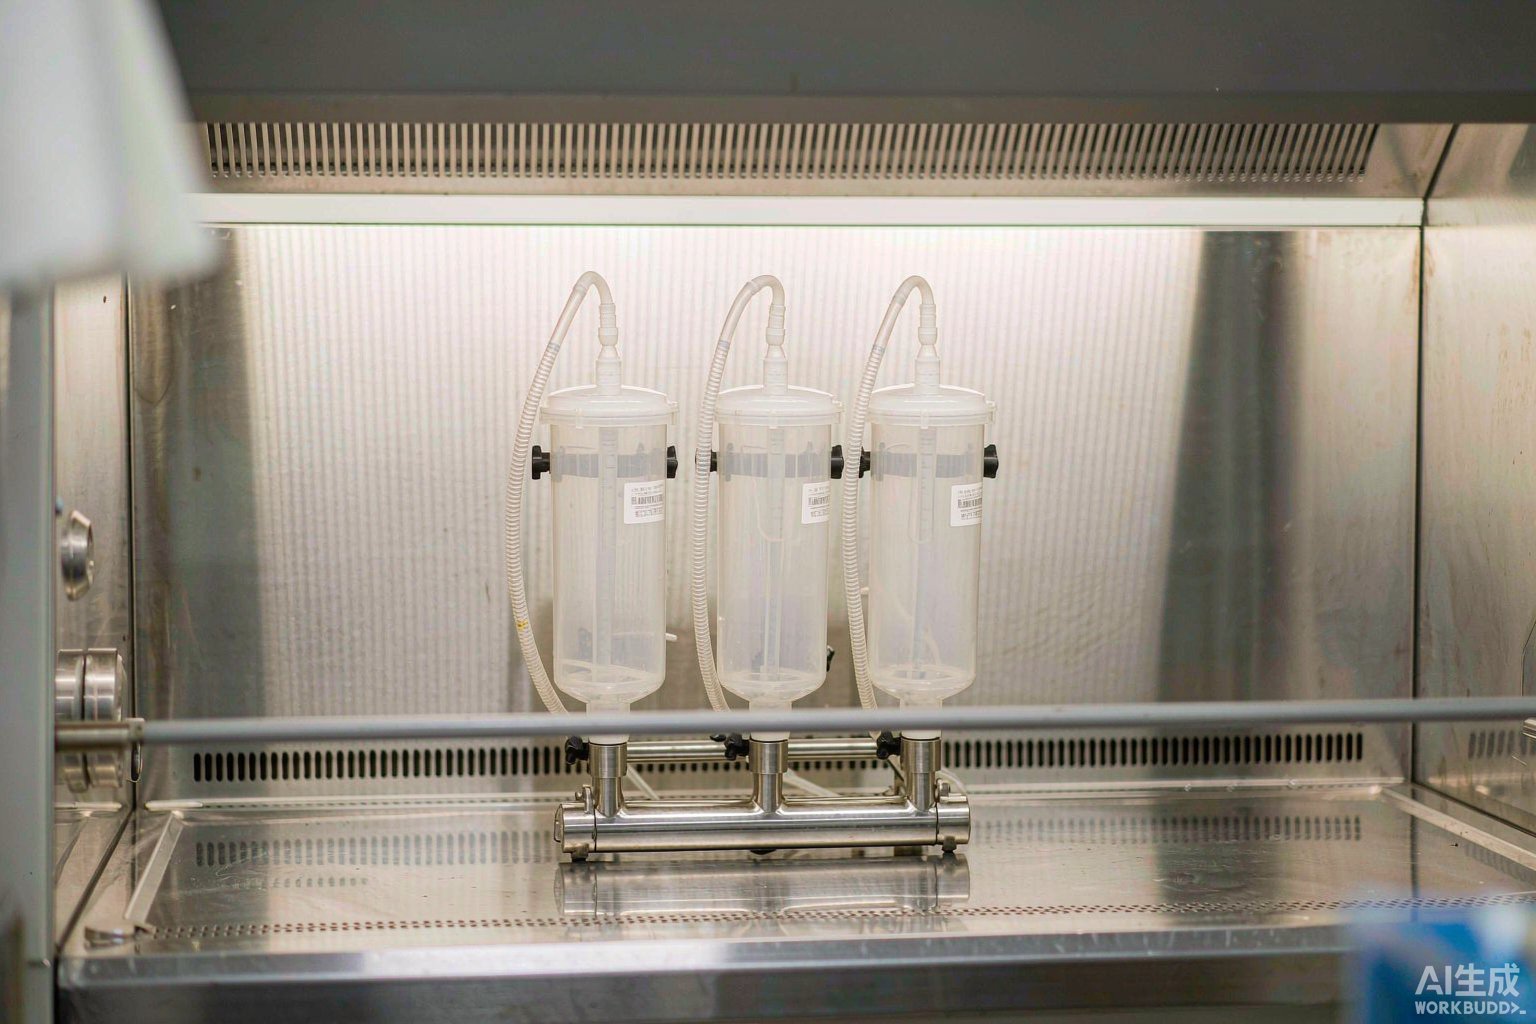
1. Map the temperature chain first: four temperature endpoints in sterility testing
Sterility testing is not a single-temperature operation but a temperature chain spanning approximately 200 °C. Listing the four endpoints in order gives the label's tolerance range clear boundaries, rather than vaguely covering it with the phrase "cryogenic label."
Endpoint 1: Specimen storage end. Biological products, vaccines, recombinant proteins, and cell therapy products often enter the laboratory refrigerated at 2–8 °C or frozen at -20 °C or -80 °C, and the original container often must be re-frozen for retention after sampling. This means the label must repeatedly cycle between -80 °C and room temperature.
Endpoint 2: Sterilization end, 121 °C. Media, rinse solutions, and reusable filter components must all be autoclaved; the membrane filter used for sterility testing should have a pore size no greater than 0.45 μm and a diameter of approximately 50 mm, and the sterility assurance of the membrane and filter itself also comes from this end.
Endpoint 3: Dual-temperature incubation end. After membrane filtration, generally one filter is filled with 100 mL fluid thioglycollate medium and one filter with 100 mL tryptic soy broth; for biological product samples, two filters with fluid thioglycollate medium and one filter with tryptic soy broth. The former is incubated at 30–35 °C for 14 days to detect aerobic and anaerobic bacteria; the latter at 20–25 °C for 14 days to detect molds and yeasts. 14 days equals 336 hours, and the label must withstand a full continuous humid cycle at each of the two temperature ranges.
Endpoint 4: Inactivation end, 121 °C. Regardless of whether colony growth is observed, used cultures and equipment containing viable organisms must be autoclaved (commonly 121 °C, 30 minutes; refer to your laboratory's biosafety procedures) before cleaning or disposal. If a label applied to the culture device detaches, curls, or leaves adhesive residue at this end, it directly becomes a cleaning burden for the autoclave and a cross-contamination risk.
| Temperature endpoint | Temperature range | Objects involved | Hard requirements for labels |
|---|---|---|---|
| Specimen storage end | 2–8 °C / -20 °C / -80 °C | Original packaging containers, retention tubes, retest samples | Low-temperature end must cover -80 °C; no adhesive failure during cross-temperature cycling |
| Sterilization end | 121 °C saturated steam | Media bottles, rinse solution bottles, reusable filter components | Must cover the autoclave 121 °C tier |
| Dual-temperature incubation end | 30–35 °C and 20–25 °C, 14 days each | Culture device cylinder body, rack position labels | No adhesive failure, fading, or obstruction of the observation surface during 336 hours of continuous humid exposure |
| Inactivation end | 121 °C, commonly 30 minutes | Used culture devices, equipment containing viable organisms | No detachment, no adhesive residue, no contamination of the autoclave after sterilization |
2. Culture devices and filter cups: adhesion to low-surface-energy plastic interfaces
The filter cup and cylinder body of culture devices are mostly engineering plastics such as polycarbonate, polystyrene, or polypropylene, whose surface energy is generally lower than that of glass and stainless steel; polypropylene is on the order of 29–31 mN/m, among the most difficult interfaces to bond. The same pressure-sensitive adhesive that reaches practical strength immediately on a glass bottle requires longer wetting time and more thorough bubble-removal pressing on such plastic cylinder bodies.
The second variable is curvature. The outer diameter of filter cup cylinder bodies is commonly 50–70 mm, corresponding to a circumference of approximately 157–220 mm. When a flat label is applied to a cylindrical surface, the peeling force arm at both ends is proportional to label width: on a 60 mm diameter cylinder, a 25 mm wide, relatively stiff film label has a noticeably higher end-peeling tendency than a 15 mm wide label of the same type. Therefore, for curved surfaces, prefer soft, conformable cloth-based materials, or keep label width within 20 mm, and press firmly into place after application.
The third variable is surface treatment residue. Before aseptic operations, specimen container exteriors are commonly wiped with 75% ethanol; if a water film remains after ethanol evaporation, it directly occupies the contact area between the adhesive layer and the interface. The standard procedure is: ethanol wipe → dry cotton swab wipe → allow to stand for at least 30 seconds until the interface is thoroughly dry → then apply the label. Silicone-containing cleaners form a permanent low-surface-energy film on the interface and should be prohibited entirely.
3. The 121 °C autoclave tier: only three materials cover it
The official material guide clearly divides applicable environments into four tiers: LN₂ -196 °C, freezer -80 °C, hot water 100 °C, and autoclave 121 °C. These four tiers are not a continuous range but four independent validated tiers—checking -196 °C does not automatically mean 121 °C is covered, and vice versa. For the sterility testing temperature chain, each tier must be compared individually.
Three products with all four tiers checked: T629 is a nylon cloth label that is easy to apply, resistant to high and low temperatures, and highly conformable, and is the only product with all four application categories checked: room temperature, microscope slides, cryovials/test tubes, and conical tubes; T459 is a self-laminating label with a clear tail that protects printed content and provides a clear window for observing liquid levels; T429 requires at least 3 mm overlap when applied to cryovial surfaces, suitable for wrap-around labeling of narrow tubes and filter cup necks.
Two products with three tiers checked and the autoclave tier unchecked: T439 is a 6-color cryogenic label with pre-printed color at the top, used to quickly distinguish experimental container categories, suitable for color-coding specimen batching and dual-temperature grouping; T509 is a durable vinyl label suitable for wrap-around, with good conformability, requiring overlap in LN₂ environments, suitable for soft bags and large-diameter containers. These two can be applied to specimen containers and culture device exteriors but should not enter the autoclave with equipment.
Two products covering only -40 °C: low-temperature freezer materials rated only for -40 °C and above have a validated tier ending at -40 °C, covering neither the 121 °C sterilization tier nor the -80 °C specimen step. A common error is to infer from their good performance in a -40 °C freezer that they are equally reliable under 121 °C steam and 336 hours of humid exposure—there is no inferential relationship between the two.
| Material No. | Material and structure | LN₂ -196 °C | Freezer -80 °C | Hot water 100 °C | Autoclave 121 °C | Applicable step in this article |
|---|---|---|---|---|---|---|
| T629 | Nylon cloth label, good conformability | Yes | Yes | Yes | Yes | Culture device body, equipment sterilization, specimen full temperature range |
| T459 | Ultra-thin polyester, self-laminating with clear window | Yes | Yes | Yes | Yes | Cylinder observation surface, labeling beside reading area |
| T429 | Ultra-thin polyester, at least 3 mm overlap | Yes | Yes | Yes | Yes | Narrow tubes, filter cup neck wrap-around labeling |
| T439 | 6-color pre-printed cryogenic label | Yes | Yes | Yes | Not checked | Specimen batching, dual-temperature grouping color coding |
| T509 | Vinyl wrap-around label, requires overlap in LN₂ | Yes | Yes | Yes | Not checked | Soft bags, large-diameter container wrap-around |
| T419 | Glossy white PET, for cryovials and microcentrifuge tubes | No | No | No | No | Conventional freezing above -40 °C only, not in this article's chain |
| T329 | Matte white PP pressure-sensitive cryogenic label | No | No | No | No | Conventional freezing above -40 °C only, not in this article's chain |
Table note: The above table is excerpted tier by tier from the official material guide; temperature tiers are official hard facts and are not rounded or merged into ranges. Specific applications are subject to the product specification sheet and product manager selection advice.
4. 14-day dual-temperature humid exposure: three failure modes under 336 hours of humid heat
Converting 14 days to hours gives 336 hours. During these 336 hours, the label is not in a mild condition such as "constant 35 °C" but in the high-humidity environment of an incubator—to suppress evaporation of medium water, incubators typically maintain high relative humidity, so the label remains in near-saturated moisture for extended periods while also enduring temperature and humidity fluctuations each time the door is opened for daily observation.
Type 1: Adhesive hydrolysis and interfacial displacement. Water molecules penetrate along the label edges, gradually displacing contact points between the adhesive layer and the plastic interface. Penetration rate depends on edge seal quality, so post-application bubble-removal pressing and standing time directly determine the remaining adhesive strength after 336 hours. The holding tack and peel strength of pressure-sensitive adhesives can be quantitatively compared according to the test methods of GB/T 4851-2014 and GB/T 2792-2014; it is recommended to request these two measured data from suppliers at the selection stage rather than relying only on marketing claims.
Type 2: Face stock moisture absorption and wrinkling. Moisture-absorbing face stock changes dimensions under humid heat, ends lift first, and after lifting the water ingress area further expands, forming a positive feedback loop of accelerated failure.
Type 3: Printed content diffusion and fading. Humid heat plus medium splatter most easily damages barcode readability. Media contain peptone, and processing of some specimens also requires rinse solutions containing polysorbate 80; surfactants significantly accelerate interfacial displacement and ink diffusion. This is why the printing combination for sterility testing must use resin-based ribbons, not wax-based or mixed-based.
5. Clear window and reading exclusion zones: labels must not block the observation surface
Result reading in sterility testing relies on visual observation of medium turbidity, with daily observation for microbial growth over 14 days. Any labeling method that blocks the observation surface is equivalent to using a label to shield one reading opportunity.
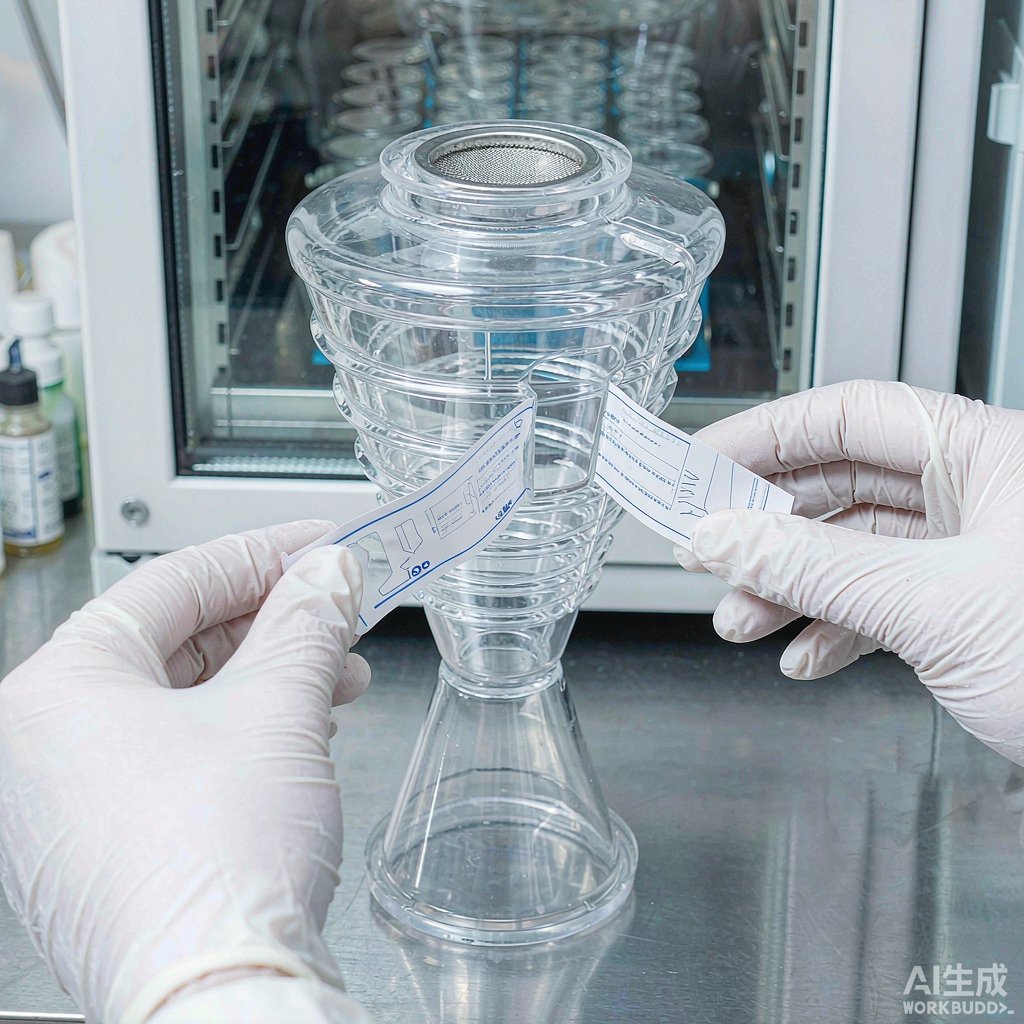
Therefore, cylinder body labeling must clearly observe three exclusion zones: do not wrap fully around the cylinder body, to avoid circumferential obstruction; do not cover the membrane position graduation lines and liquid level observation area; do not apply to the drainage port, membrane clamping position, or clamp load-bearing surface, to avoid affecting sealing and disassembly.
If labeling near the observation surface is truly necessary, choose a self-laminating type with a clear window structure: the clear tail is used to observe the liquid level, and self-lamination simultaneously seals the printed content under the film, ensuring both readability and preventing medium splatter from acting directly on the ink layer. This is one of the few points in sterility testing scenarios where "structural selection directly determines operability."
6. Specimen containers: geometric differences among ampoules, vials, and soft bags
The labeling challenge for specimen containers lies in geometry, not temperature. The wrappable arc length determines how large a code can be placed and whether wrap-around overlap is needed.
| Container type | Common outer diameter | Wrappable arc length (outer diameter × π) | Recommended labeling method |
|---|---|---|---|
| Ampoule / narrow tube | 10 mm | Approx. 31.4 mm | Wrap-around, overlap at least 3 mm |
| Small-diameter bottle | 16 mm | Approx. 50.3 mm | Wrap-around or flat, overlap at least 3 mm |
| Vial | 22 mm | Approx. 69.1 mm | Flat, rounded corners |
| Large-diameter bottle | 30 mm | Approx. 94.2 mm | Flat, width can be up to 25 mm |
| Soft bag / infusion bag | Irregular flexible surface | Not applicable | Wrap-around vinyl material, apply after bag is filled |
There is another easily overlooked geometric constraint: aqueous specimen volumes less than 10 mL are typically fully transferred to a sterile container with no less than 100 mL of suitable diluent, mixed, and then filtered; the original container and transfer container are two different labeling objects, and their numbers must be explicitly distinguished, otherwise the traceability chain breaks at this step.
7. Biological products and refrigerated specimens: traceability at the -80 °C freezing end
The medium formulation for biological product specimens differs from general samples: after rinsing, two filters each receive 100 mL fluid thioglycollate medium and one filter receives 100 mL tryptic soy broth, i.e., one extra portion on the aerobic side. This directly leads to two consequences: first, the number of culture devices in the same batch increases, and the coding field must accommodate filter serial numbers; second, such specimens mostly come from 2–8 °C or -80 °C cold chains, and residual samples must still be re-frozen for retention after sampling.
The label must therefore work across the -80 °C to 30–35 °C temperature range. The key to cross-temperature operation is not "whether the minimum temperature can be withstood" but that each temperature transition produces condensation water at the interface—when removed from -80 °C and rewarmed to room temperature, condensation water first forms on the cold surface and is then absorbed by the adhesive layer. Only materials validated at both the low-temperature end and the high-temperature humid end can withstand such repeated cycling. For samples requiring long-term retention and retesting, the retention sample number and retest status should also be written into the code in accordance with ISO 20387:2018 requirements for biological sample preservation and traceability.
8. Labeling for positive controls, culture tubes, and method suitability tests
The credibility of sterility testing rests on three control groups: specimen group, positive control group, and negative control group. The positive control is inoculated with less than 100 CFU and should grow well when incubated at 30–35 °C for 48–72 hours; the negative control uses the corresponding solvent, diluent, and rinse solution operated in the same way and must show no microbial growth.
These three groups are physically very easily confused—they use the same batch of media, the same membrane filtration instrument, and the same incubator, differing only in contents. Group identification must therefore be machine-readable coding, not handwritten abbreviations. It is recommended to fix a "role field" in the middle of the code: S for specimen group, P for positive control, N for negative control.
Strains used for positive controls are typically preserved as glycerol stocks at -80 °C, and repeated freeze–thaw cycles directly affect bacterial count and viability. Culture tube labels must also cover the -80 °C end and withstand condensation water after removal from low temperature; this is the same type of condition as specimen retention tubes and can be designed together.
9. Code design: three-segment format of batch—membrane position—culture device rack position
The traceability chain for sterility testing must answer three questions: which day this batch was tested, which membrane was used, and where it is placed in the incubator. The three-segment code fixes these three questions in different code fields, so a single scan answers all of them.
| Field | Length | Example value | Meaning |
|---|---|---|---|
| Batch field | 8 digits | 20261014 | Test date + daily sequence |
| Membrane position field | 3 digits | 2A1 | Filter serial number + medium type + role field |
| Rack position field | 4 digits | B305 | Incubator number + shelf coordinates |
| Check digit | 1 digit | 7 | Prevents entry and reading errors |
Total length is 16 digits, within the numeric capacity of a DataMatrix 20×20 symbol. Once printed, the code must not be altered; if a number change is required due to sampling adjustments, a new label must be applied and the change documented in records—over-labeling on top of old labels is prohibited, as it is the most common starting point for traceability chain breaks. Record and review requirements can be implemented with reference to ISO/IEC 17025:2017 provisions on technical records and result traceability.
10. Symbology and printing: DataMatrix size calculation and ribbon matching
Perform size calculation first, then determine symbology; the order cannot be reversed. For a DataMatrix 20×20 symbol with module size X = 0.25 mm, the symbol body is 5.0 mm, approximately 6.0 mm after allowing one module width quiet zone on each side, and the numeric capacity can accommodate 20 digits, sufficient for the first three code segments. If Code 128 is used instead, the module count is 11n+35; with n=16 this is 211 modules, and at X=0.19 mm the symbol width is approximately 40.1 mm, approaching 44 mm after adding quiet zones on both sides—it fits on a 60 mm diameter (circumference approximately 188 mm) cylinder body, but the usable flat area in the cylinder height direction is limited, and curvature causes middle modules to deviate from the scanning focal plane, so measured grades are often lower than on flat containers.
Therefore, prefer DataMatrix on culture devices and narrow specimen tubes, and use Code 128 on flat containers such as media bottles and rinse solution bottles. Print quality should be sampled before warehousing according to symbol grades in ISO/IEC 15416 (linear barcodes) and ISO/IEC 15415 (two-dimensional matrix codes); under humid heat conditions, it is recommended to set the symbol grade threshold at C or above, and reprint entire batches below the threshold.
Ribbon matching is the most easily overlooked step in sterility testing scenarios. Under humid heat plus surfactant splatter, wax-based and mixed-based ribbons have insufficient ink layer resistance, and resin-based ribbons should be used uniformly; for laboratory cryogenic label printing, BRL series cryogenic ribbons (available in 110 mm×300 m and 80 mm×300 m specifications) can be selected for use with nylon cloth and polyester face stocks that have all four tiers checked. A print resolution of 300 dpi or higher is recommended; symbols with module size less than 0.25 mm should use 600 dpi, otherwise jagged module edges will directly lower the symbol grade.
11. Six-step labeling SOP
Step 1: Position selection. Avoid the observation window, membrane position graduation lines, drainage port, and clamp load-bearing surface; keep curved-surface label width within 20 mm or switch to cloth-based material.
Step 2: Cleaning. 75% ethanol wipe → dry cotton swab wipe → allow to stand for at least 30 seconds; silicone-containing cleaners are prohibited.
Step 3: Printing. Resin-based ribbon, 300 dpi or higher; after printing, sample symbol grades according to ISO/IEC 15416 or ISO/IEC 15415, and reprint entire batches that fail.
Step 4: Application. For curved surfaces, establish the centerline first, then squeeze unidirectionally toward both sides; for wrap-around types, overlap at least 3 mm, with the overlap on the back of the container rather than the observation surface.
Step 5: Bubble removal. Press with fingertips from center to periphery for 10–15 seconds, then press edges once more to ensure no visible bubbles.
Step 6: Standing and review. Allow at least 24 hours after application before placing in the incubator; numbers must be reviewed and signed by a second person, and review records retained with the batch.
12. Failure troubleshooting: six typical problems
| Phenomenon | Most likely cause | Action |
|---|---|---|
| Label ends lifting on days 3–5 of incubation | Excessive curved-surface width or insufficient bubble removal | Use narrower width or switch to cloth-based; double post-application pressing time and redo standing |
| Label detaches entirely, adhesive remains on cylinder body | Residual water film or silicone-containing cleaner on interface | Redo cleaning procedure, extend drying time to 60 seconds |
| Barcode unscannable after day 7 | Insufficient ribbon resistance, ink layer eroded by medium splatter | Switch to resin-based ribbon, add self-laminating structure to protect ink layer |
| Label curls and detaches after sterilization, adhesive residue contaminates autoclave | Material does not cover the 121 °C tier | Switch to material with all four tiers checked, or move labeling to an external carrier that does not enter the autoclave |
| Liquid level and turbidity unclear during reading | Label position covers the observation surface | Relocate to the back of the cylinder body, or switch to self-laminating type with clear window |
| Two codes in the same batch scan to the same result | Code field missing filter serial number or role field | Redesign code per three-segment format, replace old labels and document the change |
Recommended Products
For the label materials and application scenarios covered in this article, the following BradyLAB (BRD) products are available for selection reference (click to view specifications and request a quote):
- T629 Sample Bank -196 °C Nylon Cloth Low-Temperature Label (¥999/roll)
- Lab121-459 PET Self-Laminating Label (Price on request)
- Lab169-429 Polyester Cryogenic Label (Price on request)
- BRL-110 Laboratory Cryogenic Ribbon 110 mm×300 m (Price on request)
FAQ
Q1: Must labels on culture devices withstand 121 °C?
It depends on the labeling object. Labels that enter the autoclave with equipment, media bottles, and rinse solution bottles must cover the 121 °C tier; temporary identification labels applied only to the exterior of culture devices and not entering the autoclave may use materials with three tiers checked. The criterion is whether the label will experience saturated steam during the process, not what container it is applied to.
Q2: Can labels still be scanned after 14 days of incubation?
This requires three conditions simultaneously: material covers humid heat conditions, ribbon is resin-based, and printed symbol grade meets the threshold before warehousing. If any one is missing, humid heat and medium splatter will consume readability within the 7–14 day window. It is recommended to perform an intermediate check on day 7 of incubation rather than waiting until day 14 reading to discover the barcode is unscannable.
Q3: What is the relationship between 0.45 μm membrane pore size and label selection?
Direct relationship is minimal, but it determines the closed nature of the operation: the membrane filter used for sterility testing should have a pore size no greater than 0.45 μm and a diameter of approximately 50 mm, used with a closed membrane filter. Closed means the membrane is no longer removed and transferred, so the label bears full identification responsibility, and the code must be written correctly the first time.
Q4: Do the two temperature ranges of dual-temperature incubation require different labels?
Materials need not differ, but codes must differ. The 30–35 °C and 20–25 °C ranges differ only limitedly in humid heat intensity, and the same material covers both; however, the two groups of culture devices are very easily confused in the same incubator or adjacent rack positions, so it is recommended to add a temperature group field to the code and use pre-printed color bands for secondary visual distinction.
Q5: How to select labels for specimens that are -80 °C frozen biological products?
Choose materials validated at both the low-temperature end and the high-temperature humid end, i.e., products with all four tiers checked: LN₂ -196 °C, freezer -80 °C, hot water 100 °C, and autoclave 121 °C. Materials rated only for -40 °C and above are invalid at both the -80 °C step and the 121 °C step. Cross-temperature operation also requires allowance for condensation water interfacial displacement, and post-application standing time should be extended accordingly.
Q6: Can handwritten labels replace printed labels?
Not recommended as primary identification. 14 days of humid heat plus medium splatter will cause handwritten ink to diffuse, and handwriting cannot provide machine-readable codes and check digits; in operations such as sterility testing that require daily observation and two-person review, the traceability chain will be noticeably weakened. Handwriting is suitable only as a temporary annotation layer and must not cover the printed code.
Q7: If a number is found to be wrong on an already applied label, can a new label simply be applied on top?
No. Over-labeling causes the old code to shift with the adhesive layer under humid heat, and scanning may read two layers of results, breaking the traceability chain. The correct procedure is to completely remove the old label, clean the interface, reapply a new label, and note the reason and time of label replacement in records.