
How should labels for antimicrobial susceptibility test (AST) plates be selected? Let's put the conclusion first: the selection order is the exact opposite of that for a biobank. For a biobank, the first constraint is the minimum temperature—LN₂ at −196 °C, freezer at −80 °C, dry ice at −78.5 °C—and only after temperature is settled do geometry and symbology come into play. For clinical microbiology AST plates, however, the first constraint is the reading surface: the only output of the plate is the zone of inhibition diameter, and the zone of inhibition is measured through the bottom of the dish from the back of the plate. Once a label covers the reading area, the result for that plate is void, with no remedy—incubation is already complete, the colonies have already grown, and repeating the test means another 16–18 hours.
In AST plates, temperature ranks only fourth: incubation at 35 °C ± 2 °C falls within the ambient range, which any ambient-grade material can withstand. Instead, the two geometric questions—"where to apply" and "how large"—go wrong almost daily. This article presents an actionable decision chain in the order of "reading surface → label position → geometric window → symbology → temperature → chemical and biosafety," together with the official material matrix, a dual-label scheme, a six-step implementation process, and troubleshooting for five types of failure.
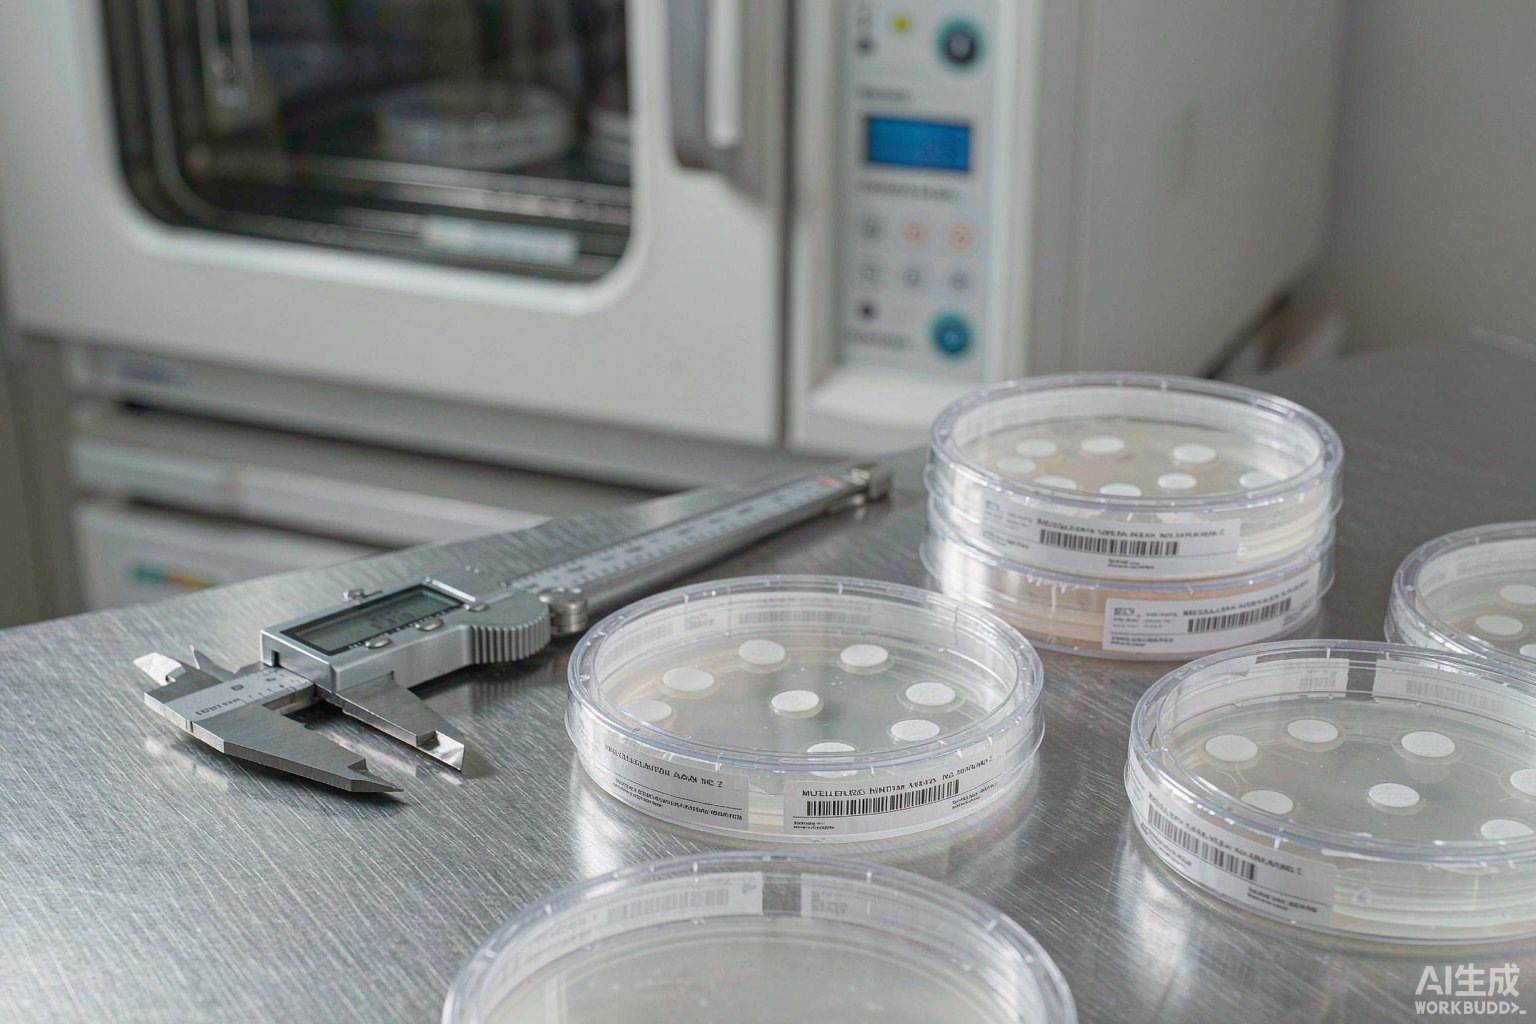
1. Conclusion: The selection order for AST plates is the opposite of that for a biobank
1.1 Biobanks prioritize "lowest temperature"; AST plates prioritize "reading surface"
The difference in selection order between the two scenarios stems from different cost structures of labeling failure. In a biobank, the value of a cryovial is that "the sample inside is still there and can still be found"; exceeding the temperature limit invalidates the sample itself, so temperature must come first. If a cryogenic label falls off, at least the sample is still in the vial and can be traced back through location records. AST plates are the opposite—the bacterial lawn on the plate is fixed once incubation ends; a detached label does not lose the sample, but a label that obscures the plate directly destroys the only readable output. One is "temperature destroys the content," the other is "position destroys the reading."
The decision order for AST plates should therefore be rewritten as: ① first check whether the label will fall into the reading area (geometric constraint, veto item); ② then check whether the labeling surface is exposed under the incubation orientation (inverted incubation means only the outside bottom of the dish can be labeled); ③ then check the code length and available dimensions (symbology constraint); ④ only then temperature (35 °C incubation and 121 °C disposal); ⑤ and finally chemical exposure and biosafety.
1.2 Why the reading surface outweighs temperature: one failed reading voids the entire plate
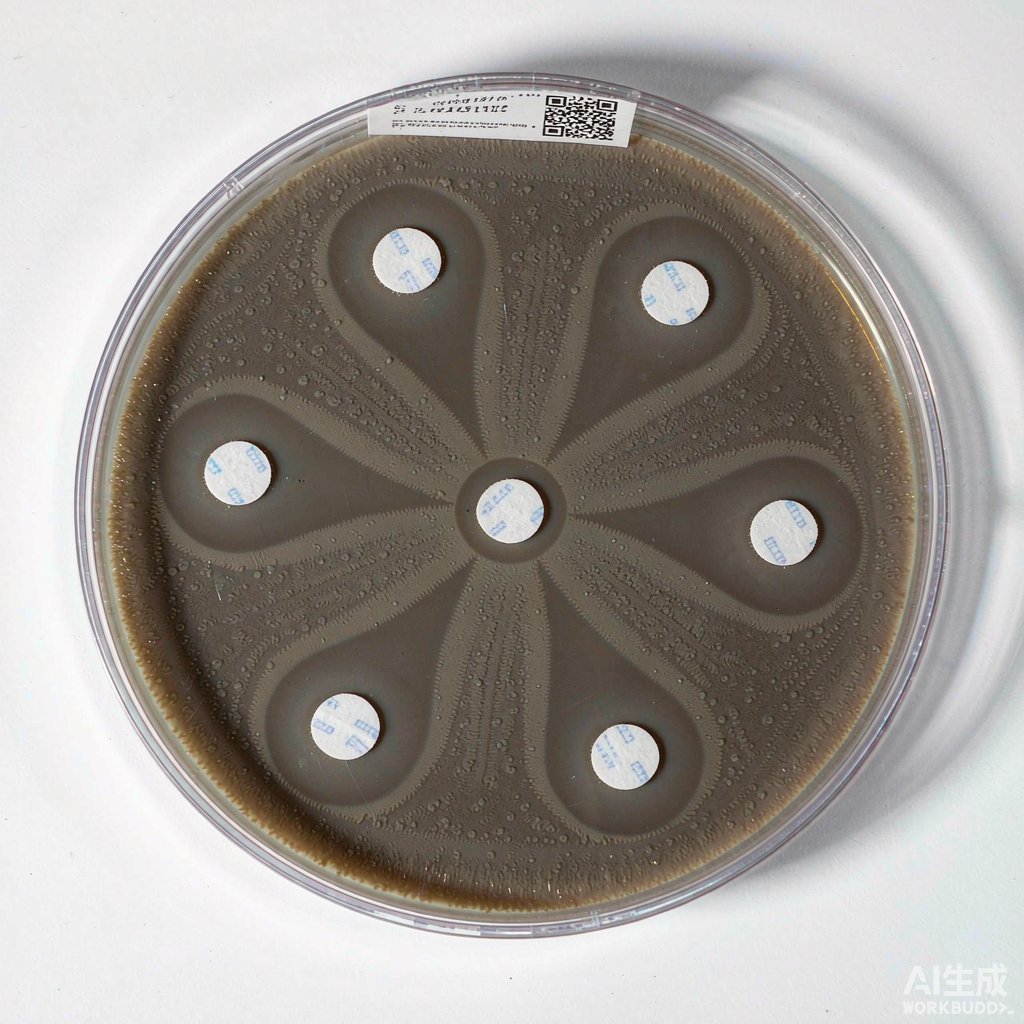
The entire quantitative output of the disk diffusion method (Kirby-Bauer method) is the diameter of the concentric zone around the disk where no bacterial growth occurs. According to current standard AST methods, the operating chain is fixed: pick morphologically consistent colonies from a pure culture and adjust the bacterial suspension to 0.5 McFarland turbidity (approximately 1.5 × 10⁸ CFU/mL) with sterile saline or broth; dip a sterile cotton swab, streak the surface of an M-H agar plate three times, rotating the plate approximately 60° each time, and finally swab around the agar edge; after streaking, dry at room temperature for 3–5 min so that excess surface moisture is absorbed.
Then apply the AST disks: the center-to-center distance between disks must be no less than 24 mm, and the distance from the disk center to the plate edge no less than 15 mm. Once applied, disks must not be moved; otherwise, abnormal drug diffusion trajectories will produce double diffusion shadows. Place the prepared plates inverted in a 35 °C ± 2 °C incubator; incubate common aerobic bacteria for 16–18 h; fastidious bacteria such as Streptococcus pneumoniae require a 5%–7% CO₂ environment, and some strains require M-H agar containing 5% sheep blood. After incubation, use calipers or a dedicated measuring device to measure the full zone of inhibition diameter, including the disk diameter, on the back of the plate, to the nearest millimeter, then compare with the standard breakpoint table to determine susceptible, intermediate, or resistant.
Note the weight of the phrase "measure on the back of the plate": it means the reading line of sight must pass through the outer bottom surface of the dish. And the outer bottom surface of the dish is precisely the only permitted label location—this is the sole contradiction this article aims to resolve.
2. First constraint: Inverted incubation means labels can only go on the outside bottom of the dish
2.1 Definition and purpose of inversion: lid down, medium-containing dish bottom up
The standard inverted incubation orientation is: the lid facing down on the incubator shelf, and the medium-containing dish bottom facing up, with the medium surface facing fully down and not touching the lid. The sole purpose is to let condensation collect on the inside of the lid rather than dripping onto the agar surface, which would scatter colonies and cause spreading or contamination. To judge whether inversion is correct, check three things: the lid is down and level, the medium is fully solidified and does not flow, and condensation collects on the inside of the lid without flowing back.
Timing of inversion also matters: after pouring, the medium must fully solidify (approximately 15–30 min) before inversion; flipping before solidification deforms the medium, causes uneven thickness, or even detachment. Common disposable Petri dishes are made of polystyrene (GPPS), with a nominal temperature range of approximately −20 °C to 60 °C; the medium must be cooled to approximately 50 °C before pouring, as excessive temperature deforms the plastic dish and generates abundant condensation.
2.2 Labels must follow the dish bottom itself, not the lid
The general rule in microbiology laboratories is: write the label on the outer wall of the dish bottom (the half containing agar), not on the lid. The reason is very practical—lids may be lost, slip off, or be swapped with those of other plates during batch operations; once mismatched, a label on the lid attributes the result of specimen A to specimen B, which is the most dangerous class of error in the laboratory. A number written on the outer wall of the dish bottom always follows the experimental entity itself; even if the lid is swapped, the correspondence between the plate body and the result remains intact.
After inversion, the dish bottom faces up, and the label is also facing up and visible, making it easy to verify the number, date, and specimen type without turning the plate over. Common label content includes: operator name or code, date, specimen type and number, medium type, and dilution; two-sector or four-sector plates also require sector purpose annotations.
2.3 Four exceptions that must be incubated upright
Inversion is not absolute. The following four scenarios must be upright; inversion would cause experimental failure, and label positions must be adjusted accordingly: AST or antimicrobial testing by the Oxford cup method (the liquid in the cup must not flow out), slide microculture of fungi, motility tests with low-concentration agar (0.3%–0.5%), and antimicrobial tests with volatile substances. In addition, mold and yeast counts follow the corresponding national standard methods and likewise do not use the inverted orientation.
The common feature of these four exceptions is that there is liquid or structure above the plate that must maintain its position. When upright, the lid is on top; a label on the top surface of the lid faces up and is easy to read, but the risk principle of "lids are interchangeable" still applies—for upright scenarios, it is recommended to add a short number on the side wall of the dish bottom as a fallback, forming a two-point identification.
3. Second constraint: The outside bottom of the dish is also the reading surface for the zone of inhibition
3.1 The zone of inhibition is measured on the back of the plate, to the nearest millimeter
The zone of inhibition diameter must be read to the nearest millimeter, while the breakpoint gaps between the susceptible, intermediate, and resistant categories are often only 1–3 mm. This means that the edge of any opaque covering on the reading surface introduces systematic error: an opaque label prevents the operator from seeing the true boundary of the zone of inhibition, while a translucent label may shift the boundary through refraction. Furthermore, the edge of the zone of inhibition may itself be gradual (some drug-strain combinations show cloudy growth or faint inner growth), requiring careful boundary identification under transmitted or reflected light—at which point, even if the label covers only a small arc of the zone, the reading is unreliable.
Applying a label over the reading area is therefore equivalent to covering part of the measuring instrument. This belongs to the same class of problem as flow cytometry sample tubes and cuvettes, where "the body must not be obscured," except that AST plates carry an additional constraint: they are simultaneously the medium container, the carrier of the incubation orientation, and the reading device—three roles crowded onto a single plastic part.
3.2 Deriving the reading area from disk placement rules
The reading area is not an abstract concept; it can be precisely derived from disk placement rules. Taking the most common disposable Petri dish, φ90 mm × 15 mm, as an example: the outer bottom diameter is 90 mm with a radius of 45 mm, and the agar surface diameter is approximately 85 mm with a radius of approximately 42.5 mm.
According to the requirement that "the disk center must be no less than 15 mm from the plate edge," the maximum radius of the outermost disk centers = 42.5 − 15 = 27.5 mm. According to "the center-to-center distance between disks must be no less than 24 mm," a φ90 plate typically holds 6 disks, and in practice the disk centers mostly fall within an annular band of radius 20–27.5 mm. The zone of inhibition expands outward from the disk center, with common zone diameters of 15–30 mm (radius 7.5–15 mm); accordingly, the outer edge radius of the reading area typically falls in the 34–40 mm range.
In other words, almost the entire annular band of radius 34–40 mm may be reading area and must not be covered by anything. Only the outermost ring is left for labels.
3.3 Quantitative calculation of the safe labeling annulus
Taking the conservative upper limit of the reading area outer edge as 38 mm and reserving a 0.5 mm process margin from the 45 mm outer bottom radius, we obtain a safe labeling annulus = radius 38–44.5 mm, radial width 6.5 mm. This yields the hardest dimensional conclusion of this article:
Labels applied to the outer bottom surface of the dish must not exceed 6.5 mm in height.
Width is determined by the sector central angle. The four corners of a rectangular label must not cross the inner or outer edges of the annulus. Calculating chord length based on an inner radius of 38 mm: a 90° sector corresponds to a chord length of 2 × 38 × sin45° ≈ 53.7 mm; a 120° sector corresponds to 2 × 38 × sin60° ≈ 65.8 mm; a 180° sector corresponds to 76 mm. Therefore, a single label strip should not exceed 50 mm in width (corresponding to approximately a 90° sector); when a longer code is required, use two labels on opposite sides, or switch to a sector with a larger central angle.
| Item | Value | Source and notes |
|---|---|---|
| Petri dish specification | φ90 mm × 15 mm | Common disposable polystyrene (GPPS) specification; also available in 60 / 70 / 90 / 150 mm, etc. |
| Outer bottom radius of dish | 45 mm | Usable outer diameter for labeling |
| Agar surface radius | Approximately 42.5 mm | Agar surface diameter approximately 85 mm, slightly smaller than the outer bottom diameter |
| Maximum disk center radius | 27.5 mm | Agar radius 42.5 mm minus "≥15 mm from plate edge" |
| Minimum center-to-center distance between disks | 24 mm | Prevents zone overlap; φ90 plates typically hold 6 disks |
| Reading area outer edge (typical) | Radius 34–40 mm | Disk center radius + zone of inhibition radius (common zone diameter 15–30 mm) |
| Safe labeling annulus | Radius 38–44.5 mm | Radial width 6.5 mm, located at the outermost ring of the outer bottom surface |
| Maximum label height | ≤6.5 mm | Determined by the radial width of the annulus; veto item |
| Recommended label width | ≤50 mm | Corresponds to approximately a 90° sector (inner-edge chord length 53.7 mm) |
Note: if the zone of inhibition diameter for a certain drug at your institution frequently exceeds 32 mm (reading area outer edge beyond the 38 mm safety line), the above annulus is no longer safe; in that case, move the label to the side wall of the dish or the top surface of the lid. The most reliable approach is to retrieve your institution's AST raw records from the past year, analyze the actual distribution of zone diameters, and replace the 38 mm assumption in this article with the real upper limit.
4. Third constraint: Symbology and dimensions
4.1 A 6.5 mm narrow strip cannot fit a 1D barcode: Code 128 length calculation
The 6.5 mm height limit directly rules out 1D barcodes for the primary label on the dish bottom. The Code 128 symbol length can be estimated by the number of modules M = 11n + 35 (n is the number of data characters), with a narrow module width of the conventional X = 0.19 mm and a total quiet zone of 10 mm on both sides. In the width direction, a 50 mm-wide label minus 1 mm margins on each side leaves approximately 48 mm of usable barcode length:
(11n + 35) × 0.19 + 10 ≤ 48 → 11n + 35 ≤ 200 → n ≤ 15 characters, sufficient in width.
But the height direction fails: a 6.5 mm-high label minus 0.75 mm margins top and bottom leaves a bar height of only approximately 4.85 mm. The bar height of a 1D barcode directly determines the scanner's vertical tolerance and the stability of grade-based verification; 4.85 mm is clearly below the commonly recommended minimum bar height, and grade degradation is likely with either handheld or platform scanners. Conclusion: no 1D barcode on the primary label on the dish bottom.
4.2 Switch to DataMatrix: the right solution for small size and high density
2D matrix codes offer clear advantages at this size. Following the ISO/IEC 15415 print quality grading approach, the module size (X) and symbol edge length directly determine readability. Within the 4.85 mm usable height:
- DataMatrix 16×16, X = 0.25 mm → edge length 4.0 mm, capacity approximately 12 digits or 8 alphanumeric characters;
- DataMatrix 18×18, X = 0.25 mm → edge length 4.5 mm, capacity approximately 18 digits or 12 alphanumeric characters;
- DataMatrix 20×20, X = 0.22 mm → edge length 4.4 mm, capacity approximately 24 digits or 16 alphanumeric characters.
In other words, placing an 18×18 or 20×20 DataMatrix on a 6.5 mm-high narrow strip can carry the complete plate number without encroaching on the reading area. The prerequisite is sufficient printer resolution—X = 0.22 mm corresponds to a module precision of approximately 115 dpi; conventional 300 dpi thermal-transfer printers can output this reliably, while 203 dpi models require verification on the actual machine.
4.3 Dual-label scheme: division of labor between the dish-bottom narrow strip and the lid label
A single 6.5 mm narrow strip cannot carry the complete field set. A dual-label division of labor is recommended:
- Primary label (outer bottom edge annulus of the dish): a narrow strip ≤6.5 mm in height, carrying only "short plate serial number + medium type color code + 20×20 DataMatrix"; its role is to prevent mismatch, enable scanning, and avoid blocking the reading. The 50.8 × 6.35 mm specification of BradyLAB (BRD) Lab290-689 falls exactly within this window.
- Secondary label (top surface of the lid): the top surface of the lid is not the reading surface, so a larger label can carry the complete field set and a 1D barcode. But remember—the lid label must not serve as the sole identifier; it is only an auxiliary means for retrieval and stacking management. A 38 × 12 mm specification can accommodate a DataMatrix 24×24 (X = 0.40 mm, edge length 9.6 mm); if a 1D barcode is insisted upon, 38 mm minus margins leaves approximately 36 mm, which by the formula above can hold only 9 characters; long codes must switch to 2D.
| Label position | Available dimensions | Recommended symbology | Capacity | Reading surface? |
|---|---|---|---|---|
| Outer bottom edge annulus of dish | Width ≤50 mm, height ≤6.5 mm | DataMatrix 18×18 / 20×20 | Approximately 18–24 digits | Yes (obscuring prohibited) |
| Outer bottom edge annulus of dish | Same as above | Code 128 | Width sufficient for 15 characters, but bar height only 4.85 mm, not recommended | Yes (obscuring prohibited) |
| Top surface of lid | Usable diameter approximately 88 mm | DataMatrix 24×24 (X=0.40 mm) | Approximately 44 digits / 32 letters | No |
| Top surface of lid | 38 × 12 mm label | Code 128 (X=0.19 mm) | Maximum 9 characters | No |
| Side wall of dish | Side wall height 15 mm, usable approximately 8–10 mm | DataMatrix 18×18 or short text | Fallback short number | No |
5. Fourth constraint: Temperature and humidity chain
5.1 Seven-stage temperature chain and material grades
Temperature ranks fourth in the AST plate scenario, but the chain is not short. A complete AST test passes through seven temperature stages, of which only two raise the temperature requirement:
| Stage | Temperature condition | Duration | Material grade | Notes |
|---|---|---|---|---|
| Storage of uninoculated plates | 2–8 °C refrigerated | Short-term no more than 1 week; long-term requires sealing film | Ambient grade | Polystyrene dishes rated −20 °C to 60 °C |
| Medium pouring | Cooled to approximately 50 °C before pouring | Solidify 15–30 min | Ambient grade | Excessive temperature deforms the plastic dish |
| Drying after inoculation | Room temperature | 3–5 min | Ambient grade | Excess surface moisture must be absorbed |
| Incubation | 35 °C ± 2 °C (fastidious bacteria 5%–7% CO₂) | 16–18 h | Ambient grade | High humidity in the incubator; interface condensation is the main failure source |
| Storage of AST disks (unopened) | −20 °C to 8 °C | Per expiry date | Grade resistant to −40 °C or below | Bring to room temperature before use to avoid condensation reducing potency |
| AST disks (opened) | 2–8 °C, with desiccant, protected from light, sealed | Recommended no more than 7 days | Ambient grade | Above the −40 °C threshold; no LN₂ grade required |
| Waste sterilization | 121 °C pressurized steam | 15–30 min (per institutional biosafety manual) | If post-sterilization traceability is required, use autoclave grade | Most scenarios do not require post-sterilization readability |
Looking at these seven stages together: the main operating condition is 35 °C high humidity, which falls within the ambient range; only the unopened storage of AST disks involves −20 °C, and −20 °C is above the −40 °C threshold, so a material resistant to −40 °C or below suffices—the LN₂ grade is entirely unnecessary; only long-term strain preservation reaches lower temperature grades. What truly deserves attention is not low temperature but the sustained high humidity inside the 35 °C incubator—moisture forms an interfacial water film between the adhesive layer and the polystyrene surface, lifting the label and causing edge curling, exactly the same failure mechanism as cell culture vessels in high-humidity environments.
5.2 How to read the official material matrix
The table below is transcribed from the official material guide. Three reading tips: first, only four products—T629, T625, T419, and T329—are checked in the ambient column, so 35 °C incubation conditions should be selected from these four; second, models such as T509, T429, and T439 are not checked in the ambient column—they are introduced for functional requirements such as wrap-around geometry, laminate protection, color-code zoning, and conformability, not for temperature; third, only three products—T459, T429, and T629—are checked in the 121 °C autoclave column, of which T629 is the only model checked in all four columns—LN₂, freezer, hot water, and autoclave—and in all four application categories—ambient, microscope slides, cryovials/test tubes, and conical tubes.
| Model | Key points of official description | Ambient | LN₂ −196 °C | Freezer −80 °C | Hot water 100 °C | Autoclave 121 °C |
|---|---|---|---|---|---|---|
| T629 | Nylon cloth label, easy to apply, resistant to high and low temperatures, good conformability, for all laboratory labeling needs | √ | √ | √ | √ | √ |
| T459 | Ultra-thin polyester self-laminating label with clear tail, protecting printed content and providing a clear window for observing liquid level | — | √ | √ | √ | √ |
| T429 | Ideal for labeling frozen flat surfaces; when applied to frozen tube surfaces, overlap at least 3 mm end to end | — | √ | √ | √ | √ |
| T439 | 6-color cryogenic label with pre-printed color at top for quick identification and classification of container types | — | √ | √ | √ | — |
| T509 | Durable vinyl label, suitable for wrapping, good conformability; requires overlap when used in LN₂ environments | — | √ | √ | √ | — |
| T625 | Vinyl cloth label, repositionable, removable, no adhesive residue, reusable | √ | — | — | — | — |
| T419 | Bright white PET material, for cryovials and microcentrifuge tubes, resistant to environments above −40 °C | √ | — | — | — | — |
| T329 | Matte white PP self-adhesive, resistant to −40 °C low-temperature freezing | √ | — | — | — | — |
Lower temperature grades (e.g., glycerol stock preservation of strains) require models checked in the freezer −80 °C column, linking to the labeling scheme for strain preservation; this article does not elaborate. It must be emphasized that the temperature figures in the official table are hard facts and must not be rounded or rewritten as "approximately"; for specific materials and temperature ranges, refer to the product specification sheet, or contact the product manager for selection.
6. Fifth constraint: Chemical exposure and biosafety
6.1 Disinfectant wiping, UV irradiation, and moist heat sterilization
Chemical exposure for AST plates is not severe, but three sources must be covered: first, wiping of the workbench with 75% ethanol and chlorine-containing disinfectants—label edges are repeatedly wiped when plates are handled in the biosafety cabinet; second, UV irradiation in the biosafety cabinet (commonly a 30 min irradiation program)—UV ages and yellows some face stocks and printed layers; third, pressurized steam sterilization during disposal—moist heat damages the adhesive layer far more than dry heat.
Therefore, the printing method should uniformly use thermal transfer + resin-based ribbon, not direct thermal. Direct thermal print fades rapidly under 75% ethanol wiping and 35 °C high humidity, whereas resin-based ribbon with a suitable face stock can reliably withstand wiping and condensation. Peel strength and holding tack can be verified against GB/T 2792-2014 and GB/T 4851-2014 for incoming inspection and annual review—this is also the most direct quantitative language for explaining "why labels curl under moist heat."
6.2 Biosafety compliance boundary: division of labor between the statutory layer and the self-applied layer
Clinical microbiology laboratories involve pathogenic microorganisms, and labeling must clearly distinguish the statutory layer from the self-applied layer. BradyLAB (BRD) self-applied labels serve only as carrier mapping and process management and do not replace or override any statutory labeling:
- Patient identity and test reports belong to the laboratory information system master data; plate labels carry only the corresponding specimen number and plate serial number, not diagnostic conclusions;
- Biohazard warning signs follow GB 19489-2008 "Laboratories—General Requirements for Biosafety" and WS 233-2002, with symbol format per ISO 7010 W009; these belong to the statutory layer, and the self-applied layer must not cover or alter their format;
- Registration of preservation, transport, and destruction of strains (viruses) is managed by qualified preservation institutions under the relevant regulations; the self-applied layer only records strain number, passage information, and location as process records;
- Disposal of medical waste and discarded cultures follows the institutional biosafety manual for pressurized steam sterilization; the self-applied layer does not participate in statutory transfer manifests.
At the laboratory quality management system level, ISO 15189:2022 sets clear identification and record requirements for pre-examination procedures and result reporting, while ISO/IEC 17025:2017 and ISO 20387:2018 specify record integrity and traceability from the perspectives of testing competence and biological sample preservation, respectively. Barcode and 2D code print quality are accepted by grading per ISO/IEC 15416 and ISO/IEC 15415, respectively—these two deserve particular rigor on AST plates, because the module size of small DataMatrix codes is already approaching the lower limit of printer resolution.
7. Field set and coding rules
7.1 Field set for plate labels
Given the 6.5 mm height limit, the fields on the primary dish-bottom label must be streamlined. It is recommended to retain only three categories: ① plate serial number (unique within the institution, 8–12 digits); ② medium type abbreviation (e.g., MH for M-H agar, BA for blood agar, MAC for MacConkey, CHOC for chocolate agar, SDA for Sabouraud); ③ inoculation date. All other fields move to the secondary lid label:
- Specimen number / patient inpatient or outpatient number mapping code (do not write patient names, to avoid identity exposure on the bench);
- Full medium type name and lot number;
- Inoculation date and time, incubation conditions (35 °C air / 5%–7% CO₂);
- Types and quantities of AST disks and lot numbers;
- Quality control strain information (e.g., concurrent test results for Escherichia coli ATCC 25922);
- Reading date and reader code;
- Disposal date and sterilization batch number.
7.2 Coding rules and color-code zoning
The code is recommended to use a three-part format of "date + specimen type + serial number," e.g., 261010-MH-037, with a total length within 15 characters, which fits completely into a 20×20 DataMatrix. If the same specimen is inoculated onto multiple media simultaneously (blood agar, MacConkey, M-H plate), they should share the same specimen segment and be distinguished by the medium segment, avoiding three unrelated plate numbers.
For rapid differentiation of medium types, the most effective approach is not reading text but looking at color. The 6-color pre-printed top design of T439 exactly meets this need—bind each of the 6 common media to a color, so operators can distinguish them at a glance in the incubator without flipping each plate to check text. Note, however, that the 30 × 15 mm specification has a height of 15 mm, exceeding the 6.5 mm height limit for the dish bottom, so it must not be applied to the reading surface; instead, apply it to plate storage rack positions, original packaging of uninoculated plates, or strain preservation tubes.
8. Six-step implementation process
8.1 Process steps
Step 1: Analyze the zone of inhibition diameter distribution at your institution. Retrieve AST raw records from the past year and take the actual upper limit of zone diameters to determine the outer edge radius of the reading area and the inner edge radius of the safe labeling annulus. This article defaults to 38 mm; be sure to replace it with real data.
Step 2: Determine label position and orientation. Confirm whether your institution uses inverted incubation (most aerobic AST is inverted), and accordingly determine that the primary label goes on the outer bottom edge annulus of the dish; for upright scenarios such as the Oxford cup method, apply it to the side wall of the dish or the top surface of the lid instead.
Step 3: Determine dimensions and symbology. The primary dish-bottom label should be ≤6.5 mm in height and ≤50 mm in width, with symbology 18×18 or 20×20 DataMatrix; the secondary lid label should be 38 × 12 mm, with symbology 24×24 DataMatrix or Code 128 of ≤9 characters.
Step 4: Determine material and printing. For the main 35 °C high-humidity operating condition, select from the four models checked in the ambient column; if post-sterilization traceability is required, select T629; printing should uniformly use thermal transfer with resin-based ribbon, such as BRL-110-13