
Conclusion first: The selection sequence for labels on glass volumetric ware (volumetric flasks, pipettes, burettes, graduated cylinders) is the opposite of that for biological sample bank labels. For sample banks, temperature comes first—decide first whether LN₂ or ULT freezer; for glass volumetric ware, the "statutory reading zone comes first": the first constraint is that the label must never occupy the neck graduation line, the scale reading face, or the single mark; the second constraint is that the field set carries the "metrological identity" (unique ID, accuracy class, nominal capacity, verification date, expiry date) rather than "specimen identity"; the third is cleaning and chemical exposure to reagents; and only last come temperature and sterilization level. The reason is that the primary service condition of glass volumetric ware is dry use at ambient 20 °C, so temperature is hardly a material-selection threshold; what actually causes labeling failure is chemical exposure during cleaning, and what actually causes errors is placing the label over the graduation line. The implementation sequence should be: define prohibited zones → define field set → define geometry and symbology → define chemical exposure level → define temperature/sterilization level → define replacement cycle. What BRD 博锐迪 provides in the glass volumetric ware scenario is the physical-world carrier for this metrological traceability system.
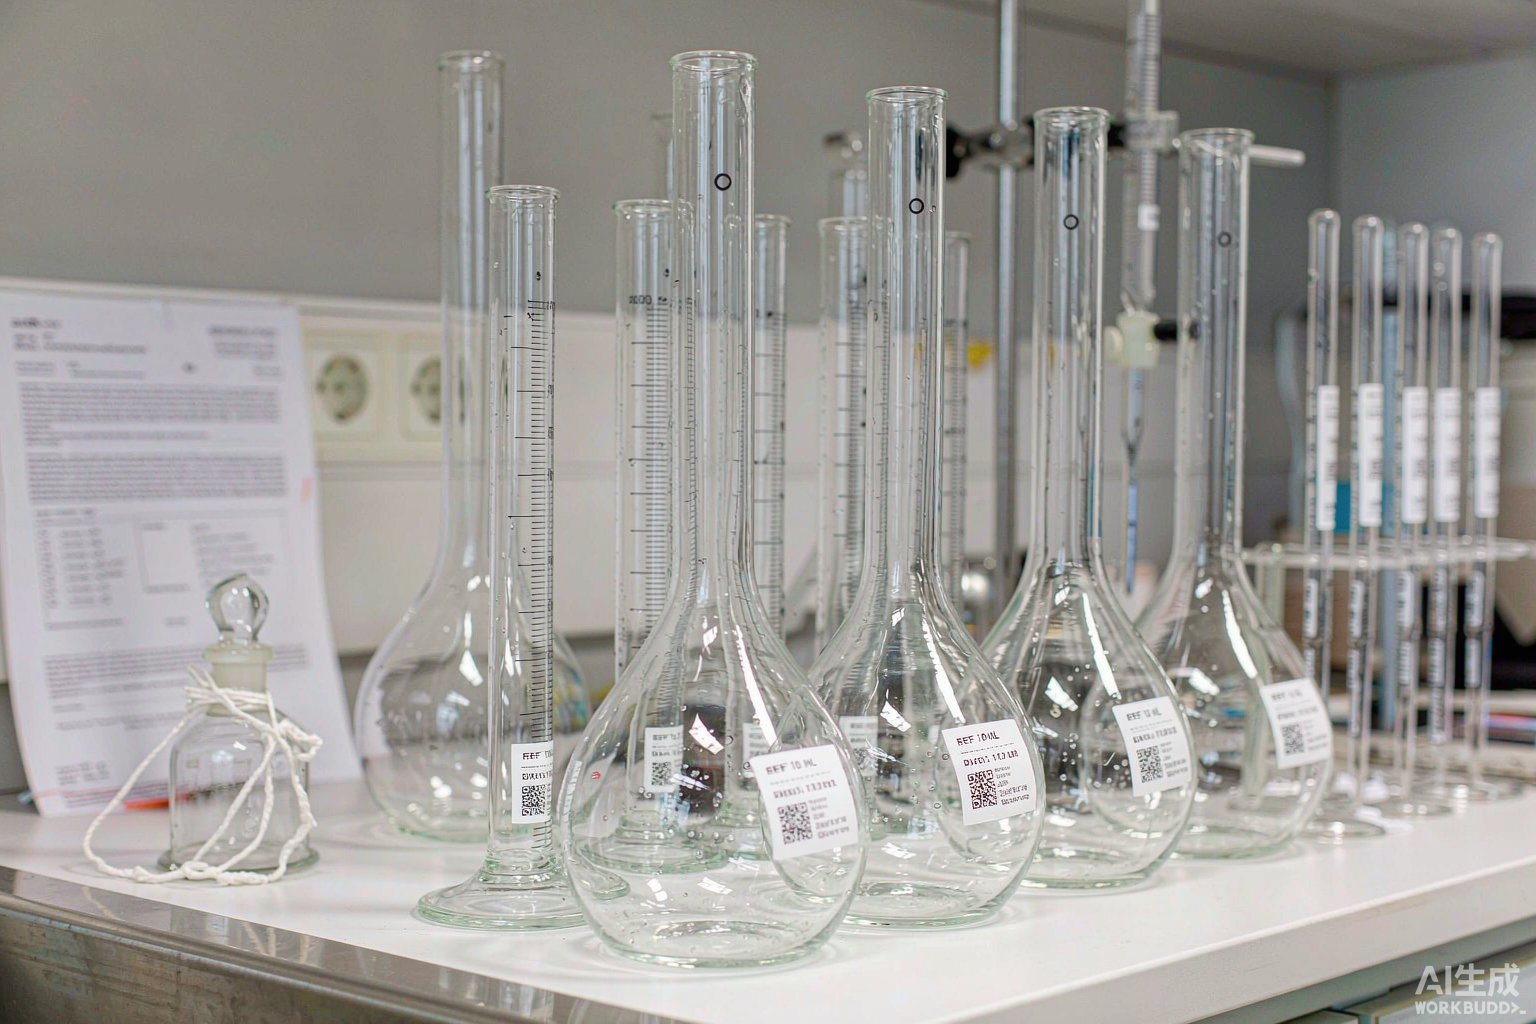
1. Why the first constraint is the "prohibited zone," not temperature
The biggest difference between glass volumetric ware and cryovials is that the former is a type of container whose value is obtained by reading a scale. A cryovial label should cover as much of the writable area as possible—the larger the better; glass volumetric ware is exactly the reverse—the label can only go on "what's left." A volumetric flask is calibrated to volume by the single ring mark on its neck; a burette reads dispensed volume along the full graduated section; a pipette delivers a fixed volume by the single mark on its upper tube; a graduated cylinder reads volume by the graduations on its body. These graduation lines are not decoration—they are the statutory reading interface of a measuring instrument.
JJG 196-2006 "Common Glass Volumetric Ware" sets a clear upper limit on graduation line width: burette graduation lines no wider than 0.3 mm; single-mark pipettes, graduated pipettes and single-mark volumetric flasks no wider than 0.4 mm. This figure itself makes one thing clear—the graduation lines are extremely fine, and a 20 mm-wide label pressed onto them covers not "a little" but the entire reading reference. Worse still, the mark on a volumetric flask is on the narrow neck, whose outer diameter is typically only 10–25 mm (about 16 mm for the 100 mL size), so a slight upward shift of the label crosses the line; the single mark of a pipette is on the upper tube, while the lower tube is often only 4–8.5 mm in diameter, leaving no flat surface for a label at all.
There are two more structures that are easily covered: first, the fixed pairing of the stopper and body of stoppered ware. The regulation requires that the factory stopper be paired and secured to the body and the instrument with a twisted fiber cord or net cord, with attention to length so as not to affect use; once a label presses on the pairing cord, every opening of the stopper tears at it, the adhesive layer quickly fails, and the pairing relationship may be disrupted. Second, the volume and temperature originally marked on the body—this is the original information of the instrument, which a self-adhesive label must not cover and can only avoid.
| Volumetric ware | Statutory reading interface | Absolute prohibited zone | Recommended label position | Structural avoidance |
|---|---|---|---|---|
| Single-mark volumetric flask | One ring mark on the neck | Entire neck section (including 10 mm above and below the mark) | Lower pear-shaped body, above the flat base | Avoid ground stopper and pairing cord |
| Single-mark pipette | Single mark on upper tube | Upper-tube mark area and lower drain tip | Bulb cylinder surface, or blank section above the upper-tube mark | Avoid grip area and pipette bulb joint |
| Graduated pipette | Full graduated scale | Entire graduated interval | Un-graduated section above the zero mark on the upper tube | Must not wrap around; avoid blocking light for reading |
| Burette | Full scale and meniscus | From zero mark to full-capacity mark | Un-graduated section above zero mark, above the stopcock | Avoid stopcock, rubber tubing and clamp positions |
| Graduated cylinder and measuring cup | Body graduations | Front reading face | Back of body or band above the base | Avoid pour spout and grip position |
This table can be used directly as the basis for on-site marking. It is recommended that when each type of volumetric ware is first received, the upper and lower boundaries of the prohibited zone be measured with a vernier caliper and photographed for records, forming a "label position map"; when personnel rotate, work according to the map to avoid shifting by feel. This is the highest return-on-investment step in this scenario, because it costs nothing yet eliminates the vast majority of reading disputes caused by obstruction.
2. Field set: it carries metrological identity, not specimen identity
The second constraint comes from the field set. The core of a cryovial label is "specimen identity," which is fixed for life once determined; the core of a glass volumetric ware label is "metrological identity"—it must answer four questions: which instrument this is, what its accuracy class is, when it was last verified, and when its next verification is due. Together these four answers determine whether this instrument can be used today to produce data.
The system basis is direct. ISO/IEC 17025:2017 Clause 6.4 governs equipment management and Clause 6.5 governs metrological traceability; together they require a laboratory to demonstrate that every piece of equipment affecting results is within its validity period and traceable; ISO 15189:2022 imposes the same traceability requirements on the pre-examination and examination processes of medical laboratories. Reduced to a small label, this means compressing all the mandatory fields in the table below into it.
| Field | Mandatory | Value rule | Recommended carrier |
|---|---|---|---|
| Unique ID | Mandatory | Unique for life; not to be mixed with fixed-asset numbers; distinguished by category prefix, e.g., F for volumetric flask, P for pipette, B for burette, C for graduated cylinder | Main label fixed layer |
| Nominal capacity | Mandatory | Consistent with the marking on the instrument body, e.g., 100 mL | Main label fixed layer |
| Accuracy class | Mandatory | Print A or B; glass volumetric ware without a marked class is treated as Class B | Main label fixed layer |
| Verification or calibration date | Mandatory | Consistent with the verification certificate or calibration record | Main label fixed layer or replaceable layer |
| Expiry date or next verification date | Mandatory | Calculated per the regulation cycle; recommend also printing the expiry year and month | Replaceable layer for easy renewal on expiry |
| Certificate No. or institution abbreviation | Recommended | If on-site quick reference is needed, only the last four digits of the certificate may be printed | Replaceable layer |
| Downgrade or out-of-service mark | Conditionally mandatory | Instruments failing verification may be downgraded for use or destroyed; downgraded items must show the new class | Overlay status layer |
The class field deserves separate explanation. The regulation explicitly states that "glassware without a marked class is treated as Class B," which means that for a batch of instruments without an engraved A, if the class is not written on the label, the site will very likely default to using them as Class A—yet the capacity tolerance of Class A and Class B differs by a factor of two: for a 100 mL single-mark volumetric flask, for example, the Class A capacity tolerance is ±0.10 mL and Class B is ±0.20 mL. Printing the class is the cheapest way to eliminate this hidden risk.
The same applies to the downgrade field. The handling path given by the regulation is that "volumetric ware passing calibration must bear a class mark; volumetric ware failing calibration may be downgraded or destroyed." If a downgraded item keeps its original label, it will continue to participate in experiments as Class A; the correct practice is to cover the old class with an overlay status layer, print the new class and downgrade date, and update the ledger accordingly.
3. Geometric calculation: the labelable window for four types of volumetric ware
The third constraint is geometry. Glass volumetric ware includes large bodies over 100 mm in diameter as well as fine lower tubes under 6 mm in diameter, and their labelable windows differ by more than thirty times. The site does not need to memorize a dimension table; it only needs to remember one algorithm: circumference equals pi times outer diameter; the upper limit of flat-label width that does not produce end lifting is the arc length corresponding to a 90° central angle, i.e., one quarter of the circumference; if even this width cannot fit the symbol, wrap-around must be used, with a minimum wrap length of one circumference plus at least 3 mm overlap.
Substituting publicly available dimensions gives the results below. Note that dimensions of glass volumetric ware vary by manufacturer and batch; the table below illustrates magnitude and method, and on-site work should be based on the outer diameter actually measured with a vernier caliper.
| Volumetric ware and size | Reference OD mm | Circumference mm | Max flat-label width mm | Conclusion |
|---|---|---|---|---|
| Volumetric flask 25 mL (body) | 38 | approx. 119.4 | approx. 29.8 | Flat-label possible; 1D symbol fits |
| Volumetric flask 100 mL (neck) | 16 | approx. 50.3 | approx. 12.6 | Prohibited zone; do not use |
| Volumetric flask 100 mL (body) | 60 | approx. 188.5 | approx. 47.1 | Flat-label possible; preferred position |
| Volumetric flask 500 mL (body) | 100 | approx. 314.2 | approx. 78.5 | Flat-label possible; ample space |
| Single-mark pipette 5 mL (bulb) | 13 | approx. 40.8 | approx. 10.2 | Barely flat-labelable; 2D symbol recommended |
| Single-mark pipette 25 mL (bulb) | 21 | approx. 66.0 | approx. 16.5 | Flat-label possible; 2D symbol safer |
| Single-mark pipette 25 mL (lower tube) | 7 | approx. 22.0 | approx. 5.5 | Not flat-labelable; wrap-around required |
| Graduated pipette 5 mL (tube body) | approx. 7.98 | approx. 25.1 | approx. 6.3 | Not flat-labelable; wrap-around required |
| Graduated pipette 25 mL (tube body) | approx. 13.09 | approx. 41.1 | approx. 10.3 | Flat-label possible; 2D symbol |
The body outer diameter of burettes varies considerably by manufacturer and size, and no unified value is found in public sources, so this article does not supply one on their behalf; it is likewise recommended to measure the outer diameter and calculate with the same formula, and regardless of the result, to label only the un-graduated section above the zero mark—the only area of a burette that does not participate in reading.
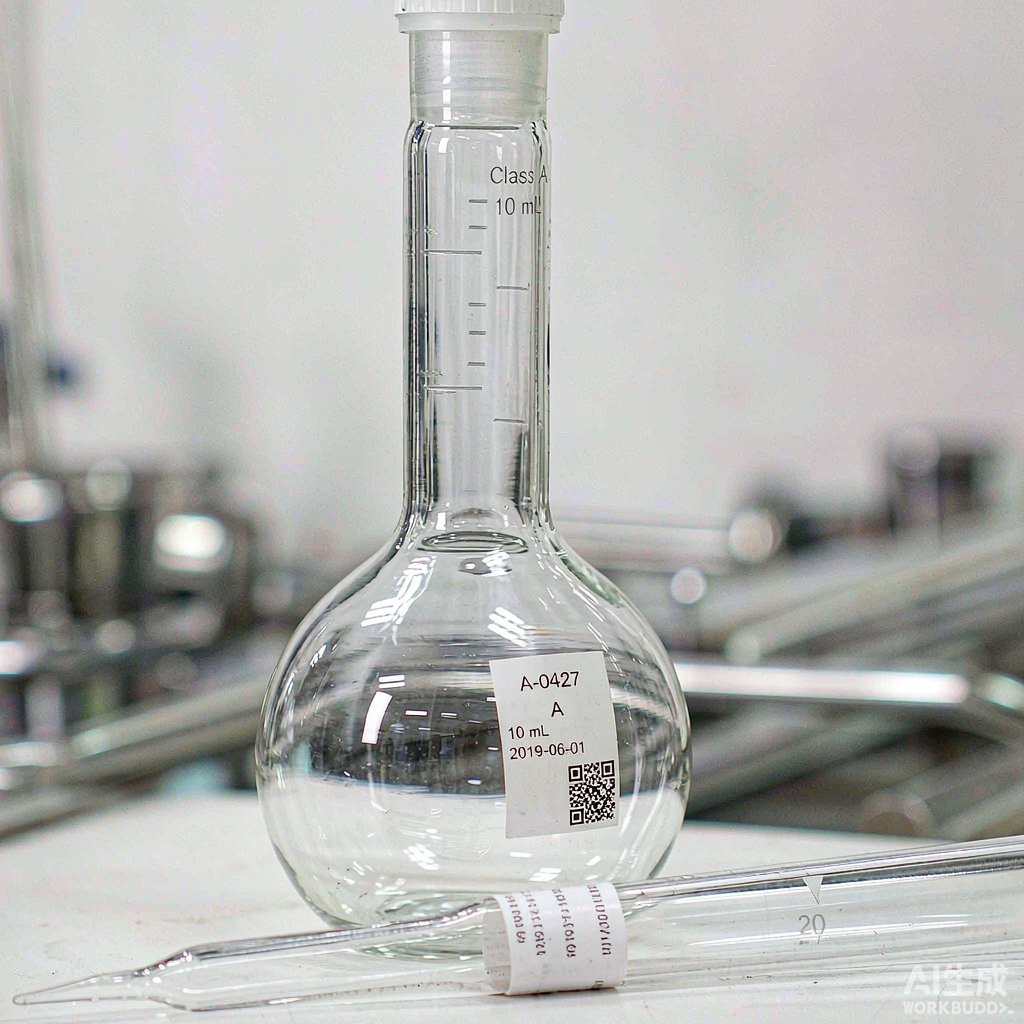
4. Chemical exposure level: cleaning solutions damage labels more than reagents
The fourth constraint is chemical exposure, and it runs counter to most people's intuition: what damages glass volumetric ware labels most is often not the reagents the ware has contained, but the cleaning solutions used to wash it. Reagents stay in the ware for minutes, whereas cleaning solution soaking often lasts for hours, and repeatedly in cycles.
| Process | Typical medium | Parameters | Contact mode | Main effect on label |
|---|---|---|---|---|
| Pre-wash | Tap water rinse | Remove loose dust | Short rinse | Mechanical scouring; edge lifting |
| Soaking | Chromic acid cleaning solution | Soak 4–6 h or overnight | Prolonged static soaking | Strong oxidizing acid attacks face stock and printed layer |
| Alkali wash | Sodium hydroxide solution | Dedicated for ware used with alkaline solutions | Prolonged soaking | Strong alkali saponifies adhesive layer; face stock embrittles |
| Rinse | Purified water | Rinse 3 times | Short rinse | Interfacial displacement; wet-state adhesion failure |
| Organic solvent rinse | Ethanol or ethanol-ether mixture | Accelerate drying | Short rinse | Extracts ribbon resin layer; print fades |
| Drying | Air dry naturally | Do not oven-bake | Ambient ventilation | Avoid changes in glass expansion coefficient |
The last row is often overlooked but is critical: glass volumetric ware should not be oven-baked, because baking may affect the glass expansion coefficient; it should be air-dried in a ventilated place and placed in the verification laboratory in advance to reach temperature equilibrium. This specification is intended to protect the metrological performance of the ware, but it also determines the label application window—since rapid drying by baking is not possible, the label must maintain adhesion through the transition from ambient wet to dry state, and the surface must be thoroughly dried before application.
At the material level, T409, positioned as chemical-resistant in the official material guide table, offers excellent chemical resistance and abrasion resistance and is the material to evaluate first under chromic acid and strong alkali cleaning conditions; however, the official table does not check its ambient-temperature column or moist-heat sterilization column, so selection must be weighed accordingly. It must be stated honestly that the BRD official material guide table does not provide resistance parameters for specific reagents such as chromic acid cleaning solution or sodium hydroxide, and this article does not draw conclusions on its behalf; for the above conditions, please refer to the product specification sheet and actual compatibility testing, and contact the product manager for selection.
At the printing level there is no controversy: this scenario must use thermal transfer with a resin-based ribbon. The wax carrier of a wax-based ribbon is extracted during organic solvent rinsing, and the print typically begins to fade after only one or two rounds of ethanol rinsing. A resin-based ribbon, once cured, forms a cross-linked adhesion layer with significantly higher solvent and alkali resistance. The ribbon width should be 2–3 mm wider than the label width to avoid edge print gaps.
5. Temperature and sterilization level: ambient 20 °C is the primary service condition
Temperature comes last because it is indeed not a threshold in the glass volumetric ware scenario. The verification environmental conditions given by the regulation are room temperature 20 ± 5 °C, room temperature change no more than 1 °C/h, and water temperature differing from room temperature by no more than 2 °C, with purified water conforming to GB/T 6682 as the verification medium (the current version is GB/T 6682-2008; the regulation text cites GB 6682-1992). In other words, the entire service environment of a piece of glass volumetric ware basically falls within this narrow 15–25 °C band.
Only the sterilization step truly needs separate evaluation, and here there is a boundary that must be made clear. Routine sterilization of glassware has two paths: moist-heat sterilization in an autoclave at 121 °C for 20 min, suitable for glassware and pipette tips; dry-heat sterilization in a drying oven at 160–180 °C for 2 h, suitable for glassware and stainless steel instruments. Some pharmaceutical glass containers also use a dry-heat process at 250 °C for 30–45 min to achieve depyrogenation.
Comparing the temperature levels in the BRD official material guide table shows that: the moist-heat 121 °C level has corresponding materials available in the table, whereas dry-heat 160–180 °C and 250 °C depyrogenation already exceed the temperature upper limit given in the official material guide table. Therefore the handling principle given in this article is—if the ware requires dry-heat sterilization or depyrogenation, the label must be applied after sterilization is complete and the ware has cooled to room temperature, and must not go into the oven with the ware; only for glass pipettes that require repeated moist-heat sterilization with the ware does one enter the 121 °C material selection level. No extrapolation is made on this point, because the official table provides no resistance data beyond the upper limit. In addition, glass pipettes require slow heating and cooling during moist-heat sterilization, as sudden cooling or heating may cause breakage; this thermal stress also acts on the adhesive interface and is a common cause of label lifting after sterilization.
6. Material selection matrix: select by service condition, not by temperature
The table below is transcribed item by item from the BRD official material guide table; checks and blanks are consistent with the official table, with no extrapolation. When selecting, first look at the service-condition row, then at the container-type column.
| Material | Official positioning | Ambient | LN₂ | Freezer | Hot water | Moist-heat sterilization | Recommended use in this article |
|---|---|---|---|---|---|---|---|
| T629 | Nylon cloth label, easy to apply, high/low temperature resistance, good conformability | Yes | Yes | Yes | Yes | Yes | Main identification for glass pipettes and volumetric ware requiring moist-heat sterilization with the ware |
| T509 | Durable vinyl label, suitable for wrapping, good conformability | Not checked | Yes | Yes | Yes | Not checked | Wrap-around identification for fine tube bodies, overlap no less than 3 mm |
| T429 | Self-laminating freezer label; at least 3 mm end-to-end overlap when applied to cryovial surfaces | Not checked | Yes | Yes | Yes | Yes | High-wear scenarios where printed content needs laminate protection |
| T439 | Six-color cryogenic label with pre-printed color at the top | Not checked | Yes | Yes | Yes | Not checked | Color-coded zoning by volumetric ware category or class |
| T409 | Excellent chemical resistance and abrasion resistance | Not checked | Yes | Yes | Yes | Not checked | Evaluate first for chromic acid and strong alkali cleaning conditions |
| T625 | Vinyl cloth label, repositionable, removable, no residue, reusable | Yes | Not checked | Not checked | Not checked | Not checked | Replaceable layer for verification date and expiry date |
| T419 | Glossy white PET material, for cryovials and microcentrifuge tubes | Yes | Not checked | Not checked | Not checked | Not checked | Long-term ambient dry-state identification; official positioning rated for environments above -40 °C |
| T329 | Matte white PP self-adhesive cryogenic label | Yes | Not checked | Not checked | Not checked | Not checked | Economical option for long-term ambient dry-state identification |
First, how to read this table. In the ambient-temperature column of the official material guide table, only four items are checked—T629, T625, T419, T329; the ambient-temperature column for T509, T429 and T439 is unchecked, and their positioning points respectively to three functional needs: wrap-around geometry, laminate protection and color-coded zoning. The primary service condition of glass volumetric ware is ambient dry state, so pure ambient long-term identification should preferably be selected from the first four; only when a geometric or functional need genuinely exists should the latter three be introduced, and it should be clear that they are driven by need rather than by temperature.
How to implement specifically. First, for glass pipettes and volumetric ware bodies requiring moist-heat sterilization with the ware, choose T629—the official table positions it as "for all places in the laboratory that need identification," and it is the only item checked in all four columns of ambient, microscope slide, cryovial and conical tube, with good conformability that fits curved glass surfaces. Second, for fine tube bodies under 8 mm in diameter such as pipette lower tubes and graduated pipettes, which geometrically cannot be flat-labeled, choose T509 for wrap-around identification, calculating the length per the formula in Section 3 and leaving no less than 3 mm overlap; note that its ambient-temperature column is unchecked, so if the site uses it only in ambient dry state, confirm before full-scale rollout. Third, for scenarios with frequent cleaning where the label surface needs extra protection, choose the T429 self-laminating structure to press the printed content under the film. Fourth, for information that must be updated at each verification, such as verification date and expiry date, use T625 as a removable layer; it peels off without residue and leaves no cumulative adhesive stain on the glass surface.
The two routine ambient dry-state options are T419 (glossy white PET material) and T329 (matte white PP self-adhesive); the official table states for both that the low-temperature lower limit has a clear boundary, while the ambient-temperature column is checked for both, and the ambient service condition of glass volumetric ware falls entirely within this column. If the same batch of labels must also serve low-temperature specimen containers, the level must be selected separately by container and must not be mixed. It should be emphasized again that the official guide table does not provide resistance parameters for specific reagents such as chromic acid cleaning solution or sodium hydroxide; the table above presents only official positioning and temperature checks and does not replace actual compatibility testing.
7. Adhesive layer and curved surfaces: application technique is more error-prone than material
Glass itself is an easy substrate to label. Silicate glass is a high-energy surface, with surface energy far higher than low-surface-energy plastics such as polypropylene and polyethylene (the latter typically in the 29–31 mN/m range year-round), so the adhesion conditions for glass are theoretically generous. The vast majority of on-site failures are not due to wrong material selection but to something on the interface: acid or alkali residue after cleaning, a solvent film after ethanol-ether rinsing, or a water film when natural drying is incomplete—all three form a weak boundary layer between the adhesive and the glass, and the label peels off entirely on the first soak.
Adhesion performance can be evaluated according to current method standards: peel strength per GB/T 2792-2014, and holding tack per GB/T 4851-2014. These two indicators correspond to two types of failure—insufficient peel strength manifests as edge lifting and complete peeling, while insufficient holding tack manifests as creep displacement under long-term load. Requesting these two data points from the supplier predicts actual service life better than looking only at "what temperature it withstands."
There are three empirical values for curved-surface application. First, when wrapping fine tubes, the end-to-end overlap should be no less than 3 mm, with the overlap area falling exactly on the label's own non-printed area so as not to consume symbol space. Second, apply from one end to the other at a uniform pressure to avoid bubbles in the middle; glass is transparent, and bubbles deflect the line of sight during reading, directly affecting meniscus reading. Third, after application, let it stand for a period before use, allowing the adhesive to complete the transition from initial tack to holding tack—especially important under process conditions where natural drying is used and baking cannot accelerate it.
8. Symbology: 2D for fine tubes, 1D for flask bodies
The choice of symbology is directly determined by the geometry table in Section 3 and requires no separate discussion of preference. Taking a 1D symbol as an example, a 20-digit 1D code, including start, check and stop characters, has about 11N+35 modules, i.e., about 255 modules; at the common narrow-module setting of 0.19 mm, the symbol width is about 48.5 mm, and with quiet zones at both ends the total length approaches 52 mm. This length is barely acceptable even against the 47.1 mm flat-label width limit of a 100 mL volumetric flask body, let alone the 5.5 mm space of a lower tube.
Switching to 2D is entirely different. A DataMatrix 24×24 module has a side length of about 6.0 mm at a module size of 0.25 mm and about 7.2 mm at 0.30 mm; even if it does not fit within the flat-label width, a wrap-around label typically has 10–15 mm of usable width along the tube axis, which is fully sufficient, and a 2D symbol has built-in error correction and remains readable after partial wear. This is also why this article recommends 2D for all fine tubes and free choice for flask bodies according to scanner configuration.
For quality criteria, 1D symbols are graded per ISO/IEC 15416 and 2D symbols per ISO/IEC 15415. The recommended on-site practice is: after printing a new label, perform a grading test once and retain a sample, then spot-check each batch; if both a main label and a replaceable layer exist on the same instrument, use the same code for both, ensuring that readability at either location traces back to the same instrument and the same verification record.
9. Verification cycle and replacement rhythm: label life should be shorter than instrument life
The verification cycle of glass volumetric ware is a hard input in material selection. JJG 196-2006 gives a verification cycle of 3 years, and the regulation also lists exceptions: 1 year for stoppered-free burettes; another practical convention shortens ware used with alkaline solutions to 1 year as well. Both exceptions point to the same type of risk—alkali attack on glass and the fragility of stopper-free structures both accelerate instrument inaccuracy, so the cycle must be shortened.
The significance of this cycle for labeling is twofold. On the lower bound, the label must last at least one verification cycle; otherwise it must be re-applied at every verification, and the more times the ID is transcribed, the higher the risk of mixing up numbers. On the upper bound, the label should not be designed to "last as long as the instrument"—because the instrument is verified only every 3 years, while the label wears during every cleaning cycle; printing the expiry date on a label that cannot be removed means looking at expired information every day for three years. Therefore this article recommends a two-layer structure: the main label prints the lifetime-unique ID, nominal capacity and class on a durable material; the expiry date and verification date are printed on a removable material and replaced after each verification.
Two self-checks within the cycle are worth writing into the SOP, and neither requires additional equipment: first, tightness—for stoppered graduated cylinders and flasks, after filling to the highest mark and closing the stopper, invert 10 times, holding each inverted position for at least 10 s, with no water seepage; for burettes, with the glass stopcock closed for 20 min or the plastic stopcock for 50 min, the leakage should not exceed the smallest graduation value. Second, capacity self-calibration—use the gravimetric method to calculate the actual capacity at 20 °C per V20 = m·K(t), with 2 parallel measurements at each calibration point, and the difference between the two measurements must not exceed one quarter of the capacity tolerance. The results of both should be written back to the replaceable layer or the ledger to form a closed loop.
10. Six-step implementation process
Step one, mark the prohibited zones. Per the table in Section 1, for each type of volumetric ware, measure with a vernier caliper the positions of the neck mark, the graduated interval and the pairing cord, determine the upper and lower boundaries and photograph for records, forming a label position map.
Step two, define fields and coding rules. Use a lifetime-unique ID with a category prefix, not mixed with fixed-asset numbers; the class field must be printed, and unmarked class is treated as Class B; static fields go on the main label, and verification date and expiry date go on the replaceable layer.
Step three, calculate geometry and select symbology. Measure the outer diameter, calculate the circumference as pi times the outer diameter, and take one quarter as the flat-label width limit; if it does not fit, switch to wrap-around, with a minimum length of one circumference plus 3 mm overlap. Use DataMatrix for all fine tubes, and choose for flask bodies according to scanner configuration.
Step four, define chemical exposure level and printing method. List the laboratory's cleaning processes item by item, noting medium, concentration, contact time and temperature; wherever chromic acid cleaning solution or prolonged strong alkali soaking is involved, evaluate chemical-resistant materials first; use thermal transfer with resin-based ribbon for all printing, with ribbon width 2–3 mm wider than the label.
Step five, define temperature/sterilization level. Confirm whether the ware undergoes moist-heat sterilization with the ware; if so, choose a material covering the moist-heat sterilization level; wherever dry-heat sterilization or depyrogenation is used, switch to applying the label after sterilization and cooling, and the label must not go into the oven with the ware.
Step six, connect to the verification ledger and review. After each verification, update the date field of the replaceable layer and synchronize the ledger; quarterly spot-check the tightness and capacity self-calibration results, and request and review the supplier's adhesive data per GB/T 2792-2014 and GB/T 4851-2014.
11. Six types of failure and troubleshooting
| Symptom | Most likely cause | Troubleshooting action | Corrective measure |
|---|---|---|---|
| Complete peeling after soaking | Acid, alkali or water film residue on the interface at application | Review the surface preparation and drying steps before application | Degrease and dewater, then re-apply with uniform pressure |
| Edge lifting | Flat-label width exceeds the empirical limit of one quarter circumference | Recheck the ratio of outer diameter to label width | Switch to wrap-around or a narrower size |
| Print fading | Ribbon is wax-based or mixed-based, extracted by ethanol | Check ribbon model and batch |