
Key Takeaways First
For flow cytometry sample tube label selection, the answer is: first determine size and thickness based on mechanical compatibility, then determine face stock based on chemical exposure, and finally determine the model based on temperature span. The order of these three steps cannot be reversed. The standard sample tube used in flow cytometry is a 5 mL round-bottom polystyrene tube, with standard specifications of 12 mm outer diameter and 75 mm tube length, commonly referred to in the industry as a 12×75 mm tube. The reason it is harder to label than ordinary test tubes is not the special material, but three constraints stacking simultaneously: the tube diameter is only 12 mm, the unfoldable arc length of the tube wall is about 37.7 mm, and the truly safe flat-lay window is less than 32 mm; during sampling, the tube body must be inserted into the sample needle assembly or the tube rack of an automated sampler, and the thickness and height added by the label become mechanical interference; inside the tube is a fluorescently labeled live cell suspension, which must be protected from light throughout from staining incubation to acquisition, so the label must both act as a light-blocking layer and leave a window for observing the liquid level and pellet. The conclusion repeatedly verified by BRD 博锐迪 in clinical laboratory and biobank projects is: selecting labels as a "consumable purchase" will inevitably lead to rework, while selecting them as "part of the sampling process" gets it right the first time.
I. The Triple Specificity of Flow Cytometry Sample Tubes
The first specificity is size. The outer diameter of a 12×75 mm tube is 12 mm, and the circumference equals π times 12 mm, i.e., about 37.70 mm. This number may seem not small, but when labeling, the two ends cannot butt together, and expansion allowance and a viewing window must be left; the actual flat-lay arc length is generally controlled at 30–32 mm. In other words, the design width of the label is limited from the start to just over three centimeters.
The second specificity is mechanical interference. During manual sampling, the operator pushes the tube into the sample needle assembly, and the round bottom of the tube must fully seat into the positioning base; an automated sampler places the entire tube into the rack hole, and then a robotic arm or carousel drives the tube upward to complete injection. Any protrusion beyond the tube wall contour—including lifted label edges, stacking at double-layer overlaps, or even adhesive overflowing from the label tail—may cause the tube to catch on the outer edge of the hole or prevent the tube bottom from reaching the bottom. The instrument-side manifestations of such failures are "sample needle clogging," "sampling failure," or "insufficient injection volume"; during troubleshooting, the tubing is often suspected first, and few people think of the label first.
The third specificity is optics. Flow cytometry detection relies on the light signal emitted after fluorophores are excited by lasers: FITC excitation at about 494 nm and emission at 519 nm, PE excitation at about 496 nm and emission at 575 nm, APC excitation at about 650 nm and emission at 660 nm, and 7-AAD excitation at about 546 nm and emission at 647 nm. These fluorophores undergo photobleaching under indoor lighting, with FITC being the most sensitive; observable decay can occur within minutes under conventional lighting conditions. Therefore, incubation after staining is usually performed at room temperature or 4 °C in the dark for 15–30 min, and the queue before acquisition should also be placed in a dark box. The label plays an underestimated role here: an opaque face stock itself can shield the tube body from light, but complete wrapping prevents the operator from checking the liquid level height and whether the cell pellet is resuspended. This is the contradiction between the "light-blocking layer" and the "observation window."
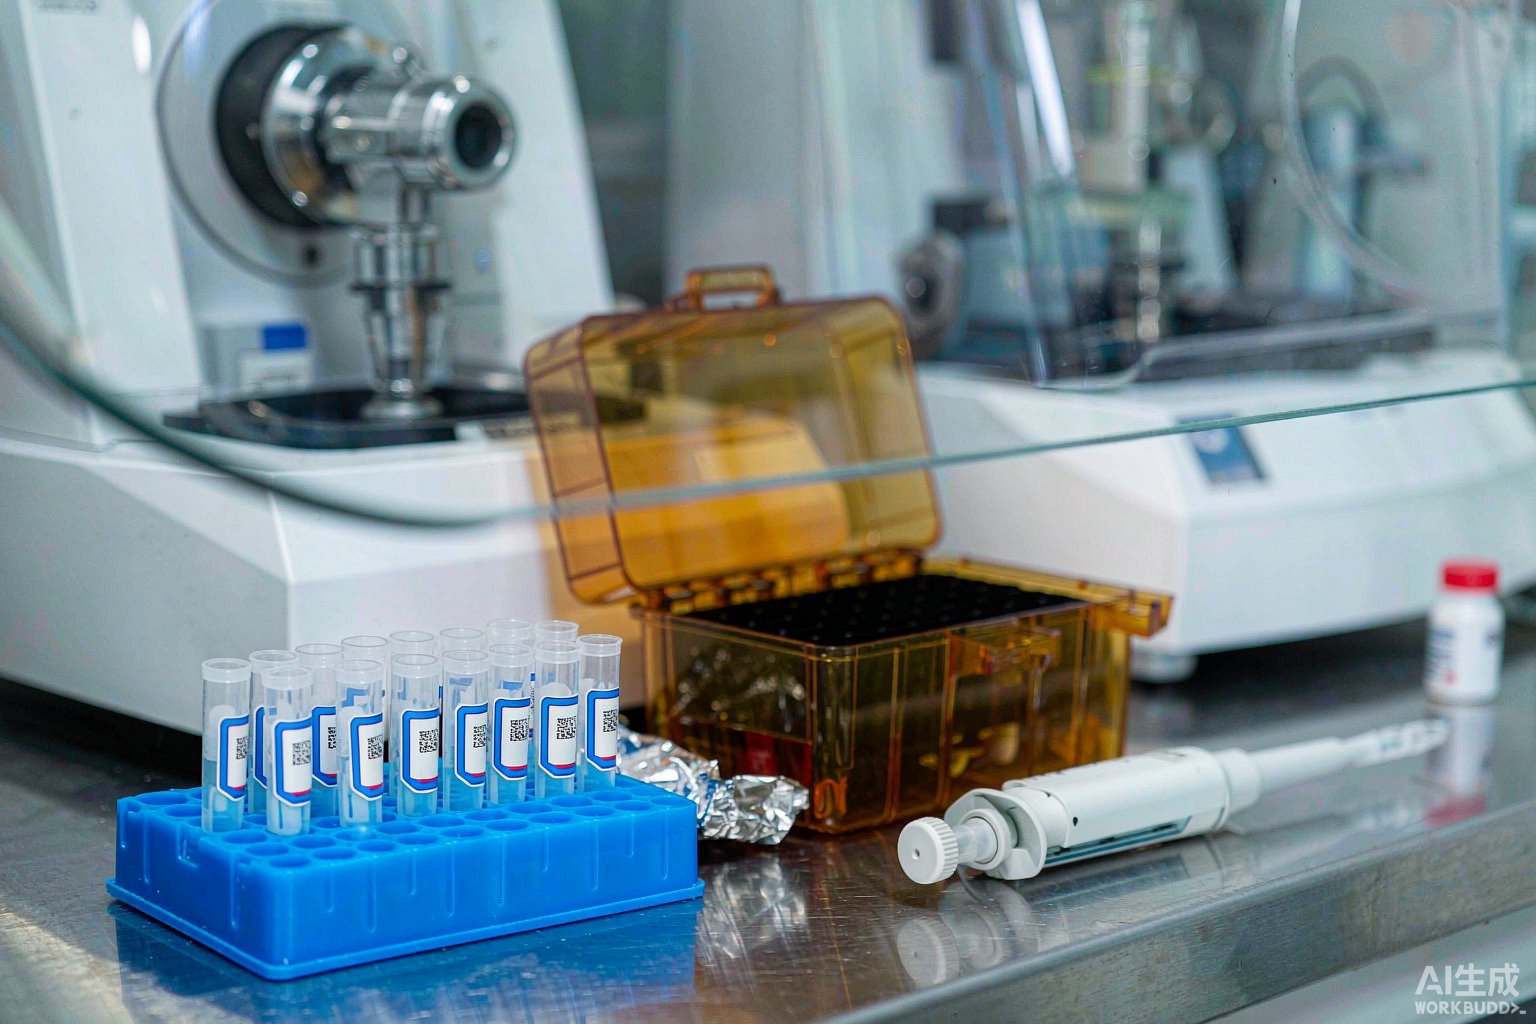
II. Geometric Window: How Wide a Label Fits on a 12 mm Tube Diameter
Breaking down the usable labeling area of a 12×75 mm tube yields a clear set of design parameters. The total tube body length is 75 mm, the cap covers about 8–10 mm at the top, and the bottom is round (some brands have conical or self-standing bottoms). After the sample needle is inserted, the needle tip approaches the tube bottom, and the residual volume during sampling is usually on the order of 50–100 μL. Based on these geometric relationships, the recommended parameters are as follows.
| Geometric parameter | Measured/recommended value for 12×75 mm round-bottom tube | Constraint on label design |
|---|---|---|
| Tube outer diameter | 12 mm (some batches 12.0–12.5 mm) | Label must conform to a curved surface with a 6 mm radius; rigid face stocks tend to lift at the edges |
| Unfoldable arc length of tube wall | About 37.70 mm | Label width ≤ 32 mm, leaving 2.5–3 mm clearance at each end |
| Effective straight section length of tube body | About 55–60 mm (excluding cap area and round-bottom area) | Label height ≤ 25 mm, top margin from tube opening ≥ 12 mm |
| Automated sampler rack hole diameter | Usually 12.5–13.0 mm | Total thickness including adhesive ≤ 0.20 mm, overlap ≤ 0.40 mm |
| Residual liquid level after centrifugation/washing | 0.2–1.0 mL suspension | Lower edge of label not less than 5 mm below liquid level to avoid immersion |
| Polystyrene (PS) surface energy | Usually 34–42 mN/m (varies with grade and mold release agent residue) | Conventional acrylic adhesive can wet out, but initial tack must be increased at low temperature or high humidity |
The most easily overlooked item in this table is "total thickness including adhesive." The nominal thickness of the face stock is not the same as the finished thickness; the adhesive layer, release liner residue, and double-layer stacking at overlaps all count. If a wrap-around label is used, the overlap area is necessarily double-layer, and the actual thickness is close to twice that of a single layer. Therefore, the wrap-around solution must specify the overlap angle and overlap length, rather than simply wrapping once around.
III. Sampling Step: Mechanical Interference from Thickness and Height
The sample needle assembly of a flow cytometer is a slender metal needle with an outer sleeve, inserted into the tube bottom to aspirate the suspension. During sampling, the tube is pushed upward, and the needle passes through the cap septum or directly enters an open tube. For open tubes, the instrument requires the tube body to be vertical and the tube bottom to seat accurately; if the upper edge of the label extends beyond bounds, the tube opening positioning ring may be pushed off-center. Models equipped with automated samplers (carousel or robotic arm type) are even stricter: the rack hole diameter is usually only 12.5–13.0 mm, and if the label bulges on the tube wall, the tube cannot seat fully, and scraping or even tube dropping may occur during carousel rotation.
There are three executable control points in engineering. First, keep the top margin of the label from the tube opening at 12 mm or more, so that the positioning ring and cap area always contact bare tube wall. Second, when using wrap-around labels, place the overlap segment on the side of the tube body rather than the side facing the sample needle, avoiding double-layer thickness directly facing the positioning surface. Third, after labeling, use a finger to expel air along the curved surface from the center to both ends, then press firmly with a lint-free cloth, and do not run on the instrument immediately within 24 h—allow the adhesive layer to complete wetting and leveling; the peel strength will be significantly higher than the initial tack immediately after labeling. This indicator is tested according to the peel strength method of GB/T 2792-2014, and slip resistance is evaluated according to the holding tack method of GB/T 4851-2014.
IV. Light Protection and Observation: The Dual Role of the Label
The most common mistake with fluorescently stained samples in the laboratory is not wrong reagent preparation, but "left too long, exposed to too much light." There are two mitigation paths, depending on whether the experimental workflow itself requires frequent checking of the liquid level.
Path one, overall light protection: use an opaque face stock to wrap the tube body, combined with a dark box or aluminum foil sleeve for transport. This approach is suitable for batch operations—a dozen or so samples in the same batch are stained together, washed together, and run together, with no need to check the liquid level tube by tube in between, as long as the tube opening code is readable. In this case, the focus of the label is the abrasion resistance and reagent splash resistance of the printed content on the outer surface.
Path two, local window: use a self-laminating structured label with a transparent viewing window; the laminate protects the printed area while leaving a transparent region for observing the liquid level and cell pellet. This approach is suitable for scenarios where it is necessary to judge whether cells are fully resuspended, such as single-cell suspensions from tissue sources, bone marrow, or pleural/ascites specimens, where the pellet state directly affects the probability of needle clogging during acquisition. Self-laminating labels with a transparent viewing window also have advantages in cryopreservation and low-temperature environments—the window can also serve as a liquid level observation port, which is especially useful when sampling from a liquid nitrogen tank.
There is another often overlooked detail: label color is unrelated to fluorescence channels, but it affects manual color sorting. When running a multicolor panel with a dozen or so tubes simultaneously, using labels with different background colors or pre-printed color bands to distinguish antibody combinations is much faster than reading numbers tube by tube, and it also reduces the risk of taking the wrong tube. This is exactly the idea behind six-color pre-printed labels—different colors are pre-printed at the top, operators group by color block, and the number serves only as the final verification method.
V. Chemical Exposure: Lysis Buffer, Fixative, and Methanol-Containing Permeabilization Reagents
The reagents in the flow cytometry sample processing chain are more complex than imagined. Whole blood samples first require red blood cell lysis, commonly using ammonium chloride lysis buffer (formulation approximately NH₄Cl 8.3 g/L, KHCO₃ 1.0 g/L, EDTA-Na₂ 0.037 g/L, pH 7.2–7.4), acting at room temperature for 5–10 min; followed by washing, blocking, and antibody incubation; intracellular antigens require fixation and permeabilization. Typical reagents include 1%–4% paraformaldehyde (room temperature 10–20 min), 70% ethanol (-20 °C overnight, commonly used for DNA content and cell cycle analysis), 0.1% Triton X-100, or 0.05%–0.1% saponin permeabilization reagent. Commercial fixation/permeabilization buffers commonly used for transcription factor intracellular staining contain methanol.
Methanol is the key here. It has a dissolving effect on the color-forming layer of thermal printing and some inks. Once the label surface is contaminated, barcode contrast drops rapidly, and scanning failure often occurs at the pre-acquisition scanning step, causing the entire tube of sample to be rejected and re-collected. Therefore, methanol-containing workflows must use resin-based ribbons and polyester face stocks, with thermal transfer rather than direct thermal printing.
| Process step | Typical reagent and concentration | Contact mode | Label response |
|---|---|---|---|
| Red blood cell lysis | Ammonium chloride lysis buffer, room temperature 5–10 min | Tube wall splashing, overflow in centrifuge | Face stock resistant to saline and weak alkali; edge sealed against seepage |
| Washing | PBS or buffer containing 0.5%–2% BSA, 2–8 °C | Prolonged immersion of tube wall | Adhesive layer resistant to water immersion; avoid paper-based face stocks |
| Surface staining | Fluorophore-labeled antibody, in the dark 15–30 min | Occasional dripping | Laminate protects printed area; opaque face stock blocks light |
| Fixation | 1%–4% paraformaldehyde, room temperature 10–20 min | Dripping, wiping | Polyester face stock; avoid direct thermal printing |
| Permeabilization | 0.1% Triton X-100 or 0.05%–0.1% saponin | Dripping, wiping | Resistant to surfactants; printed layer requires lamination |
| Intracellular/nuclear staining | Methanol-containing fixation-permeabilization buffer | Dripping, wiping | Resin-based ribbon + polyester face stock; direct thermal printing prohibited |
| DNA content analysis | 70% ethanol, -20 °C overnight | Whole-tube low-temperature immersion | Must cover operating conditions below -20 °C, overlap ≥ 3 mm |
It should be noted that paraformaldehyde and methanol belong to categories requiring safety labeling under chemical classification, and storage containers and preparation bottles should bear safety labels in accordance with GB 15258 and GB 30000; operating areas for blood-derived samples should have biosafety signage in accordance with GB 19489-2008 and WS 233-2002, and the biohazard graphical symbol shall be ISO 7010 W009.
VI. Cross-Temperature Range: From LN₂ -196 °C Cryopreservation to 37 °C Thawing to 4 °C Acquisition
There is a special two-stage path in flow cytometry samples: peripheral blood mononuclear cells (PBMC) isolated from peripheral blood need to be cryopreserved first, then stained and run after thawing. The freezing medium is usually 90% fetal bovine serum plus 10% dimethyl sulfoxide, or complete medium plus 10% dimethyl sulfoxide; the controlled cooling rate is about -1 °C/min, and after cooling to -80 °C, the samples are transferred to liquid nitrogen for long-term storage. The liquid phase temperature of liquid nitrogen is -196 °C, and vapor-phase storage is usually below -150 °C. During thawing, place in a 37 °C water bath, thaw within 1–2 min, then slowly dilute and centrifuge to remove dimethyl sulfoxide.
This means the same label must go back and forth among three temperature zones: -196 °C, 37 °C water bath, and 4 °C staining incubation. Cross-temperature range selection cannot use "average value" thinking; it must be graded according to the lowest temperature in the entire process: as long as a liquid nitrogen step exists in the workflow, select material according to the -196 °C grade; if only 2–8 °C refrigeration and room temperature operations are involved, select material according to the refrigerated grade.
| Temperature/condition grade | Corresponding models in the official material guide | Applicability judgment for flow cytometry scenarios |
|---|---|---|
| Liquid nitrogen -196 °C (including vapor phase ≤ -150 °C) | T629 nylon cloth, T459 self-laminating with transparent viewing window, T429 self-laminating, T409 polyester, T439 six-color pre-printed, T424 chemical-resistant, T509 vinyl wrap-around (requires overlap for liquid nitrogen) | PBMC cryovials, cell suspension tubes requiring long-term storage |
| Freezer -80 °C | T629, T459, T429, T409, T439, T509 | Controlled cooling endpoint, short-term deep low-temperature temporary storage |
| Hot water 100 °C | T629, T459, T429, T409, T439, T424, T509 | Extreme verification condition for water bath thawing step |
| Autoclaving 121 °C | T629, T459, T429 | Disposable sample tubes themselves are not sterilized; used only for labeling reusable instruments |
| Room temperature and -40 °C and above (2–8 °C refrigeration) | T625 vinyl cloth label (repositionable, removable, no adhesive residue); T419 gloss white PET, T329 matte white PP (resistant only to -40 °C and above) | Staining tubes run the same day,周转 tubes requiring frequent label changes |
The grade divisions in the table come from the official material guide; do not mix grades based on experience during selection. Special note: face stocks in the -40 °C grade and the -80 °C grade cannot be interchanged; their adhesive layer performance at low temperatures differs significantly. Using material resistant only to -40 °C in -80 °C or liquid nitrogen environments will cause the label to peel off in sheets after removal, and the sample identity will be lost with it.
Wrap-around labels on thin tubes also have a hard requirement: head-to-tail overlap. When applied to frozen tube surfaces, overlap at least 3 mm. This number is not arbitrary—the adhesive layer contracts at low temperatures, and the overlap area provides "self-locking" rather than merely additional bonding area. When overlap is insufficient, shear forces generated by thermal expansion and contraction act directly on the adhesive layer edge, gradually expanding from lifted corners to complete peeling.
VII. Barcode Selection: Why DataMatrix Should Be Preferred on 12 mm Tubes
Placing a barcode within the 32 mm usable arc length is the most specific engineering problem in flow cytometry tube identification. Taking a linear barcode as an example, each Code 128 symbol character occupies 11 modules, plus a start character, check character, and a 13-module stop character, with left and right quiet zones of 10 modules each. When encoding 20 characters, the total number of modules is (20+2)×11+13 = 255, plus 20 modules for quiet zones, totaling 275 modules; even if the narrow module width is reduced to 0.19 mm, the total symbol width reaches about 52.3 mm, far exceeding the 32 mm usable arc length. If the encoded content is compressed to 12 characters, the total width is about 35.5 mm, still exceeding; when compressed to 8 characters, it is about 27.2 mm, barely fitting, but information content has already been sacrificed.
Switching to a two-dimensional symbol is completely different. Calculated at a 0.25 mm module size, a 26×26 module DataMatrix symbol has a side length of about 6.5 mm, about 7.0 mm including the quiet zone around it, occupying only about one-fifth of the usable arc length, while information density is several times higher. The remaining space can be used to enlarge human-readable characters or add a color code area.
| Symbol type | Encoded content | Module count/size | Symbol width at narrow module 0.19–0.25 mm | Can it fit within 32 mm arc length |
|---|---|---|---|---|
| Code 128 | 20 alphanumeric characters | 255 modules + 20 modules quiet zone | About 52.3 mm | No |
| Code 128 | 12 alphanumeric characters | 167 modules + 20 modules quiet zone | About 35.5 mm | No (exceeds by 3.5 mm) |
| Code 128 | 8 alphanumeric characters | 123 modules + 20 modules quiet zone | About 27.2 mm | Yes, but information content limited |
| DataMatrix | 20+ characters | 26×26 modules, X=0.25 mm | About 6.5 mm (7.0 mm including quiet zone) | Yes, ample margin |
| DataMatrix | Longer encoding or redundant verification | 32×32 modules, X=0.25 mm | About 8.0 mm (8.5 mm including quiet zone) | Yes |
Regarding print quality, two-dimensional symbols are graded according to ISO/IEC 15415, and linear symbols according to ISO/IEC 15416, both using a grading system. It is recommended to write the grade threshold into the acceptance sheet: two-dimensional symbols not lower than grade 3.0 (corresponding to grade C or above), linear symbols not lower than grade 2.5. Labels that do not meet the grade may still scan when dry, but after contact with sheath fluid or after low-temperature cycling, symbol contrast and axial non-uniformity will deteriorate rapidly, ultimately becoming unreadable at critical moments. The cost of scanning failure before acquisition is far higher than the cost of a label.
VIII. Compliance Anchors: Pre-Examination Procedures and Biosafety
If flow cytometry detection is used clinically, the label is not just an internal management tool but part of the quality system. ISO 15189:2022 sets clear requirements for pre-examination processes: from sampling container identification, patient identity verification, and sample receipt to rejection criteria, every step must have traceable records. Specifically for flow cytometry tubes, the most core requirement is that "the identification on the tube must be uniquely linkable to the patient and the test request." In practice, it is recommended to include at least three items: patient unique number, sampling date and time, and test item code; absence of any one should be considered an unacceptable sample. If samples come from a biobank, the requirements of ISO 20387:2018 for accession, retrieval, and status records also apply to cryopreserved cell suspensions.
On the instrument side, the equipment and metrological traceability requirements of ISO 17025:2017 apply: flow cytometers require daily performance verification with fluorescent beads, comprehensive calibration every six months to one year, and drift in optical path and voltage settings must be recorded. If the test items involve in vitro diagnostic reagent matching, related identification and records should also be included in the scope of the ISO 13485:2016 system. These clauses may seem unrelated to labels, but during audits, auditors usually spot-check along the chain of "patient—sample—test—report," and a broken label means a broken chain.
Regarding safety signage, operating areas for blood and body fluid samples should have warnings graded in accordance with GB 19489-2008 and WS 233-2002, with the biohazard symbol using ISO 7010 W009; preparation and storage containers for paraformaldehyde, methanol, ethanol, etc. should bear chemical safety labels in accordance with GB 15258 and GB 30000. A common problem in laboratories is: safety signs on cabinet doors and refrigerator doors are complete, but temporary labels on preparation bottles and waste liquid containers are blurred or missing—this is precisely a high-frequency point of point deduction during inspections.
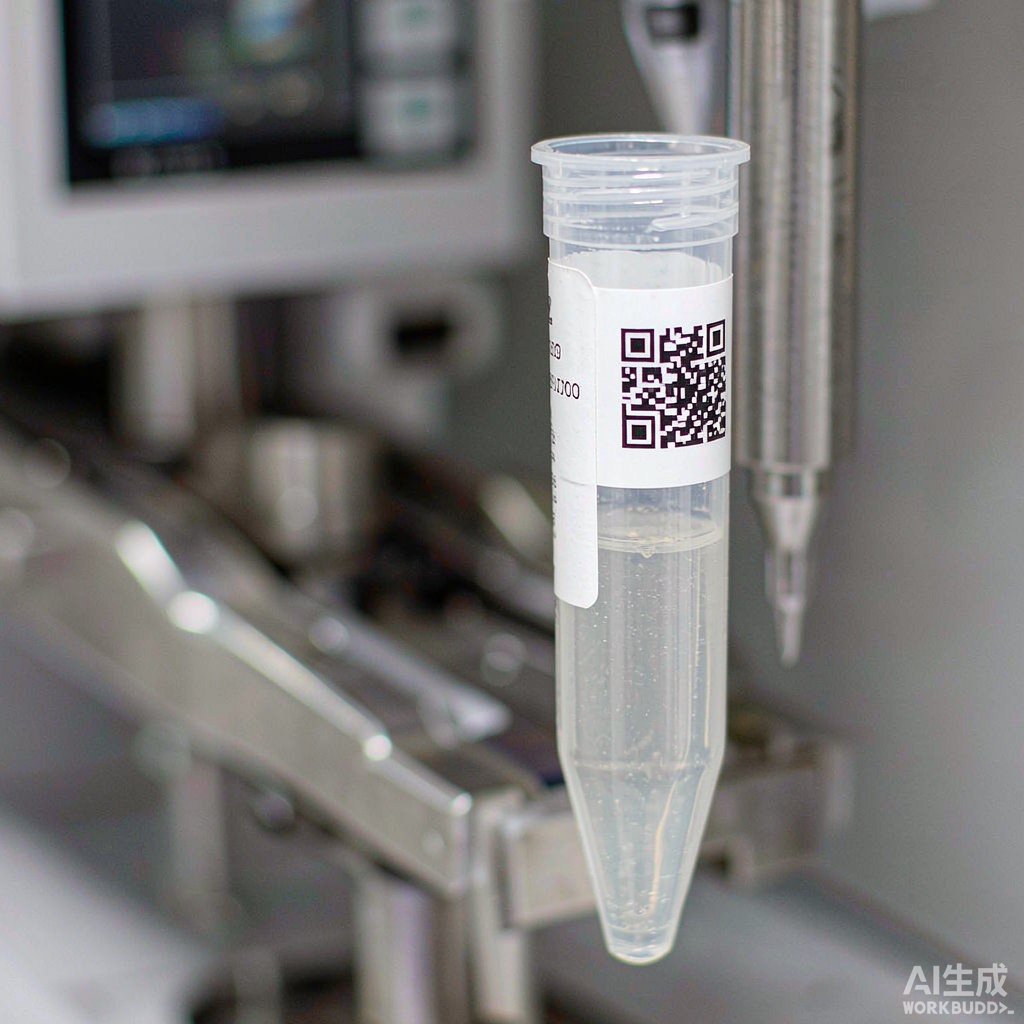
IX. Six-Step Implementation SOP
Step one, define the information set. Determine the fields that must be carried on the label: patient unique number or sample number, sampling date and time, item or panel code, tube sequence number (e.g., 1/8), antibody combination color code. Once the fields are determined, the encoding length is determined, and the symbol type is then selected accordingly.
Step two, measure dimensions. Check the tube outer diameter, usable arc length, top margin, and allowable thickness against the geometric parameter table above, and control label width within 32 mm, height within 25 mm, and total thickness including adhesive within 0.20 mm.
Step three, determine face stock and ribbon. For workflows containing methanol or paraformaldehyde, select polyester face stock with resin-based ribbon; for workflows requiring only refrigeration and room temperature, lower-cost options may be selected; for locations requiring temporary labeling or周转 reuse, select removable material with no adhesive residue.
Step four, determine temperature grade. Determine whether the lowest temperature in the workflow reaches -80 °C or -196 °C; if so, select material according to the corresponding grade, and specify in the wrap-around solution that the overlap length shall not be less than 3 mm.
Step five, printing and quality inspection. Set printing darkness and speed, sample-check barcode grade after printing (ISO/IEC 15415 or 15416), and record the grade and sampling frequency; also visually inspect character clarity and edge burrs.
Step six, labeling and on-instrument verification. Label in a dry room-temperature environment, expel air along the curved surface from the center to both ends and press firmly, and allow to stand before running on the instrument; before first batch use, perform a pass-through verification with empty tubes on the automated sampler to confirm that tube jamming or scraping does not occur.
X. Failure Modes and Troubleshooting
| Phenomenon | Possible root cause | Troubleshooting points |
|---|---|---|
| Automated sampler tube jamming, tube bottom not seated | Label thickness exceeds limit, double-layer stacking at overlap, upper edge out of bounds | Measure total thickness including adhesive; check whether top margin ≥ 12 mm; turn overlap segment to the side |
| Label peels off in sheets after low-temperature removal | Cross-grade selection, using -40 °C grade in -80 °C or liquid nitrogen environment | Recheck grade divisions in the official material guide; re-grade according to the lowest temperature in the entire process |
| Label edge lifting | Air not expelled from curved surface, face stock too rigid, labeling temperature too low | Switch to more conformable cloth-based or vinyl; press firmly and allow to stand 24 h |
| Scanning failure before acquisition | Methanol contamination of printed layer, insufficient print grade, symbol size too small | Switch to resin-based ribbon; retest grade; switch to DataMatrix and enlarge module size |
| Barcode readable but content wrong | Encoding rules inconsistent with LIMS, manual number changes not synchronized | Unify encoding rules; prohibit handwritten overwriting; establish number-change traceability |
| Abnormal fluorescence signal decay | Insufficient light protection causing photobleaching (label light blocking not covering) | Switch to opaque face stock or dark box; shorten room-temperature exposure time |
| Label blurred after reagent splashing | Not laminated, ink chemical resistance insufficient | Switch to self-laminating structure; avoid direct contact with methanol-containing reagents |
XI. Traceability Loop: Patient—Tube—Panel—Data File
The final step of flow cytometry detection is binding the physical tube to the data file. Data files generated during instrument acquisition are usually named by tube position number. If the tube position number and the tube wall label code are not the same rule set, a manual mapping step is required after acquisition, and this step is a high-error area. A feasible approach is to have the LIMS generate a tube position—code correspondence table before acquisition, operators place tubes according to the table, and after acquisition write back according to the table, with data file names directly using the tube wall code.
Recording of acquisition parameters is equally important. Lymphocyte subset analysis generally acquires more than 10,000 target cell events; minimal residual disease detection requires sensitivity of 10⁻⁴–10⁻⁵, corresponding to acquisition event counts often on the order of 1 million to 5 million. Acquisition event count, sample flow rate (low speed about 12 μL/min, medium speed about 35 μL/min, high speed about 60 μL/min), voltage settings, and compensation matrix should all be recorded in files associated with the tube wall code; otherwise, results cannot be reproduced.
Finally, archiving. Most stained samples are not retained, but cryopreserved PBMC and original anticoagulated whole blood may be retained for months to years. At this point, the label must satisfy two things simultaneously: be identifiable in the liquid nitrogen tank and have a corresponding record in the information system. Cross-system consistency can only be ensured by one set of encoding rules, not by two parallel numbering systems plus manual cross-referencing. BRD 博锐迪's approach in biobank scenarios is: define the encoding rule once and for all, with labels, LIMS, data files, and cryostorage rack positions sharing the same string of characters at all four levels, so that scanning at any step returns to the same record.
Recommended Products
For the label materials and application scenarios covered in this article, the following 博锐迪 (BRD) products are available for selection reference (click to view specifications and request a quote):
- T629样本库-196℃尼龙布耐低温试管生物样本库签化验采样液氮标签(¥999/卷)
- T439样本库-80℃度液氮聚酯PET冷冻低温液氮彩色标签贴纸化验采样(询价)
- Lab208-509/25.4x63.5缠绕式冻存管生物样本库细管液氮分类标签(询价)
- T419样本库-80℃低温亮面聚酯PET冻存管冰箱冷冻冷藏耐低温标签纸BRD博锐迪(询价)
Q: Can ordinary test tube labels be used directly on flow cytometry sample tubes?
Not recommended. Ordinary test tube labels are mostly designed for 13–16 mm tube diameters, and both width and thickness exceed the safe window for 12 mm tubes. Common consequences are automated sampler tube jamming or instrument scraping after label edges lift. Even if manual sampling barely works, once liquid nitrogen cryopreservation or methanol-containing reagent contact occurs in the workflow, the reliability of ordinary labels will drop significantly.
Q: How wide and how high should a label be on a 12×75 mm tube?
Width is recommended not to exceed 32 mm. The unfoldable arc length of the tube wall is about 37.70 mm, and 2.5–3 mm clearance should be left at each end to absorb conformability errors and avoid butt-joint edge lifting. Height is recommended not to exceed 25 mm, with a top margin from the tube opening of 12 mm or more, avoiding the cap positioning area and the automated sampler clamping area.
Q: Which is more suitable for flow cytometry tubes, wrap-around or back-adhesive?
If the workflow involves low-temperature storage, wrap-around is preferred, and the head-to-tail overlap should be explicitly not less than 3 mm; the overlap area provides self-locking capability at low temperatures. If tubes are run the same day only at room temperature and 2–8 °C refrigeration, back-adhesive is more time-saving, but face stock rigidity must be controlled; otherwise, a 6 mm radius curved surface is very prone to edge lifting.
Q: Why does methanol-containing permeabilization buffer cause label failure?
Methanol has a dissolving effect on some printed layers, and the color-forming layer of direct thermal printing is especially sensitive; after contact, barcode contrast decreases or even the entire area turns black or fades white. The solution is to switch to thermal transfer printing with resin-based ribbon and polyester face stock, keep the label out of the reagent drip path as much as possible, and use a self-laminating structure for secondary protection when necessary.
Q: Are PBMC cryovials and acquisition tubes the same tube?
Usually not. PBMC are cryopreserved in cryovials, then transferred to sample tubes after thawing for staining and acquisition, so there are two identity transfers. If a single code throughout is desired, the cryovial label and sample tube label can share the same code string, with two-person verification during transfer; if two tubes are coded separately, a parent-child relationship must be established in the LIMS to avoid the thawed batch becoming disconnected from the original sample.