
Bottom line up front: The cryo straw (also called a straw or French straw) is the smallest-diameter, highest-curvature, lowest-storage-temperature specimen carrier in the laboratory, and conventional flat labels fail almost completely here. The real selection problem is not "which label sticks best" but three requirements that must hold at once: the label format must wrap and conform to a cylindrical surface on the order of 2 mm–3 mm and form an end-to-end overlap; the face stock and adhesive must withstand the extreme temperature swing from -196 °C liquid-phase LN₂ to 37 °C water bath rewarming, as well as chemical attack by cryoprotectants such as DMSO and ethylene glycol; and the label content must remain readable by eye and by scanner through LN₂ vapor, frost, and densely packed goblet canes. BRD's standard approach for LN₂ labels and biological sample bank identification is to apply a vinyl wrap-around cryogenic label to the straw body, use nylon cloth cryogenic labels for hierarchical identification of tanks, canes, and sleeves, and fix the three-level "patient—carrier—position" relationship in between with color codes and codes.
This article is intended for human assisted reproduction laboratories, sperm banks and embryo banks, livestock breeding stations, and biological sample banks engaged in gamete and embryo cryopreservation. Following the sequence "measure dimensions—define format—select face stock—define coding—address compliance—implement SOP," it breaks down the complete chain from selection to storage of cryo straw labels.
1. Why cryo straws are the most vulnerable link in the site-wide identification chain
Comparing cryo straws with conventional cryovials makes clear why they are special. A 0.5 mL cryovial typically has a body diameter of around 10 mm, so a label can be applied flat, with an adhesive area measured in square centimeters; a 0.25 mL or 0.5 mL straw has an outer diameter of only about 2 mm–3 mm, so the circumferential width the label can actually contact is less than 10 mm, reducing the adhesive area by one to two orders of magnitude. Curvature is even more problematic: the smaller the diameter, the greater the rebound stress generated by a face stock of the same thickness during application, and film materials try to "spring back" to a flat state like a bent card, lifting from the edges and then peeling off entirely.
Temperature conditions are equally extreme. Straws are usually immersed directly in -196 °C liquid-phase LN₂ or stored in gas-phase LN₂ tanks below -150 °C; vitrification requires cooling to be completed within an extremely short time, with cooling rates reaching tens of thousands of degrees Celsius per minute, and the difference in coefficient of linear expansion between the label and the straw material (mostly ionomer resin or polypropylene-type materials) is amplified instantaneously. Rewarming goes in the completely opposite direction: after removal from LN₂, the straw usually goes directly into a 37 °C water bath, crossing a temperature difference of more than 200 °C within tens of seconds to one or two minutes, and the label adhesive undergoes a severe thermal shock.
The third compounding factor is the chemical environment. The cryoprotectants (CPA) in vitrification solutions are mainly dimethyl sulfoxide (DMSO), ethylene glycol (EG), and propylene glycol (PROH), typically at working concentrations of 5%–15%, with strong permeability and both swelling and extraction effects on adhesives and inks. A small amount of residual protectant at the sealed end of the straw creeps up the wall and directly contacts the label edge. If the label ink is not solvent-resistant, characters will blur and barcode contrast will drop within a few weeks.
Combining these three points yields a practical judgment: a label that works on cryovials will not necessarily work on cryo straws; but a wrap-around solution validated on straws can usually be extended downward to test tubes and conical tubes. Selection should work backward from the most demanding small-diameter curved-surface scenario.
2. Measure first: how large is the labelable window on 0.25 mL and 0.5 mL straws
Before discussing materials, the labelable window must be calculated clearly. The usable labeling area of a straw is constrained by three boundaries: one end is the sealed section (cotton plug, powder seal, or heat-sealed portion), the other is the aspirating end, and in between a position must be left for the operator to grip with forceps. The continuous length actually available for labeling is usually only 40 mm–60 mm, and it is divided by the cylindrical surface into a "visible front" and a "back"—content applied to the back cannot be read at all inside a cane.
The table below gives order-of-magnitude judgments of the labelable window and format recommendations by common carrier specification. It must be emphasized that outer diameters and lengths of straws vary by manufacturer within tolerances, and final selection should be based on product datasheets and measured data.
| Carrier specification | Outer diameter order | Effective labeling length | Recommended label format | LN₂ application notes |
|---|---|---|---|---|
| 0.25 mL standard straw | approx. 2 mm order | approx. 40 mm–50 mm | Narrow wrap-around, width ≤ 8 mm | End-to-end overlap mandatory; keep overlap away from sealed end |
| 0.5 mL standard straw | approx. 2 mm–3 mm order | approx. 50 mm–60 mm | Narrow wrap-around or extended wrap-around | End-to-end overlap mandatory; can accommodate DataMatrix |
| 0.5 mL high-security straw (CBS) | Slightly larger than standard straw | approx. 50 mm–60 mm | Wrap-around body label + outer sleeve label | Dual-layer identification on body and sleeve, with consistent coding |
| Outer sleeve / secondary packaging tube | approx. 4 mm–6 mm order | approx. 60 mm–80 mm | Wrap-around or self-laminating | Overlap requirement may be moderately relaxed for gas-phase storage |
| Goblet cane / cane | Flat or large curved surface | Depends on structure | Flat cryogenic label | Apply after cleaning and degreasing; press edges firmly |
The most common pitfall in this table is "width." Operators often want as much information on the label as possible, so they apply a 12 mm-wide label to a straw on the order of 2 mm, and the two ends overlap severely in the circumferential direction, forming a thick step that presses against adjacent straws when placed in the goblet, ultimately causing the whole row to detach. The rule of thumb: after wrapping, the label should go around only once in the circumferential direction; the overlapping portion is the overlap segment, and a second wrap should not be made.
3. Sealing method and carrier format determine whether and where a label can be applied
Straws are not a single-format product; different sealing methods determine label placement and also the type of failure risk.
| Carrier format | Sealing method | Recommended label placement | Main failure risk | Implementation recommendation |
|---|---|---|---|---|
| Cotton-plug / powder-sealed straw | Polyvinyl alcohol powder or cotton plug with water-absorbing curing | Label on the mid-body away from the sealed end | Exudate at the sealed end creeps up the wall and attacks the adhesive | Keep ≥ 10 mm spacing between label and sealed end |
| Heat-sealed straw | Heat-sealing forceps or ultrasonic sealing | May be close to the sealed end, but avoid the heat-seal impression | Uneven surface at the impression causes the label to bridge and lift | Visually confirm impression width before determining label position |
| High-security straw (CBS) | Body seal + outer sleeve secondary packaging | Dual-layer: wrap-around body label + outer sleeve label | Inconsistent dual-layer coding leads to verification failure | Print both labels in one pass with the same code |
| Open pulled carrier | No closed sleeve; direct contact with LN₂ | Only the outer sleeve or outer carrier can be labeled | Cross-contamination risk from direct LN₂ contact | Prefer closed carriers with added sleeve |
| Straw + goblet combination | Cane holds multiple straws together | Dual-layer identification on straw body + cane outer wall | Dense packing in cane causes labels to scrape against each other | Apply large flat label to cane outer wall for primary positioning |
Dual-layer identification (body + outer sleeve) has become the mainstream approach in recent years, and the reason is not just "an extra layer of insurance." Closed carriers physically isolate the specimen from LN₂, significantly reducing cross-contamination concerns during long-term storage of open carriers in LN₂; and the outer sleeve, with its larger diameter and flatter surface, provides exactly a "large" area on which a DataMatrix code can be applied, giving automated identification equipment a reliable reading window.
4. Wrap-around labeling: adhesive stress and overlap technique on small-diameter curved surfaces
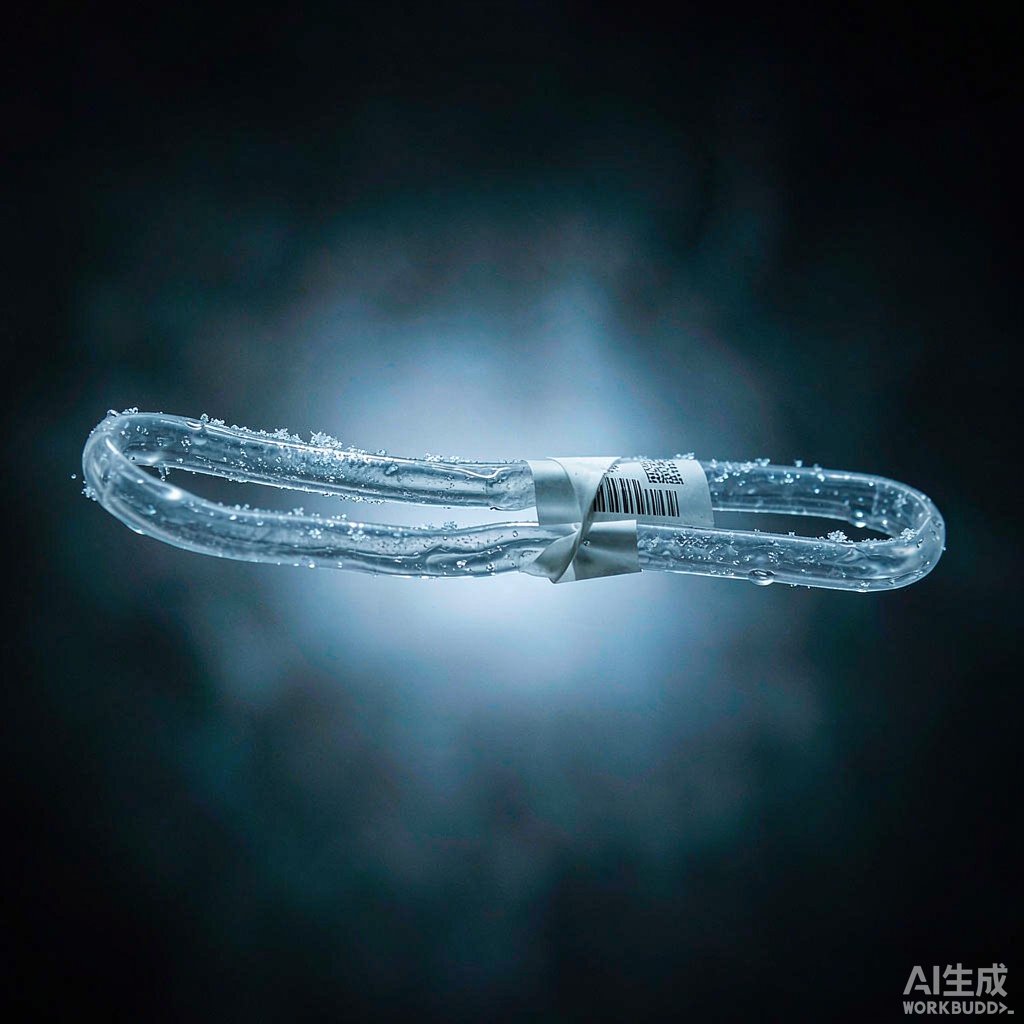
On a cylindrical surface on the order of 2 mm–3 mm, the stress state of a label is completely different from that on a flat surface. The adhesive of a flat label mainly bears shear force, whereas the adhesive of a wrap-around label continuously bears peel force from face stock rebound, and this force concentrates along the overlap edge—which is why wrap-around labels almost always fail starting from the overlap edge.
Overlap is therefore a mandatory application requirement in LN₂ scenarios, not an optional optimization. In BRD's Lab series, T509 is a durable vinyl label suitable for wrapping with good conformability, covering three tiers: LN₂ -196 °C, freezer -80 °C, and hot water 100 °C; for LN₂ environments, overlap is explicitly required; and for comparable cryogenic wrap-around types, the empirical overlap width is typically ≥ 3 mm, with the overlap segment pressed onto a flat part of the straw body, not on the seal impression or body seam.
The application sequence should be fixed in four steps: first, wipe the straw surface with a lint-free cloth moistened with 75% ethanol and let it evaporate completely to remove release agents and fingerprint oils; second, complete labeling at room temperature, rolling with the fingertip from the center of the label toward both ends to expel air bubbles—labeling at low temperature results in insufficient initial tack of the adhesive; third, after completing the overlap, press the overlap segment again to ensure no residual air remains between the two layers of face stock; fourth, after labeling, let it stand for no less than 24 hours before immersion in LN₂, allowing the adhesive to fully wet out and establish initial tack. The most frequently skipped of these four steps is the standing period, yet it is precisely what determines whether the label survives the first LN₂ immersion.
Labeling tools are also worth investing in. Manually wrapping narrow labels on straws on the order of 2 mm yields poor consistency; for batch scenarios, it is recommended to use matching labeling fixtures or label sleeves to assist positioning and control variation in wrap angle and overlap width.
5. Vitrification and cross-contamination: identification strategy for open versus closed carriers
Vitrification and programmed slow freezing have different labeling requirements. Slow freezing is usually used for sperm and some embryos, with relatively gentle cooling rates, so the straw body label undergoes less thermal shock; vitrification is used for oocytes and embryos, with cooling rates reaching tens of thousands of degrees Celsius per minute, and the straw goes from room temperature into LN₂ within an extremely short time, so the label undergoes near-instantaneous severe contraction.
The choice of carrier format also involves biosafety. Open carriers (such as pulled open straws) are immersed directly in liquid-phase LN₂, and there is a theoretical risk of LN₂ acting as a medium for pathogen transmission, a point repeatedly discussed in the literature; the closed carrier plus outer sleeve approach is precisely intended to physically isolate the specimen from LN₂. From an identification perspective, the closed approach offers an additional benefit: the outer sleeve provides a larger-diameter, flatter labeling surface that can carry higher-density 2D codes, creating conditions for double witnessing and automated identification.
It should be noted that the outer sleeve label and the body label must use the same code, and preferably be printed in one pass in the same batch. Printing in two separate passes is prone to transcription errors, and once the two are inconsistent, double witnessing loses its meaning—the verifier sees two contradictory identifiers and cannot determine which is the true specimen identity.
6. Cryoprotectants and rewarming: from DMSO attack to readability after 37 °C water bath
Attack on labels by cryoprotectants is chronic and is also the most easily overlooked failure path. DMSO and ethylene glycol are both strongly polar solvents that slowly penetrate the adhesive, causing plasticizer migration and adhesive softening; at the same time, they extract the binder in the ink, causing character edges to blur. The failure manifestation is usually not label detachment but "the label is still there, but it can't be read"—which is catastrophic at specimen retrieval.
There are three layers of countermeasures. The first is physical isolation: the overlap structure of the wrap-around label itself forms a barrier, with the overlap segment covering most of the adhesive edge and slowing solvent ingress; the second is ink matching: cryogenic labels must be printed with the corresponding resin-based ribbon, as wax-based ribbons blur rapidly in solvent environments; the third is process control: after filling the straw, wipe off residual protectant on the wall before labeling, and maintain sufficient spacing between the sealed end and the label.
The thermal shock during rewarming also requires verification. From removal from LN₂ to entry into the 37 °C water bath, the temperature difference exceeds 200 °C, and the face stock and straw material contract asynchronously, generating instantaneous shear at the interface. It is recommended that when a label model is first introduced, a minimal viable verification be performed: take 10–20 labeled straws, complete a full cycle of "LN₂ immersion for 24 hours → 37 °C water bath rewarming → room temperature standing for 2 hours," repeat 3–5 times, and after each cycle check for lifting, detachment, character integrity, and barcode grade. This test is low-cost yet exposes the vast majority of problems before batch investment.
7. Coding and reading: symbology selection and barcode quality grades on straws
Printing codes on a curved surface 2 mm–3 mm in diameter calls for much more restraint in symbology selection than on a flat surface. If the bar-space direction of a 1D barcode is arranged along the straw axis, it will be compressed by the curved surface, causing bar-width distortion; if arranged circumferentially, the available length is too short. Therefore, 2D codes are more recommended for straw scenarios, especially DataMatrix—it occupies a small area and has high redundancy, and can still be decoded even if some modules are obscured by frost.
| Symbology | Typical minimum module size | Readability on curved straw surface | Suitable position in straw scenarios |
|---|---|---|---|
| Code 128 (1D) | approx. 0.25 mm (approx. 10 mil) | Fair; sensitive to curved surface and frost | Recommended only for larger flat surfaces such as outer sleeves or canes |
| DataMatrix (2D) | approx. 0.25 mm–0.38 mm | Good; high redundancy | First choice for 0.5 mL straws and outer sleeves |
| QR Code (2D) | approx. 0.4 mm and above | Size-limited; version must be kept low | Suitable for goblet canes and tank identification |
| Plain text + color code | Depends on font size | Best; readable by eye | Essential fallback information in all scenarios |
The basis for determining barcode quality should be explicit: 1D barcodes are graded per ISO/IEC 15416, and 2D matrix codes per ISO/IEC 15415. Both use a five-grade system of A/B/C/D/F (corresponding to symbol grades from 4.0 to 0.0). For specimen identification under long-term LN₂ storage, it is recommended that the acceptance threshold at storage be no lower than grade C (2.0), and for critical specimens, grade B (3.0) or above. At acceptance, particular attention should be paid to: barcode grade should be measured once after labeling and before LN₂ immersion, and again after freeze–thaw cycles; only passing both times counts as qualified.
Regardless of the symbology used, plain text must be retained. Scanning equipment will fail, batteries will run out, and frost will obscure the lens, whereas the patient number and date printed on the label are the last human-readable fallback. This is also why, in straw scenarios, the combination of color code + short text is more practical than pursuing high-density coding alone.
8. Compliance and double witnessing: the identity chain under ISO 20387 and ISO 15189
Cryo straws carry human gametes and embryos, and identification errors directly lead to identity mismatch with irreversible consequences. The industry has developed the "double witnessing" system for this purpose: any operation involving specimen identity must be confirmed by two trained personnel present at the same time and recorded.
Regarding standards, biological sample banks handling human specimens should meet the clauses of ISO 20387:2018 "Biotechnology—Biobanking—General requirements for biobanking" concerning specimen identification, traceability, and storage condition monitoring; the quality and competence requirements for medical laboratories refer to ISO 15189:2022; if specimens are also used for testing or as supporting materials for in vitro diagnostics, the quality management system will also involve ISO 13485:2016 and ISO/IEC 17025:2017. Domestically, the implementation of human assisted reproductive technology is governed by the "Measures for the Administration of Human Assisted Reproductive Technology," and records of medical records and the preservation of gametes and embryos must be traceable over the long term, which is also why the identification system must be persistent and must not rely solely on paper ledgers. Laboratories handling infectious specimens must also meet the warning identification requirements of GB 19489-2008 "Laboratories—General requirements for biosafety" and WS 233-2002.
Translating standard requirements into labeling actions actually comes down to only three points: first, the identification on each carrier must be unique and unchangeable throughout its life cycle; second, the identification information must contain the minimum data set sufficient to trace back to the patient (number, date, specimen type); third, every identity transfer must leave a verifiable record, with at least one of a manual double-witnessing record and an electronic system log retained, and preferably both.
9. Storage media: the four-level structure of straw—sleeve—goblet cane—tank
The label on a single straw only solves the problem at the very end. What truly makes specimens findable, retrievable, and matchable is the four-level identification structure from straw to tank. At this level, the carrier surfaces are flat and ample, and the material selection differs from that of the straw body.
In BRD's Lab&HC laboratory medical label series, several products directly relevant to this scenario can be assigned as follows:
| Model | Key official description points | Tolerance tiers | Application requirements | Recommended position in this scenario |
|---|---|---|---|---|
| T429 | Self-laminating structure; ideal choice for labeling frozen flat surfaces | LN₂ -196 °C / freezer -80 °C / hot water 100 °C / autoclave 121 °C | When applied to frozen tube surfaces, overlap at least 3 mm end to end | Outer sleeves, cryovials, and other smaller curved surfaces |
| T459 | Ultra-thin polyester label with self-laminating structure and transparent tail; protects printed content and provides a transparent window for observing liquid level | LN₂ -196 °C / freezer -80 °C / hot water 100 °C / autoclave 121 °C | Self-laminating wrap; align transparent window with observation position | Cryovials and containers requiring liquid-level observation |
| T439 | 6-color cryogenic label with pre-printed color at top, facilitating rapid visual identification and classification of laboratory container types | LN₂ -196 °C / freezer -80 °C / hot water 100 °C | Assign per color-code rules; color-code meanings documented in SOP | Color-code management: distinguishing patients, batches, or specimen types |
| T629 | Nylon cloth label; easy to apply, resistant to high and low temperatures, good conformability, for all places in the laboratory requiring identification | LN₂ -196 °C / freezer -80 °C / hot water 100 °C / autoclave 121 °C | Fabric substrate has strong conformability, suitable for curved and irregular surfaces | Flat identification on tank outer walls, canes, goblet canes, etc. |
| T509 | Durable vinyl label suitable for wrapping with good conformability; requires overlap in LN₂ environments | LN₂ -196 °C / freezer -80 °C / hot water 100 °C | End-to-end overlap mandatory in LN₂ environments; recommended overlap width ≥ 3 mm | Primary model for wrap-around labeling of straw bodies |
There is a boundary that must be made clear: the Lab series also includes T419 gloss white PET and T329 matte white PP, both officially rated for environments above -40 °C, belonging to the conventional freezer tier, and must not be used in LN₂ or ultra-low temperature freezer scenarios. Mixing these two with the LN₂ tier during selection is one of the most common errors in actual projects.
The recommended implementation of the four-level structure is: the straw body uses a wrap-around label carrying the complete code; the outer sleeve uses a label with the same code for secondary confirmation; the goblet cane outer wall carries a larger cryogenic label recording the cane number and the patient group to which it belongs; the tank outer wall and canes use nylon cloth cryogenic labels recording the tank number, liquid-level inspection date, and responsible person. A parent-child relationship is established between the four levels through coding rules, so that any level can be traced upward or downward.
10. Implementation SOP: nine steps from printing to storage
To solidify the preceding judgments into executable actions, the following sequence is recommended:
1. Establish coding rules. Determine the number of digits and separators for patient number, specimen type code, cryopreservation batch number, and carrier serial number, ensuring the code is unique across the entire bank.
2. Select a wrap-around cryogenic label and confirm the temperature tier covers -196 °C. Check the temperature column in the official material guide; do not infer from experience.
3. Fix printing parameters. Use the matching resin-based cryogenic ribbon; record printing speed, darkness, and printhead temperature in the SOP; re-validate when changing ribbon batches.
4. Barcode grade acceptance. Test after printing per ISO/IEC 15416 or ISO/IEC 15415; labels below grade C (2.0) are scrapped directly—"making do" is not allowed.
5. Surface cleaning. Wipe the straw surface with 75% ethanol and label only after complete evaporation; labeling at low temperature or in frosty conditions is prohibited.
6. Wrapping and overlap. Wrap only once circumferentially; recommended overlap width ≥ 3 mm; keep the overlap segment away from the seal impression; labeling fixtures significantly improve consistency.
7. Standing and first-round verification. After labeling, let stand at room temperature for no less than 24 hours; the first batch of specimens should complete 3–5 cycles of "LN₂ 24 hours → 37 °C water bath → room temperature 2 hours" for verification.
8. Dual-layer code consistency check. Body and outer sleeve labels must be printed in the same batch with the same code, reviewed and signed by a second person.
9. Storage positioning and records. Record the four-level position of tank number, cane number, goblet position, and carrier serial number, write synchronously to the electronic ledger, and archive both the manual double-witnessing record and the system log.
11. Common failure modes and troubleshooting checklist
The high-frequency failures in actual projects can basically be grouped into five categories; simply work backward from the symptom to the cause:
Whole label detaches—mostly labeling at low temperature, uncleaned surface, or insufficient standing time, so the adhesive is put into LN₂ before initial tack is established.
Overlap edge lifts—insufficient overlap width or the overlap segment falls on the seal impression, concentrating rebound stress at the edge.
Characters blur, barcode unreadable—wax-based ribbon used, or cryoprotectant creeping up the wall and attacking the ink.
Label still present but code contradictory—body and outer sleeve printed in two separate passes, causing transcription errors; resolved by printing in one batch.
Whole row of labels scrapes against each other—label too wide or wrapped twice, pressing against adjacent straws in the goblet; narrow the label and wrap only once.
Recommended Products
For the label materials and application scenarios covered in this article, the following BRD products are available for selection reference (click to view specifications and request a quote):
- Lab208-509/25.4x63.5 wrap-around cryovial biological sample bank straw LN₂ classification label (Request a Quote)
- Lab115-459/9.53+65x9.53 biological sample bank conical tube cryogenic cryovial PET self-laminating label (Request a Quote)
- T629 sample bank -196 °C nylon cloth low-temperature-resistant test tube biological sample bank sampling LN₂ label (¥999/roll)
- Lab032-429/30X20mm biological sample bank cryovial microscope slide PET polyester label cryogenic adhesive (Request a Quote)
12. Frequently Asked Questions (FAQ)
Q1: Can cryovial labels be used directly on cryo straws?
Not recommended. Cryovial labels are usually designed for flat surfaces around 10 mm in diameter; applied to straws on the order of 2 mm–3 mm, they will rebound and lift due to excessive curvature. Straws should use cryogenic labels explicitly rated for wrapping, with overlap applied in LN₂ environments.
Q2: Can the same label be used for 0.25 mL and 0.5 mL straws?
In most cases yes, but the width must be confirmed separately. 0.25 mL straws have a smaller outer diameter and shorter labelable length, so narrower labels with compressed code content are recommended; 0.5 mL straws can accommodate a DataMatrix code.
Q3: Must straw labels be overlapped?
In LN₂ environments, yes. Overlap is the key structure resisting rebound peel force on small-diameter curved surfaces; the official application requirements for wrap-around cryogenic labels in LN₂ scenarios explicitly include this, with a recommended overlap width ≥ 3 mm.
Q4: Are there differences in label requirements between vitrification and programmed slow freezing?
Yes. Vitrification cooling rates can reach tens of thousands of degrees Celsius per minute, with more severe thermal shock and higher requirements for adhesive and face stock matching; slow freezing is relatively gentle. When introducing new labels, verification should be performed under the most demanding vitrification conditions.
Q5: What if the barcode grade does not reach grade C?
First check three variables: whether the ribbon matches (should be resin-based cryogenic ribbon), whether printing darkness and speed are within the SOP range, and whether the symbology module size exceeds the printable area of the label. If all three are confirmed correct and the grade still fails, it indicates that the label size or symbology combination is not suitable for that carrier, and the combination should be adjusted rather than relaxing the acceptance standard.
Q6: Can double witnessing rely on scanning alone?
It cannot rely entirely on scanning. Scanning addresses "machine confirmation," but equipment failure, frost obscuration, and battery depletion can all cause scanning to fail. The standard practice is to run manual double witnessing and electronic verification in parallel, with human-readable plain text retained on the label as the final fallback.
Q7: What labels should be used for goblet canes and tanks?
At this level, surfaces are flat and ample, suitable for nylon cloth cryogenic labels with good conformability; the tolerance range covers four tiers from LN₂ to autoclaving, capable of handling the periodic disinfection and wiping conditions of tank outer walls.
BRD's Lab&HC laboratory medical label series covers multiple operating conditions including LN₂, ultra-low temperature freezers, hot water, and autoclaving, and is used with BRL and BRS series cryogenic ribbons. For more materials and specific applications, please contact the product manager for selection.