
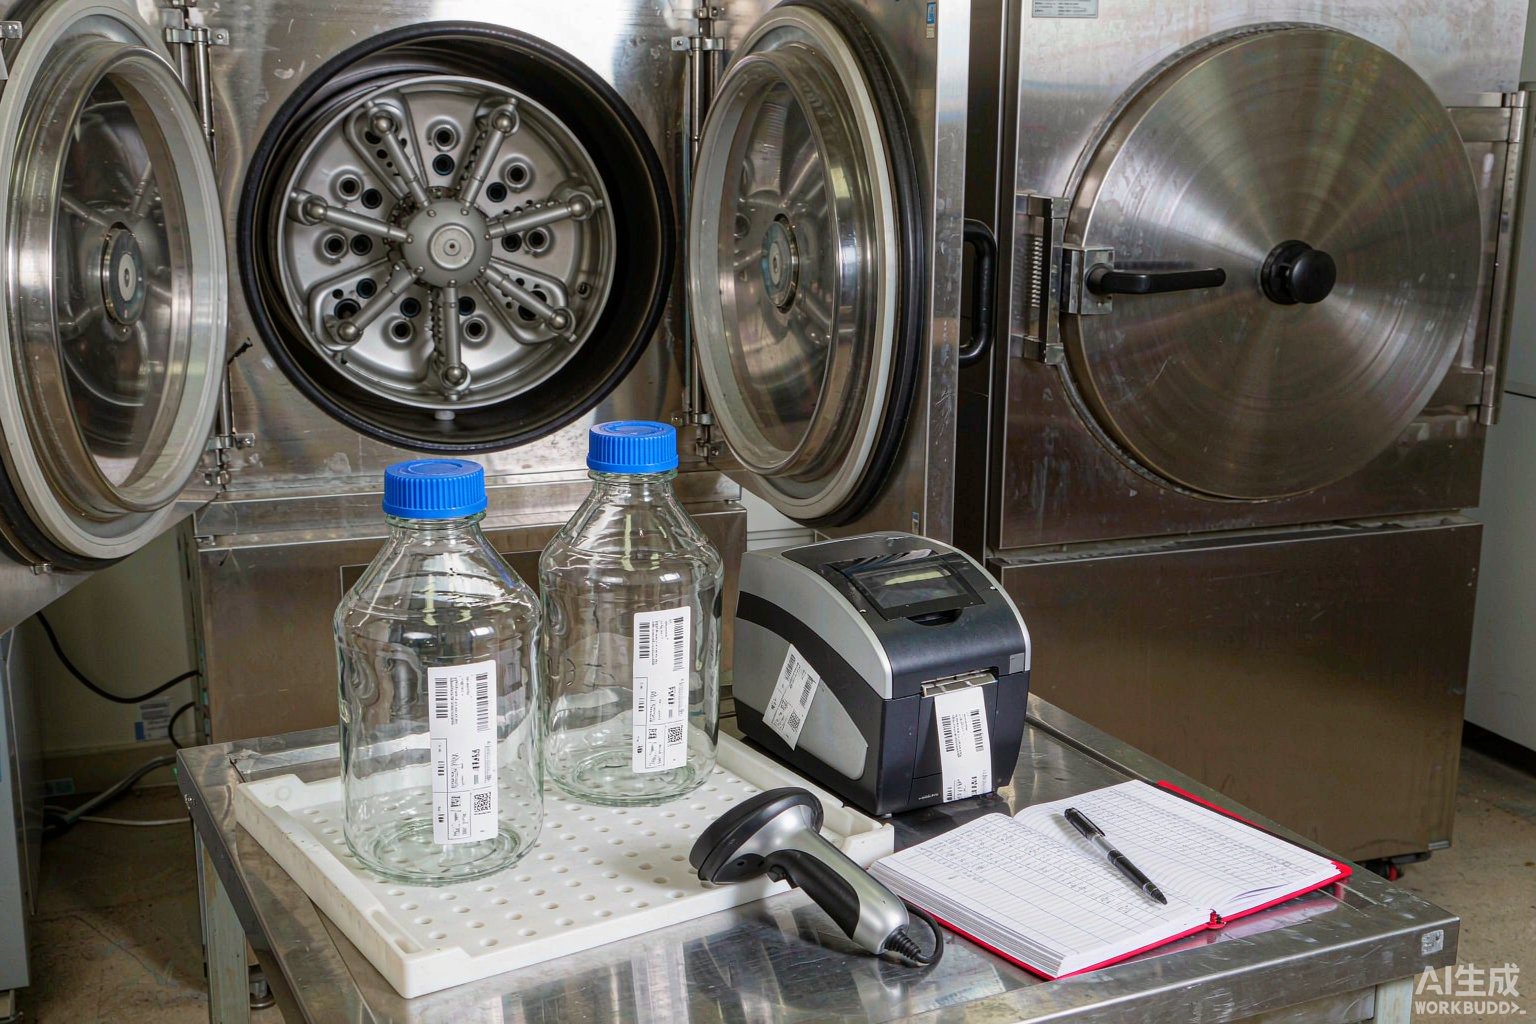
1. Conclusion First: The Primary Criterion for Centrifuge Bottle Labels Is Not Centrifugal Force, but the Number of Reuse Cycles in the Closed Loop
Large-capacity centrifuge bottles (250 mL / 500 mL / 1000 mL) are not disposable consumables but laboratory assets reused repeatedly over years. When selecting a label for such bottles, the primary criterion is not how many ×g of centrifugal load it can withstand, but whether the same label can, after hundreds of cycles through the reuse loop of "4 °C centrifuge chamber → alkaline wash → 121 °C moist heat sterilization → 60-80 °C drying → back to 4 °C," still adhere, remain legible, and not curl at the edges and get drawn into the rotor or bucket.
The cost of misplacing the criterion is very concrete. Selecting material solely by centrifugation conditions—focusing on whether centrifugal force will shear off the label—typically results in full-edge lifting and printed-layer detachment after the third or fourth autoclaving. Selecting solely by low temperature while ignoring the combined stresses of alkaline wash and moist heat leads to progressive failure within six months. The actionable order is exactly the opposite: first treat "autoclaving at 121 °C" as a hard, non-negotiable threshold to screen out half the materials, then address curved-surface conformity and chemical resistance, and only lastly verify centrifugal load.
This article provides a directly actionable set of criteria: break one reuse into five measurable stress segments, quantify curved-surface conformity difficulty with the sagitta formula, quantify the label's effect on balancing via areal density conversion, then cross-reference the official material guide table to define the applicable boundaries of T629, T459, and T429, and finally present field design, a fourteen-step implementation procedure, and a failure troubleshooting comparison table. Compliance anchors throughout include ISO 17025:2017, ISO 15189:2022, ISO 20387:2018, GB 19489-2008, WS 233-2002, GB/T 2792-2014, GB/T 4851-2014, ISO/IEC 15416, and ISO/IEC 15415.
2. Distinguish the Objects First: Disposable Centrifuge Tubes and Large-Capacity Reusable Centrifuge Bottles Are Two Different Labeling Propositions
Many projects that fail at centrifuge bottle labeling start by treating "centrifuge tubes" and "centrifuge bottles" as the same type of object. Although both go into the centrifuge chamber, their management attributes are completely opposite: the former is a consumable, and the label follows the sample; the latter is an asset, and the label follows the equipment ledger. A consumable's label only needs to survive one experimental cycle; an asset's label must survive dozens to hundreds of cleaning and sterilization cycles.
| Comparison Dimension | Disposable centrifuge tube (15 mL / 50 mL) | Large-capacity reusable centrifuge bottle (250 / 500 / 1000 mL) |
|---|---|---|
| Management attribute | Consumable, follows the sample | Asset, entered into equipment ledger and maintenance file |
| Reuse count | 1 | Typically 50-200 cycles |
| Temperature chain | Room temperature or 4 °C centrifugation → -80 °C archiving, essentially one-way | 4 °C centrifugation → alkaline wash → 121 °C sterilization → 60-80 °C drying → back to 4 °C, closed-loop reciprocation |
| Main failure mode | Slippage and edge lifting caused by centrifugal shear | Adhesive hydrolysis, printed-layer detachment, and edge rebound lifting caused by moist heat plus alkaline wash |
| Label data fields | Sample ID, project number, collection time | Asset ID, maximum allowable speed, sterilization cycle count, activation and retirement dates |
| Typical outer diameter | 17 mm / 30 mm | 62 mm (250 mL) / 96 mm (500 mL) |
This table explains why the centrifuge tube approach cannot be directly transferred to centrifuge bottles: the physical mechanisms of failure differ, and so do the verification methods. The former can be controlled by comparing barcode grades before and after centrifugation; the latter requires redesigning verification with "cycle count" as the independent variable.
3. Breaking Down One Reuse Cycle: Which Stresses a Centrifuge Bottle Label Withstands Simultaneously
Conditions must be quantified before selection. Taking the most common weekly rhythm in laboratories—three batches per week, fifty working weeks per year—one centrifuge bottle goes through about 150 complete cycles per year; with 20 minutes of 121 °C moist heat exposure per cycle, annual cumulative moist heat exposure is about 50 hours, and cumulative alkaline immersion about 37.5-50 hours. These two figures, not the speed of any single centrifugation, are the baseline for judging label life.
| Process Step | Typical Conditions | Effect on Label | Cumulative Effect (at 150 cycles/year) |
|---|---|---|---|
| 4 °C centrifuge chamber centrifugation | 4 °C, 10-30 min, RCF approx. 4,500-14,300 ×g | Unidirectional shear load superimposed on condensate interface | 150 shear cycles plus 150 wet-interface aging cycles |
| Decanting and pre-rinsing | Room-temperature deionized water | Label edges directly impacted by water flow | 150 edge-warping drivers |
| Alkaline cleaning | pH 10-11, 40-60 °C, 15-20 min | Chemical attack on face stock and printed layer | Approx. 37.5-50 h immersion |
| Moist heat sterilization | 121 °C, 20 min, saturated steam | Adhesive hydrolysis, thermal expansion mismatch between face stock and bottle body | Approx. 50 h moist heat exposure |
| Drying and storage | 60-80 °C, 60 min, then room temperature | Residual stress release, edge rebound | 150 thermal cycles |
Among these five stress segments, the third and fourth truly determine material selection: alkaline wash determines whether the printed layer survives, and moist heat determines whether the adhesive layer survives. Any material not checked for the autoclave tier in the official material guide table should be excluded at this step. The fifth segment is often overlooked, yet it is precisely the direct cause of "finding the label fully lifted the next morning after sterilization"—the drying process releases in one go the internal stress not relieved during cooling.
4. Sagitta and Conformity: Why Larger-Diameter Bottle Bodies Are Actually Harder to Label
The bottle body of a centrifuge bottle is a surface of revolution, while the label is flat. When a label of width w is applied to a cylinder of radius R, the maximum gap between the label ends and the arc surface can be calculated by the sagitta:
h = R − √(R² − (w/2)²) (R is the bottle body radius, w is the label width, both in mm)
The larger the sagitta, the greater the rebound driving force at the label edges, and the higher the peel stress the adhesive layer must resist long-term. Substituting common centrifuge bottle dimensions yields very intuitive results:
| Bottle Specification | Body Outer Diameter / Radius | Label Width w | Sagitta h (mm) | Conformity Difficulty |
|---|---|---|---|---|
| 250 mL centrifuge bottle | 62 mm / R=31 | 20 mm | 1.66 | Direct application; conforms with routine pressing |
| 250 mL centrifuge bottle | 62 mm / R=31 | 25 mm | 2.63 | Applicable; requires roller pressing to expel air |
| 250 mL centrifuge bottle | 62 mm / R=31 | 40 mm | 7.32 | Must use nylon cloth-type material with good conformity |
| 500 mL centrifuge bottle | 96 mm / R=48 | 25 mm | 1.66 | Direct application |
| 500 mL centrifuge bottle | 96 mm / R=48 | 40 mm | 4.37 | Requires conformable material and edge roller pressing |
| 500 mL centrifuge bottle | 96 mm / R=48 | 60 mm | 10.53 | Not recommended to apply a full sheet to the curved surface; split into two labels or move to the flat area of the neck |
Here is an engineering rule of thumb that is easy to get backwards: the same label applied to a larger-diameter bottle actually has a smaller sagitta (for the same 40 mm width, the 500 mL bottle body is 4.37 mm, while the 250 mL bottle body is 7.32 mm). What is truly difficult is the combination of a small diameter and a large label. So choosing an 80 × 60 mm large label for a 250 mL centrifuge bottle is more likely to fail than choosing the same for a 500 mL centrifuge bottle—the former's sagitta is more than twice the latter's.
5. The Hard Threshold of the Official Material Guide Table: The Autoclave 121 °C Tier
Consolidating the above conditions onto materials, the only non-negotiable item is the autoclave tier. According to the official material guide table, only T629, T459, and T429 are checked for all three tiers of freezer -80 °C, hot water 100 °C, and autoclave 121 °C; the remaining materials either only reach the 100 °C hot water tier or can only stay in environments above -40 °C, and are all unsuitable for application to the bottle body that goes into the autoclave.
| Material Code | Official Description | Freezer -80 °C | Hot Water 100 °C | Autoclave 121 °C | Official Labeled Applications | Positioning on Centrifuge Bottles |
|---|---|---|---|---|---|---|
| T629 | Nylon cloth label, easy to apply, high/low temperature resistance, good conformity | Applicable | Applicable | Applicable | Room temperature / microscope slides / cryovials and test tubes / conical tubes | First choice for bottle shoulder curved surfaces; most stable long-term conformity |
| T459 | Ultra-thin polyester label, self-laminating label with transparent tail, protects printed content and leaves a transparent window for observing liquid level | Applicable | Applicable | Applicable | Cryovials and test tubes / cells | For the segments with the strongest alkaline wash and friction; sacrifices print area for renewed redundancy |
| T429 | Ideal choice for labeling frozen flat surfaces; when applied to frozen tube surfaces, ends must overlap by at least 3 mm | Applicable | Applicable | Applicable | Cryovials and test tubes / packaging labeling | Transfer containers and ledger layer outside the bottle body |
| T409 | Excellent chemical resistance and abrasion resistance | Applicable | Applicable | Not checked for this tier in official table | Cryovials and test tubes / general purpose | Only suitable for removable status layers that do not enter moist heat sterilization |
The differences among the three usable materials can be stated clearly at once: T629 is nylon cloth with the best conformity, the only one in the official table checked for all four tiers of room temperature, microscope slides, cryovials and test tubes, and conical tubes, and is the most stable for long-term labeling of composite curved surfaces such as bottle shoulders; T459 has a self-laminating structure and transparent window, sacrificing print area for the strongest print protection, suitable for bottle bodies that need to observe liquid level directly through the label while frequently entering and exiting the alkaline wash tank; T429 is the one checked for both the autoclave tier and packaging labeling, more suitable for synchronizing information onto transfer containers, buckets, and ledger layers outside the bottle rather than directly onto the bottle wall in the 4 °C chamber. It should be noted that the application column of the official guide table does not list centrifuge bottles as a separate item; the suitability in this article is inferred from the four temperature tiers and chemical descriptions. For specific available specifications and dimensions, refer to the product specification sheet, or contact the product manager for selection.
6. Labels Are Not Massless: Balancing Tolerance and Symmetric Position Consistency
This point is almost always overlooked. Labels have areal density; estimated at about 180 g/m² for a common cryogenic label composite structure, a single 80 × 60 mm label weighs about 0.86 g. Meanwhile, symmetric-position balancing of large-capacity centrifuges typically requires imbalance to be controlled within 1 g (refer to the rotor manual supplied by the centrifuge manufacturer for specifics). This means whether a label is applied, how large it is, and how many are applied are themselves part of the balancing calculation.
| Label Scheme | Area (mm²) | Estimated Mass per Label (g) | Symmetric Position Difference (g) | Assessment |
|---|---|---|---|---|
| 50 × 30 mm | 1,500 | 0.27 | 0.27 | Far below common tolerance, safe |
| 60 × 40 mm | 2,400 | 0.43 | 0.43 | Still within tolerance |
| 80 × 60 mm | 4,800 | 0.86 | 0.86 | Near tolerance upper limit; symmetric identical configuration required |
| 80 × 60 mm double label | 9,600 | 1.73 | 1.73 | Exceeds common tolerance; strictly prohibited to add on one side only |
Two operating disciplines follow: First, the two bottles at symmetric positions must use exactly the same labeling scheme—same model, same dimensions, same quantity, same height; if either side has one extra label or is switched to a larger size, the imbalance directly crosses the line; Second, the height position of the label on the bottle body must be fixed, because the distance of the label mass from the axis of rotation changes its contribution to the imbalance, and position drift turns the balancing result into a random number.
7. Bottle Body, Bottle Neck, and Cap: One Label Cannot Hold All the Information
The information needs of a centrifuge bottle naturally divide into three layers; cramming them onto one label usually results in font sizes too small for a scanner to read. A reasonable approach is to layer by physical position:
Bottle body permanent layer. Applied to the relatively flat area of the lower bottle body, carrying asset ID and service-life management fields, preferably expressed with a two-dimensional symbol—for the same 13 mm square pattern area, a Data Matrix 24×24 (X dimension 0.50 mm) can hold about thirty data characters, whereas Code 128 in the same area, after deducting left and right quiet zones, has a net encodable width reduced by more than half. The asset ID is recommended to use a structure of "equipment category abbreviation + serial number + check digit" for easy manual verification.
Bottle neck or bottle shoulder temporary layer. Used for batch number, current contents, and responsible person. This layer is washed off every cycle and is a planned consumable; use removable material and enforce the operating constraint that "clearing must be confirmed before release" to prevent old batch information from entering the next round of product contact surfaces with the bottle, especially in food, pharmaceutical, or other regulated environments.
Bottle cap top status layer. This is the only position suitable for "real-time status": sterilized / to be cleaned / to be sterilized / retired, printed with color codes or large characters, visually readable without scanning.
Of the three layers, only the bottle body layer requires permanent traceability, and only it must simultaneously satisfy 121 °C and curved-surface conformity. Never print status fields into the bottle body layer for convenience—once the status changes, the entire label must be reprinted and reapplied, and the service life of the permanent layer is immediately voided.
8. Biosafety Closed Loop: Bottle-Level Traceability When Rotor and Bucket Seals Fail
According to the relevant requirements of GB 19489-2008 "Laboratories—General Requirements for Biosafety," centrifugation involving biological hazard agents should be performed within sealed rotors or centrifuge cups, and actions of loading and unloading rotors must also include measures to prevent aerosol dispersion. WS 233-2002 has the same rationale for microbiological and biomedical laboratory requirements.
These requirements have two direct consequences for labels. First, the label must withstand repeated wiping with chlorine-containing disinfectants—laboratory-prepared chlorine disinfectant solutions commonly have available chlorine concentrations of 1,000-5,000 mg/L, and spill response often uses the upper limit concentration, with the bottle wall where the label is located also wiped down. Second, the label must use "bottle" rather than "batch" as the minimum traceability unit: in the event of a leak or breakage within the rotor, the traceback chain must be able to locate the specific bottle number directly from the centrifuge chamber and bucket, then correspond to that bottle's cleaning records, sterilization records, and retirement status. Writing only a batch number cannot converge in such an accident.
9. Sterilization Cycle Counting and Retirement: Programmable Field Design
The core of reusable asset management is the life ledger. It is recommended to reserve a set of manually checkable sterilization cycle count boxes on the bottle body layer label (for example, a set of 10 boxes or a row of sequential marks); the operator crosses off one box after each sterilization and records it in the ledger. Counting is not for its own sake but to provide the basis for retirement: when cumulative cycles approach the design cycle count given by the bottle manufacturer, or annual visual inspection reveals scratches, stress whitening, or seal ring deformation, the retirement process is entered.
Label handling at retirement must also be written into the operating documents: when a bottle is scrapped, the asset code on the bottle body layer must be destroyed or defaced simultaneously, to avoid two physical entities with the same asset ID appearing in inventory. This is a basic requirement in the contexts of equipment management under ISO 17025:2017 and sample bank asset management under ISO 20387:2018, and system audits under ISO 13485:2016 and ISO 15189:2022 also often use it as a check item for equipment ledger consistency.
10. Implementation Procedure: Starting from the Moment Cleaning Is Completed
The following fourteen-step process is organized in units of "one cycle" and can be written directly into laboratory operating documents:
① After centrifugation, remove the bottle, decant the contents, and pre-rinse with deionized water, focusing on flushing residue from the label edges;
② Visually inspect the label: whether edges are lifted, printing is blurred, or barcode is degraded; determine whether replacement is needed;
③ Prepare alkaline cleaning agent per manufacturer ratio, controlled at pH 10-11, 40-60 °C, 15-20 min;
④ Rinse with deionized water until no residue remains, avoiding detergent residue at the label-bottle wall interface;
⑤ Invert to drain; do not load into the autoclave while water droplets remain;
⑥ When loading, place bottles mouth-down or on their side to avoid water pooling on the label facing up;
⑦ Moist heat sterilization at 121 °C, 20 min; specific parameters subject to the laboratory's validated cycle;
⑧ After removal, dry at 60-80 °C for 60 min;
⑨ After cooling to room temperature, perform 180° peel sampling inspection on the labeled surface per GB/T 2792-2014;
⑩ Perform batch sampling inspection of holding tack per GB/T 4851-2014 and record displacement values;
⑪ Retest with a barcode verifier per ISO/IEC 15416 (1D) or ISO/IEC 15415 (2D); replace label if below internal release grade;
⑫ Mark the cycle count box and update the ledger;
⑬ Reapply the label: uniform height and uniform dimensions at symmetric positions, roller press to expel air, and allow to stand for the dwell time required by the operating document before entering the 4 °C chamber;
⑭ Before warehousing, two-person verification of asset ID and ledger consistency to complete the closed loop.
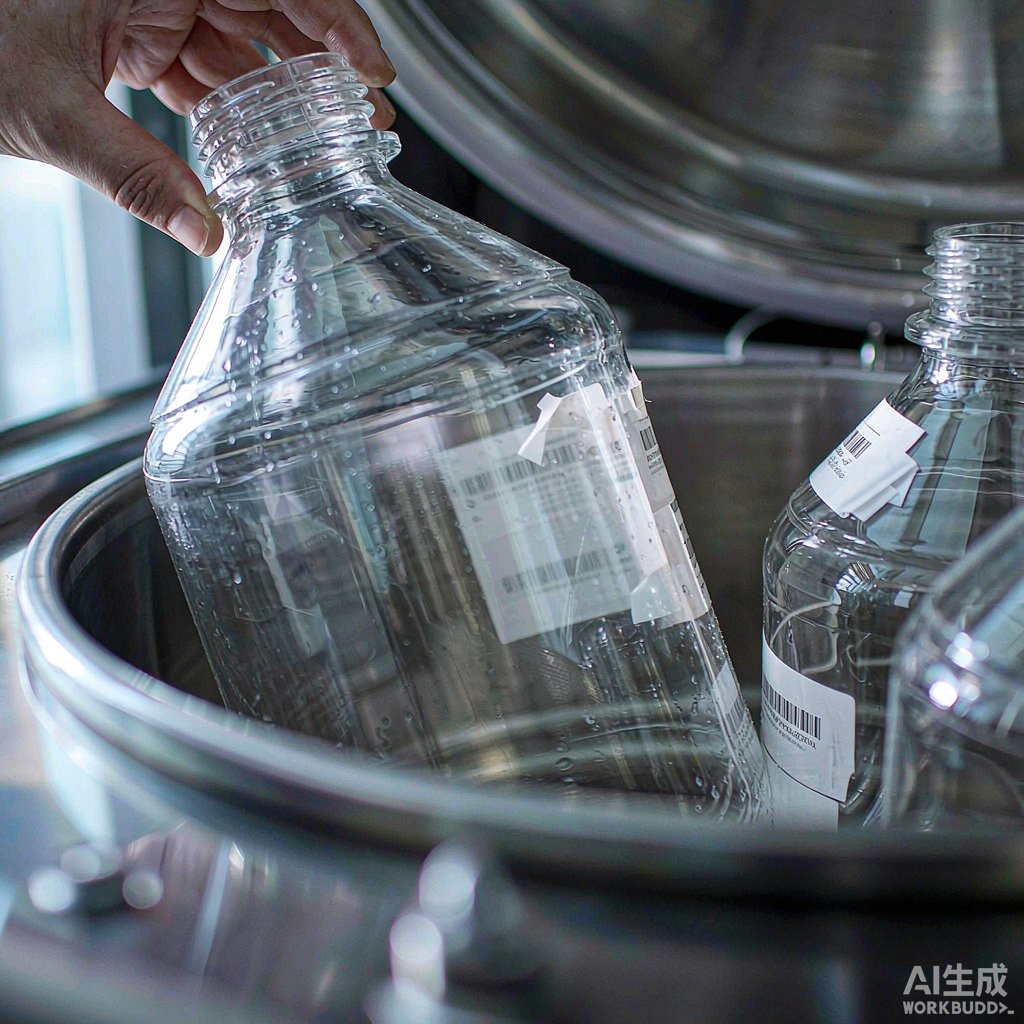
Steps ⑨ to ⑪ are the three steps most laboratories omit, yet they are precisely the only three that can turn "the label looks fine" into "the label is indeed fine." It is recommended to conduct a full-batch sampling inspection quarterly rather than waiting until a centrifugation vibration alarm to look back.
11. Common Failures and Troubleshooting Comparison
| Symptom | Most Likely Cause | Verification Method | Action |
|---|---|---|---|
| Full-edge lifting after sterilization | Thermal expansion mismatch between face stock and bottle body, or excessive sagitta | Compare peel strength before and after sterilization per GB/T 2792-2014 | Switch to conformable material and reduce label width to within 3 mm sagitta |
| Blurred printing, degraded barcode | Alkaline wash attacking printed layer | Grade per ISO/IEC 15416; replace label if below release grade | Switch to self-laminating structure, or add transparent protective layer |
| Label completely detached, residue left in bucket | Adhesive hydrolysis after moist heat | Perform holding tack test per GB/T 4851-2014 | Switch to material checked for the 121 °C tier in the official table |
| Centrifuge vibration alarm | Inconsistent label quantity or dimensions at symmetric positions, balancing imbalance | Remove bottles and weigh individually for calculation | Unify labeling scheme and height at symmetric positions |
| Scanner cannot read barcode | Symbol distortion caused by curved surface, or module size beyond depth of field | Perform 2D symbol grade test per ISO/IEC 15415 | Switch to 2D symbol and reduce X dimension |
| Progressive failure within six months, randomly distributed | Insufficient dwell time before entering 4 °C chamber after labeling; initial tack not established | Check standing time in operating records | Complete room-temperature dwell before going online |
12. Compliance Anchor List
The standards cited in this article are all currently valid versions; readers can trace back to the original clauses by number: ISO 17025:2017 (General requirements for the competence of testing and calibration laboratories, equipment management and equipment identification), ISO 15189:2022 (Medical laboratories—Requirements for quality and competence, covering the centrifugation step of pre-examination procedures), ISO 20387:2018 (Biobanking—General requirements, sample-related equipment ledger), ISO 13485:2016 (Medical devices—Quality management systems, applicable to contract manufacturing and inspection scenarios), GB 19489-2008 and WS 233-2002 (General requirements for biosafety of laboratories and microbiological laboratory guidelines, aerosol control in centrifugation operations), GB/T 2792-2014 (Test method for 180° peel strength of adhesive tapes), GB/T 4851-2014 (Test method for holding tack of adhesive tapes), ISO/IEC 15416 (Print quality of linear barcode symbols), ISO/IEC 15415 (Print quality of 2D barcode symbols). For scenarios requiring refrigerated or frozen delivery, reference may also be made to GSP requirements for temperature-responsibility records.
Recommended Products
For the label materials and application scenarios covered in this article, the following BRD (博锐迪) products are available for selection reference (click to view specifications and request a quote):
- Lab096-629/80x60mm Sample bank cryovials, EP tubes, microscope slides -196 °C liquid nitrogen nylon cloth labels (¥999/roll)
- Lab014-629/50x30mm Sample bank cryovials, EP tubes, microscope slides -196 °C liquid nitrogen nylon cloth labels (¥1890/roll)
- Lab102-429/50x60mm Cryogenic labels matte white hand-writable PET cryovial sample bank labels BRD 博锐迪 (Price on request)
- Lab121-459/66.68x15.24mm Laboratory conical tube cryogenic cryovial PET self-laminating labels (Price on request)
FAQ
Q1: Can room-temperature pressure-sensitive adhesive be used for centrifuge bottle labels, as long as it does not curl?
Answer: No. A centrifuge bottle undergoes about 150 complete cycles per year, including about 50 hours of 121 °C moist heat exposure and about 37.5-50 hours of alkaline immersion. The adhesive system of room-temperature pressure-sensitive adhesive will hydrolyze under these conditions, typically beginning to detach in full sheets after the third to fourth sterilization, and residue may also enter the rotor or bucket causing secondary contamination. During selection, screen materials directly by the autoclave tier of the official material guide table, rather than first checking whether it sticks firmly.
Q2: What label size is appropriate for a 500 mL centrifuge bottle?
Answer: Preferably control within the 25-40 mm width range. Calculated by the sagitta formula h = R − √(R² − (w/2)²), a typical 500 mL centrifuge bottle has an outer diameter of 96 mm (R=48); at a label width of 25 mm the sagitta is 1.66 mm, and at 40 mm it is 4.37 mm, both compatible with routine pressing processes; if the same label is stretched to 60 mm width, the sagitta jumps to 10.53 mm, and the edge rebound driving force increases exponentially, so applying a full sheet to the curved bottle body is not recommended.
Q3: Is it better to apply the label to the bottle body or the cap?
Answer: The two carry different information and should coexist rather than be an either-or choice. The bottle body layer holds the permanent asset ID and the full set of service-life management information, and is the only position that must simultaneously satisfy 121 °C, alkaline wash resistance, and curved-surface conformity; the cap top holds real-time status (sterilized / to be cleaned / to be sterilized / retired), printed with color codes or large characters, visually readable without scanning. Printing status fields into the bottle body layer is a common mistake—once the status changes, reapplication is required, and the permanent layer's life is immediately voided.
Q4: Should a new label be reprinted after each autoclaving?
Answer: Not necessary, and not advisable. Reprinting means the permanent layer is repeatedly replaced, which on one hand raises the cost per label to consumable level, and on the other hand introduces the possibility of writing errors in the asset ID with each reapplication. The correct approach is to let the bottle body layer accompany the bottle through its entire life cycle, replacing the label only when the barcode grade falls below the internal release grade or physical visual inspection reveals damage.
Q5: Should rotors, adapters, and buckets be labeled separately?
Answer: Yes. Rotors are key components with independent maintenance cycles that affect operational safety; their ultrasonic inspection or life accounting must be per individual rotor rather than per model. The labeling position is recommended to be a non-load-bearing flat area of the rotor, using material checked for the corresponding tier in the official table; for the specific temperature tier and application scope of that component, refer to the specification sheet.
Q6: How should sterilization cycle counting be recorded more reliably?
Answer: Use a dual-track system of "visible count boxes on the label + electronic ledger records." The count boxes on the label are for on-site real-time verification, so anyone opening the autoclave can confirm which round this batch of bottles has reached; the ledger is for statistical analysis, allowing quarterly statistics of the ratio of actual cycles to design cycles to predict retirement peaks in advance. Verify the two weekly; if inconsistent, the ledger prevails and the source of discrepancy is traced.
Q7: How to remedy bottles already labeled with labels not resistant to 121 °C?
Answer: First suspend use of this batch of bottles, completely remove the old labels and confirm no adhesive residue remains on the bottle wall (residue will carbonize and blacken after the next sterilization cycle, in turn affecting the next application). Then calculate the sagitta per Section 4, select material per Section 5, verify balancing per Section 6, reapply labels, and perform a baseline retest of barcode grading per ISO/IEC 15416 or ISO/IEC 15415 as the comparison benchmark for subsequent quarterly sampling inspections.