
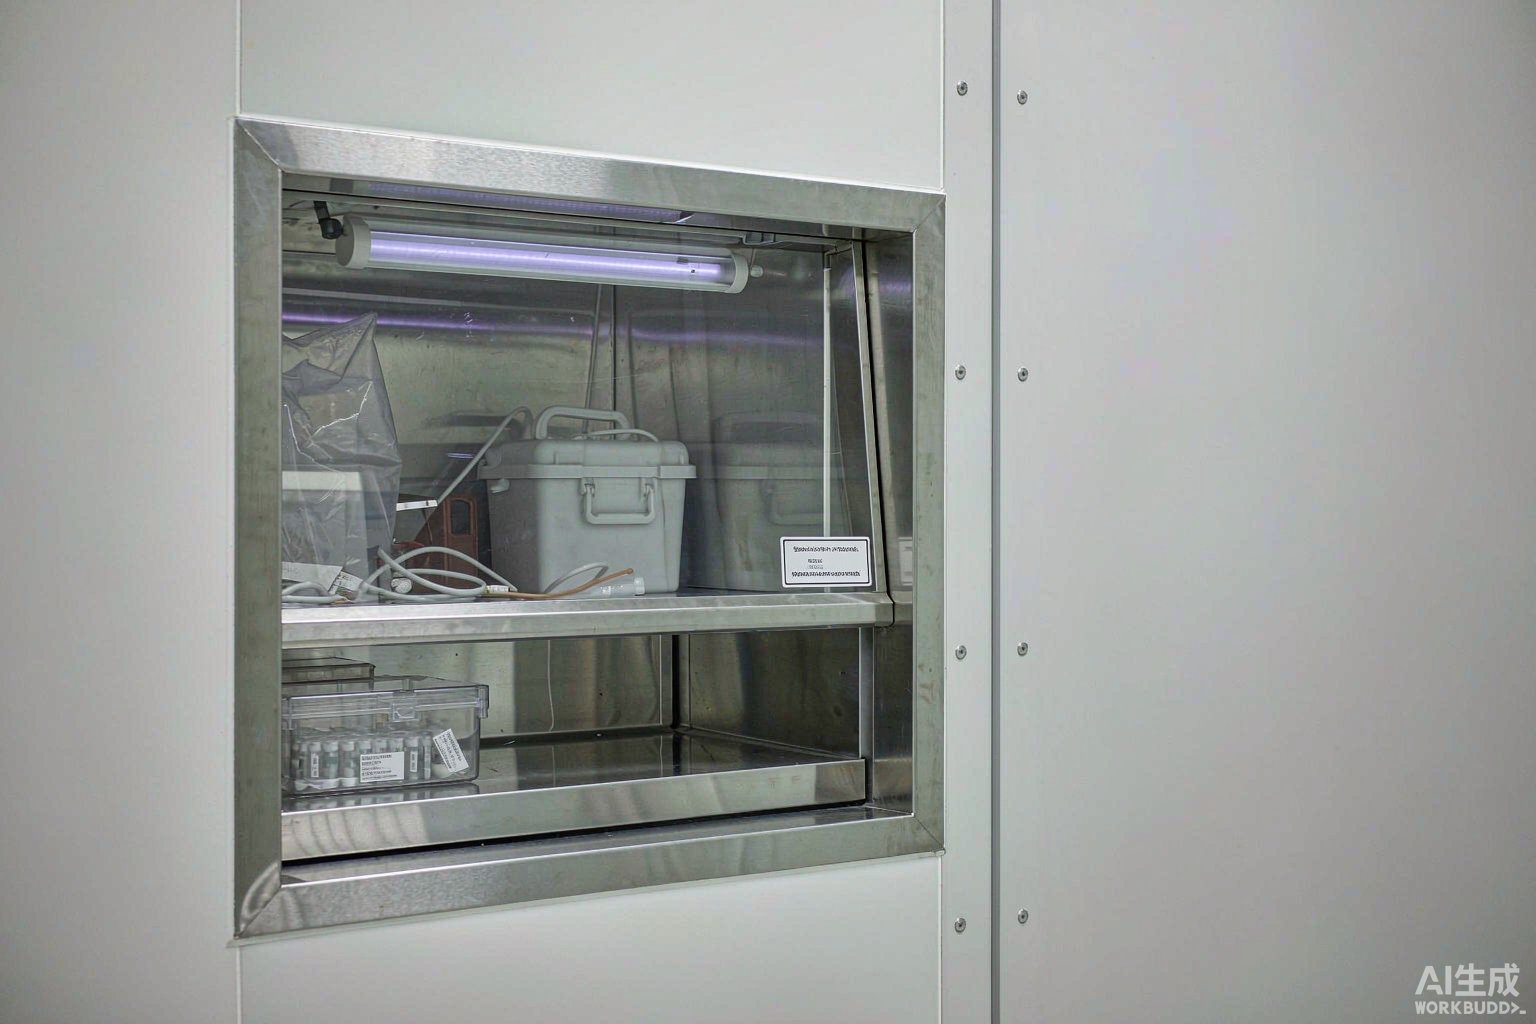
In the daily operations of laboratories, biobanks, and hospital clinical laboratories, pass-through windows (including buffer rooms, airlocks, and double-door interlocked transfer chambers) are a link in the chain that labeling solutions have long overlooked. Specimens, reagents, instruments, and waste travel back and forth between clean and non-clean zones dozens of times a day, and the labels affixed to them must simultaneously withstand three independent stresses. This article provides a directly actionable selection path and acceptance criteria.
1. Conclusion first: the primary criterion for pass-through window labeling is not "whether the adhesive can stick"
If only one conclusion can be given: for label selection in pass-through windows and buffer rooms, the primary criterion is not whether the adhesive layer can stick to the stainless steel window wall, but the cumulative load of "disinfection wipe cycles × temperature-humidity cycles" that a single label must withstand over its entire life cycle. The assessment method is: first count how many times an item passes through the pass-through window per month, multiply by the number of disinfection wipes accompanying each passage to obtain the annual cumulative wipe count, then determine whether the print layer and adhesive layer can still maintain barcode readability at this magnitude.
If a cryogenic specimen crosses the pass-through window 6 times a day, based on 250 working days per year, the annual cumulative count is approximately 1500 openings and wipes; a high-frequency specimen receiving window can reach 10 times per day, approximately 2500 per year. This magnitude far exceeds the single temperature stress that labels endure in static cryogenic storage. Therefore the selection order must be inverted: rather than first asking "is it resistant to deep freezing," first ask "how many times will this label be wiped per year, and how many condensation-rewetting cycles will it undergo." Cryogenic tolerance is only an entry ticket; wipe resistance and condensation resistance are the variables that truly determine service life.
2. Three stresses superimposed on the same label: wiping, condensation, and UV
The reason the pass-through window scenario is a high-incidence area for labeling failure is that it compresses three stresses that exist independently elsewhere onto a single label.
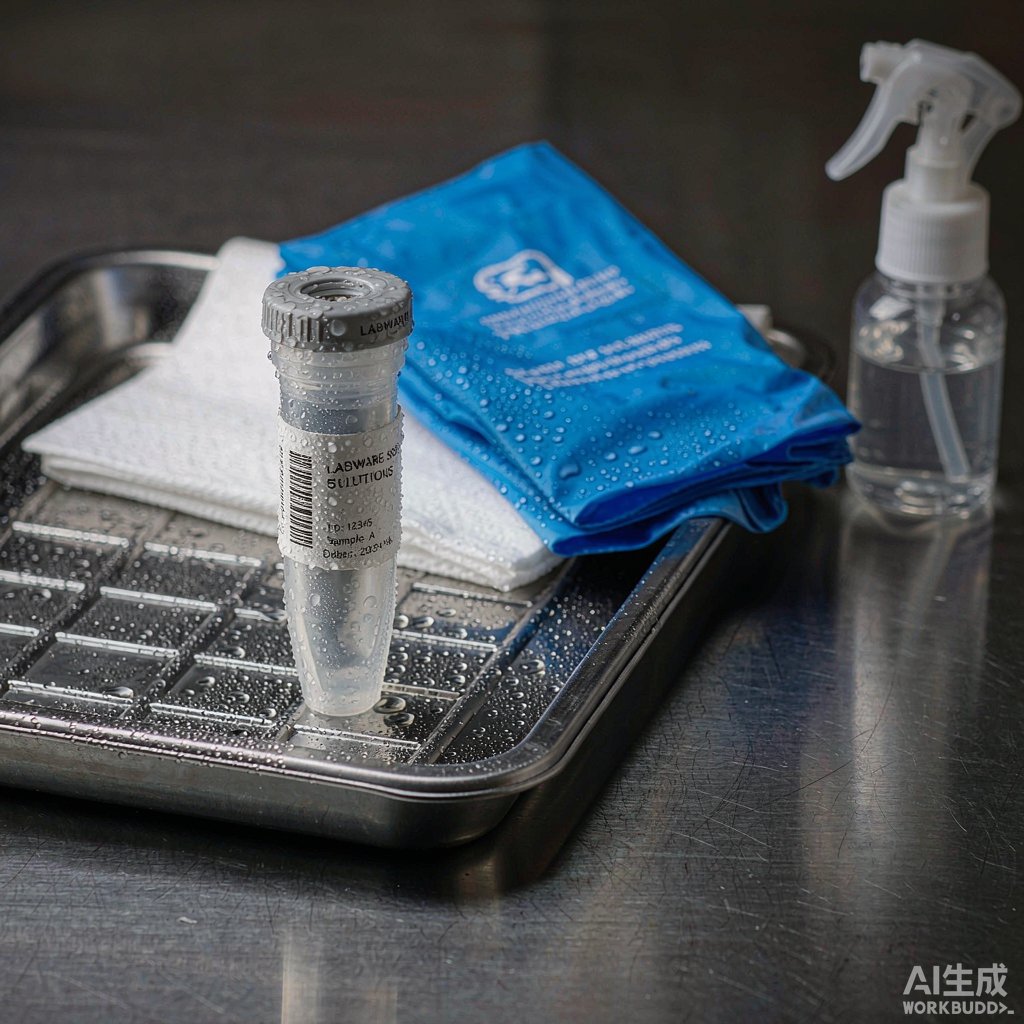
The first is chemical contact. The inner walls of the pass-through window and the outer surfaces of incoming items must be disinfected for every batch according to biosafety requirements. Commonly used disinfectants are 75% ethanol and chlorine-based disinfectant at 500–1000 mg/L available chlorine, typically wiped with lint-free cloth after application. The solvating effect of solvent-based disinfectants on the print layer and the mechanical abrasion of the wiping action are superimposed.
The second is temperature-humidity cycling and condensation. Items enter the pass-through window from a 20–24 °C clean zone, then move with refrigerated containers into 2–8 °C cold chain or -20 °C temporary storage, and finally return to room temperature. Every "cold → rewarming" cycle precipitates condensate on the label surface and at the adhesive interface, and the adhesive layer repeatedly undergoes wetting and drying.
The third is UV irradiation. Most pass-through windows are equipped with 254 nm UV germicidal lamps, at 8–20 W power, 30 min per exposure. If irradiated 5 times daily, the annual cumulative exposure can reach approximately 625 h. The fading effect of UV on dye-based thermal recording layers and some inks is cumulative and irreversible.
| Stress type | Typical conditions | Quantification basis | Failure manifestation |
|---|---|---|---|
| Chemical contact + mechanical wiping | 75% ethanol / 500–1000 mg/L chlorine-based disinfectant, lint-free cloth wiping | 6–10 times daily, 250 working days/year → 1500–2500 times | Print fading, barcode contrast decrease, laminate fraying |
| Temperature-humidity cycling and condensation | 20–24 °C clean zone ↔ 2–8 °C / -20 °C / -80 °C cold chain, rewarming | One condensation cycle per transition, dew point criteria see next section | Adhesive tack decrease after wetting, edge lifting |
| UV irradiation | 254 nm, 8–20 W, 30 min per exposure | 5 times daily → approximately 625 h cumulative annual exposure | Thermal recording layer background graying, insufficient barcode symbol contrast |
3. Quantitative criteria for condensation: calculating "rewetting" as a determinable number
Condensation is not "may occur" — it can be calculated using the dew point. Using the Magnus empirical formula, the dew point temperature can be derived from ambient dry-bulb temperature and relative humidity: first calculate actual water vapor pressure e = 0.6108 × exp(17.27T / (T + 237.3)) × RH, then back-solve the dew point Td from e. Taking common laboratory conditions as examples:
| Clean zone conditions | Calculated dew point | vs. 2–8 °C cold chain | vs. -20 °C temporary storage | vs. -80 °C specimens |
|---|---|---|---|---|
| 22 °C / 50% RH | approx. 11.1 °C | Condensation | Condensation | Condensation |
| 24 °C / 60% RH | approx. 15.8 °C | Condensation | Condensation | Condensation |
| 25 °C / 70% RH | approx. 19.1 °C | Condensation | Condensation | Condensation |
The conclusion is straightforward: as long as the transferred item ultimately enters a 2–8 °C or lower cold chain link, its label will inevitably undergo condensation during rewarming — there is no "lucky enough not to condense" scenario. Therefore, when selecting, one must not only verify "the label material is rated for -80 °C," but also verify the adhesive layer's tack performance in the wet state, and the print layer's adhesion after repeated wetting-drying cycles. This is also why the pass-through window scenario should list adhesive moisture resistance and print layer solvent resistance as independent criteria equally important as temperature resistance.
4. Quantifying disinfection wiping: from "can be wiped off" to "how many wipes before it becomes unreadable"
There are two evaluation methods for wipe resistance. The qualitative method is to moisten a lint-free cloth with disinfectant, wipe back and forth at fixed pressure for a fixed number of cycles, then visually inspect; the quantitative method is to read with a barcode verifier after wiping to see whether the symbol grade remains in the acceptable range.
According to ISO/IEC 15416 barcode symbol quality grading, grades range from 0 to 4 (corresponding to F to A), with symbol contrast, modulation ratio, and defect rate being three key parameters. The minimum acceptable grade for laboratory labels is typically 1.5 (Grade C) or above; if stable automatic data capture with a LIMS system is required, acceptance at 2.5 (Grade B) or above is recommended. This means "the text is still legible to the naked eye" does not equal "the scanner can still read it" — the criterion must be based on scan results.
For the adhesive layer, internal acceptance conditions can be established by reference to GB/T 2792-2014 (peel strength) and GB/T 4851-2014 (tack) methodology: prepare samples on two substrates — stainless steel plate and polyethylene cryovial — separately, retest after a specified number of ethanol wipe cycles, and if the degradation exceeds 30% of the initial value, the material is judged unsuitable for high-frequency transfer scenarios.
5. UV irradiation: the third stress that is often left out of calculations
UV stress is easily overlooked because it does not produce immediately visible damage. 254 nm UV irradiation has the most pronounced effect on dye-based thermal recording layers: the background gradually grays, the reflectance difference between bars and spaces decreases, and the symbol contrast parameter declines accordingly. For thermal-transfer printing, the recording layer of resin-based ribbons itself has significantly better weather resistance than dye-based thermal layers — this is the fundamental reason why high-frequency transfer scenarios generally choose thermal transfer rather than direct thermal.
It should be noted: UV irradiation and disinfection wiping are sequential actions in most pass-through windows (irradiate first, then wipe, or vice versa), and their effects on the print layer are additive rather than offsetting. If the UV lamp in the pass-through window directly irradiates the surface of labeled items, the cumulative exposure duration should be included in the life-cycle calculation.
6. Three-tier labeling architecture: identity layer, status layer, and traceability layer
Looking at a single transfer, the labeling requirements actually belong to three levels; combining them on one label will inevitably compromise at least one dimension.
| Level | Carrier | Core responsibility | Life characteristics | Material orientation |
|---|---|---|---|---|
| Identity layer | The transferred item itself (cryovial, specimen box, reagent bottle, ice box) | Unique identity, not lost across zones, resistant to cryogenic temperatures and wiping | Same life cycle as specimen, non-removable | Deep-freeze + solvent-resistant film/cloth |
| Status layer | Pass-through window inner walls, trays, transfer boxes | Indicate variable states such as "pending transfer / disinfected / removed" | High-frequency replacement, requires no residue | Repositionable, removable material |
| Traceability layer | Accompanying documents, outer box labels, system records | Handover with LIMS / biobank system, carrying timestamps and responsible persons | Archived per batch | Print quality priority, size and symbology scalable |
The benefit of the three-tier split is separating the two contradictory requirements of "long-term secure adhesion" and "easy replacement": the identity layer only handles security and weather resistance, the status layer only handles removability and legibility, and the traceability layer only handles information capacity and scanning stability. Any solution that attempts to satisfy all three with a single label will compromise on at least one dimension.
7. Identity layer selection: graded by container geometry and temperature tier
The recommended selection order for the identity layer is: first determine the temperature tier, then the container geometry, and finally the printing method.
| Material | Official positioning | Temperature tier | Geometry compatibility | Pass-through window suitability |
|---|---|---|---|---|
| T629 nylon cloth label | Easy to apply, high/low temperature resistant, excellent conformability, covering room temperature / microscope slide / cryovial / conical tube scenarios | LN₂ -196 °C, freezer -80 °C, hot water 100 °C, autoclave 121 °C | Curved surfaces, small diameters, irregular shapes | First choice: simultaneously meets cross-zone cryogenic and frequent wiping requirements |
| T439 top pre-printed 6-color | Color pre-printed at top of label for quick differentiation of laboratory container categories | LN₂ -196 °C, freezer -80 °C, hot water 100 °C | Cryovials, test tubes | Suitable for color-coded routing by zone/project |
| T429 self-laminating label | For labeling frozen flat surfaces; when applied to frozen tube surfaces, ends must overlap by at least 3 mm | LN₂ -196 °C, freezer -80 °C, hot water 100 °C, autoclave 121 °C | Frozen tube surfaces, flat surfaces | Requires strict overlap, suitable for tube surface wrapping |
| T509 vinyl wrap-around label | Durable, excellent conformability; requires end overlap when used in LN₂ environments | LN₂ -196 °C, freezer -80 °C, hot water 100 °C | Cable-like, thin tube wrapping | For basket, rod, and handle wrap-around labeling |
| T419 gloss white PET | For cryovials and microcentrifuge tubes, resistant to -40 °C and above | -40 °C and above | Standard microcentrifuge tubes, cryovials | Only suitable for -40 °C and above; does not cover -80 °C or LN₂ |
| T329 matte white PP adhesive | -40 °C cryogenic freezer label | -40 °C | Economical standard freezing | Only suitable for -40 °C tier |
It should be noted that T419 and T329 are positioned at the -40 °C tier in the official material guide; neither can cover the -80 °C or LN₂ tiers. Selection documentation must clearly distinguish them from deep-freeze tier materials and must not use the same temperature description to cover both. If an item will enter a -80 °C freezer or LN₂ dewar during the transfer chain, the identity layer should be selected from the group of T629, T439, T429, and T509.
In practical selection, T629 nylon cloth label can serve as the general base material for cross-zone transfer: its official application fields simultaneously cover room temperature, microscope slides, cryovials, and conical tubes, meaning the same batch of labels can serve multiple container types along the transfer chain without separate stocking for each container. When visual routing by project or zone is needed, the T439 top pre-printed 6-color option can be added to distinguish "which zone to go to, which project it belongs to" at first glance. For available specifications for small-diameter cryovials, refer to Lab112-629 and Lab361-329-500C: the former corresponds to a 35 × 25 mm deep-freeze nylon cloth label, and the latter to a 60 × 60 mm -80 °C tier label.
8. Status layer selection: removable, rewritable, and residue-free
The status layer is applied to pass-through window inner walls, trays, or transfer boxes to indicate "pending transfer / disinfected / removed / which responsible person." Its core requirement is exactly opposite to the identity layer: easy to peel off, leaving no adhesive residue.
According to the official material guide, T625 vinyl cloth label features repositionability, removability, no adhesive residue, and repeated adhesion. It is positioned for standard room-temperature labeling and is a reasonable choice for the status layer. It should be emphasized that the removability of removable adhesive systems comes from a lower adhesive layer cohesive strength design, which inherently conflicts with the tack requirements of deep-freeze conditions: the official material guide does not list this material for LN₂ or -80 °C tiers, so it does not serve the labeling task of following items into the cold chain along the transfer chain — it only serves room-temperature status labeling within the window and on transfer containers.
The second key point for the status layer is rewritability. If status changes are frequent, a combination of "fixed base label + replaceable overlay label" is recommended: the base label carries the fixed identification number zone, and the overlay label only carries the status. This avoids repeated peel-and-stick damage to the window wall and ensures the status field remains legible at all times.
9. Traceability layer: symbology, print quality, and system handover
The traceability layer connects physical labels with the information system. Three key points:
Symbology selection. 1D barcodes (Code 128) offer high density and low reading threshold, suitable for narrow surfaces such as tube bodies; 2D codes and Data Matrix can accommodate more characters in the same area, suitable for scenarios requiring batch numbers, timestamps, and responsible persons. If biobanks and clinical laboratories establish traceability systems per ISO 20387:2018 and ISO 15189:2022, the traceability layer should directly use 2D codes or Data Matrix to encode the specimen unique identifier together with the collection time.
Print quality grading. Per ISO/IEC 15416 (1D barcodes) and ISO/IEC 15415 (2D codes), factory acceptance should be 2.5 (Grade B) or above; in pass-through window scenarios, a "post-wipe re-verification" step should also be added — i.e., re-grade after 100 wipes following the actual disinfection procedure, and only pass if still ≥1.5 (Grade C).
System handover. The encoding rules of traceability layer labels must correspond one-to-one with the fields of the LIMS or biobank management system to avoid broken links where "it's on the label but not in the system." Clinical laboratory scenarios can reference ISO 15189:2022 requirements for specimen identification and traceability; biobank scenarios reference ISO 20387:2018; testing/calibration laboratories reference ISO 17025:2017.
10. Printing method and consumable matching: why thermal transfer outperforms direct thermal
In high-frequency transfer scenarios, the choice of printing method almost determines the upper limit of label service life. The direct thermal recording layer is a dye-based chemical reaction layer with weak resistance to solvents, UV, and abrasion; thermal transfer melts and transfers the ink layer of a resin-based ribbon onto the label face stock, and the recording layer itself is a weather-resistant polymer film that, combined with resin-based ribbon, resists both solvent wiping and UV irradiation.
The recommended combination is therefore: thermal-transfer printer + resin-based cryogenic ribbon + the aforementioned deep-freeze-resistant face stock. Ribbon width should be no less than the label width to avoid printhead edge wear; common specifications include 110 mm and 80 mm widths, matched to label size and printer model. If the text involves chemical-resistant materials such as T424, they should also be printed with BRS series ribbons per their official requirements — the matching relationships between different face stocks and ribbons are not interchangeable.
11. Failure mode troubleshooting table
| Symptom | Possible cause | Troubleshooting action | Resolution |
|---|---|---|---|
| Barcode unreadable after wiping but still visible to the eye | Insufficient symbol contrast, thermal recording layer dissolved by solvent | Re-measure symbol grade with barcode verifier | Switch to thermal transfer + resin-based ribbon |
| Label edges lifting, center still adhered | Adhesive tack decrease after condensation cycling + face stock stiffness rebound | Re-test peel strength, check for cross-temperature-zone exposure | Switch to T629 or other conformable cloth material; for small-diameter tubes, use self-laminating with overlap |
| Complete detachment after rewarming | Condensate or residual disinfectant on substrate surface during labeling | Check whether surface was dry before labeling | Specify labeling after drying; after removal from low temperature, rewarm and wipe dry before labeling |
| Adhesive residue after status label removal | Permanent adhesive system used | Verify whether material has removable properties | Switch to T625 or similar removable material |
| Barcode readable but not found in system | Encoding rules do not match LIMS fields | Sample 10 labels and compare with system | Unify encoding rules, reprint traceability layer |
| Background graying after placement under UV lamp | UV aging of thermal recording layer | Record cumulative exposure duration | Switch to thermal transfer, or move status labels out of direct UV exposure area |
12. Implementation SOP and acceptance criteria
| Step | Action | Acceptance criteria | Basis |
|---|---|---|---|
| 1 | Survey the transfer chain: frequency, disinfection method, cold chain tier, UV configuration | Derive annual cumulative wipe count and condensation cycle count | GB 19489-2008, WS 233-2002 |
| 2 | Select identity layer face stock by temperature tier | Exclude -40 °C tier materials for -80 °C/LN₂ chains | Official material guide |
| 3 | Determine dimensions and wrapping method by container geometry | Enforce overlap requirements for small-diameter tubes | Official application rules |
| 4 | Determine printing method and ribbon | Thermal transfer + resin-based ribbon | ISO/IEC 15416 |
| 5 | Status layer selection | Removable, residue-free, room-temperature tier | Official material guide |
| 6 | Traceability layer symbology and fields | One-to-one correspondence with LIMS fields | ISO 20387:2018, ISO 15189:2022 |
| 7 | Re-verification after 100 wipes | Symbol grade still ≥1.5 (Grade C) | ISO/IEC 15416, GB/T 2792-2014 |
Pass-through window configuration in barrier facility environments can also reference GB 14925-2010 requirements for facilities and environments. After the entire process is implemented, it is recommended to sample in-service labels quarterly and compare "actual service life" with "design service life" to refine the next round of material and consumable selection.
Recommended Products
For the label materials and application scenarios covered in this article, the following BradyLAB (BRD) products are available for selection reference (click to view specifications and request a quote):
- T629样本库-97 (-196 °C nylon cloth cryogenic label, ¥999/roll)
- Lab112-629 / 35×25mm (-196 °C LN₂ nylon cloth cryovial label, ¥1490/roll)
- T439样本库-41 (6-color pre-printed cryogenic freezer label, price on request)
- Lab361-329-500C / 60×60mm (-80 °C cryovial conical tube microcentrifuge tube cap label, ¥769/roll)
- BRL-110-13 (BradyLAB LAB laboratory-specific cryogenic ribbon 110mm×300m, price on request)
For more materials and specific applications, please contact the product manager for selection assistance.
FAQ
Q1: For labels in pass-through windows, is choosing -196 °C resistant ones always safe?
No. Deep-freeze resistance only addresses "won't become brittle at low temperature" — it does not address "can it still be scanned after 1500 wipes." The decisive variables in pass-through window scenarios are wipe count and condensation cycle count; solvent wipe resistance and wet-state tack should be listed as independent criteria, accepted alongside temperature resistance.
Q2: Why does a label perform fine in the freezer but fall off after returning to room temperature?
Because condensation occurs during rewarming. As long as the transferred item enters a 2–8 °C or lower link, by dew point calculation its surface will inevitably be below the ambient dew point during rewarming and water will precipitate; once the adhesive interface is invaded by a water film, tack decreases significantly. The remedy is to wipe dry after rewarming before labeling, and to select an adhesive system with better wet-state tack.
Q3: Can the status label also use deep-freeze-resistant material?
Not recommended. Removability and deep-freeze tack inherently conflict in adhesive system design: removable adhesives achieve residue-free peeling through lower cohesive strength, while deep-freeze conditions require the adhesive layer to maintain high strength at low temperatures. The official material guide positions repositionable materials at the room-temperature tier; status layer and identity layer should be selected separately.
Q4: How to choose between 1D barcodes and 2D codes in pass-through window scenarios?
For narrow surfaces such as tube bodies, Code 128 is preferred — high density and stable reading; when more fields such as batch number, timestamp, and responsible person need to be encoded, choose 2D codes or Data Matrix. If interfacing with a LIMS, it is recommended to use 2D codes or Data Matrix uniformly to avoid field truncation.
Q5: The barcode looks perfectly clear to the eye — why can't the scanner read it?
Visible to the naked eye does not equal a passing symbol grade. Symbol contrast, modulation ratio, and defect rate should be measured with a barcode verifier per ISO/IEC 15416, with grades 0–4 corresponding to F–A. Factory acceptance at 2.5 (Grade B) or above is recommended, plus a post-wipe re-verification step requiring ≥1.5 (Grade C) to pass.
Q6: Do UV lamps damage labels?
Yes, especially dye-based direct thermal recording layers. 254 nm, 30 min per exposure, multiple times daily — the exposure is cumulative, manifesting as background graying and reduced bar-space reflectance difference. Switching to resin-based thermal-transfer printing significantly improves this, or positioning status labels outside the direct UV exposure area.
Q7: Are there special requirements for labeling small-diameter cryovials?
Yes — the key is overlap. Self-laminating materials applied to frozen tube surfaces require at least 3 mm end overlap; wrap-around materials also require overlap in LN₂ environments. Insufficient overlap is the most common cause of edge lifting and detachment on low-temperature tubes, and should be written into the SOP as a mandatory action rather than a recommendation.