
Bottom line first: The label selection sequence for cell culture storage bottles (media, serum, buffers, additive stock solutions) is the opposite of that for biobanks. For biobanks, the first constraint is the lowest temperature—first determine whether the samples will go into the LN₂ vapor phase or an ultra-low temperature freezer, then select the model from the material guide table. For storage bottles, the first constraint is the moist-heat interface: the same bottle travels back and forth daily between a 2–8 °C refrigerator and a 37 °C water bath, the bottle body repeatedly condenses, and condensate forms an interfacial water film between the adhesive layer and the bottle wall, pushing the label off the wall. This is the primary cause of label edge lifting and detachment on storage bottles, not temperature overrun. Temperature becomes the first constraint in only two scenarios—the 56 °C water bath immersion for serum heat inactivation, and the −20 °C freezing after serum aliquoting.
The second counterintuitive conclusion is that geometry is no longer a constraint. The "insufficient circumference, barcode won't fit" problem that recurs on cryovials, straws, and blood collection tubes does not exist on storage bottles: a 500 mL round bottle has an outer diameter of about 86 mm and a circumference of about 270 mm, 6.6 times the circumference of a 13 mm blood collection tube (about 40.8 mm). What really takes time in storage bottle selection is the temperature chain, the surface preparation, and the color-code zoning.
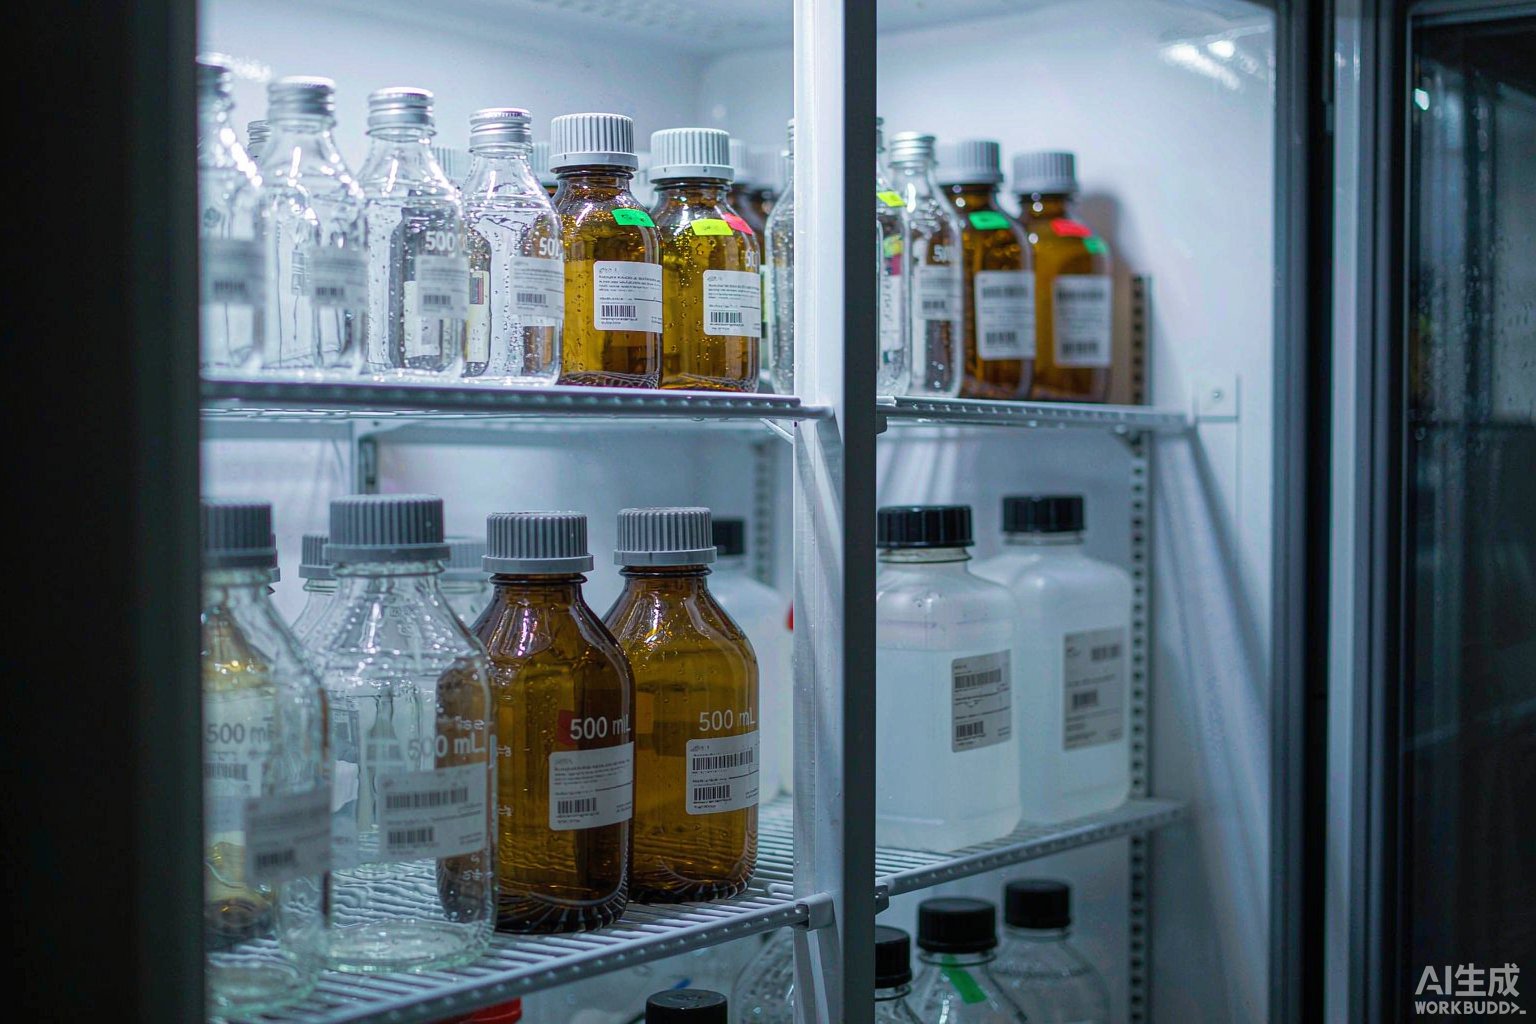
1. Why the selection sequence for storage bottles is the opposite of that for biobanks
Labels in a biobank face only a one-way temperature curve: after samples enter the LN₂ vapor phase or an ultra-low temperature freezer, they essentially do not return to room temperature, and occasional retrieval is a short operation. So the first step in selection is to find the lowest point of this curve and map it directly to the temperature column of the material guide table—one step to the answer.
Storage bottles face a curve that repeatedly crosses the dew point. A typical day for a bottle of complete medium is: take out of the 2–8 °C refrigerator → preheat in a 37 °C water bath for 15–30 min → pour out the day's amount in the biosafety cabinet → immediately tighten the cap on the remainder and return it to the 2–8 °C refrigerator. Every minute the bottle stays in room-temperature air, as long as the bottle wall temperature is below the ambient dew point, the outer surface will condense. If the labeling position falls in the condensation zone, the label backing will first be wetted by a water film, and the adhesive's initial tack and holding power will drop simultaneously; by the time the bottle returns to the refrigerator, the water film refreezes or slowly evaporates, the label edges have already lifted, and the next water bath will wash the whole label off.
Therefore, the selection sequence for storage bottles should be adjusted to: first check whether it will be immersed in a water bath (immersion → hot water grade; preheating only → ambient grade), then check whether it will be frozen (−20 °C → −40 °C or above grade), and finally check bottle material and geometry (glass or polyester round bottles with curved surfaces → face stocks with good conformability; square bottles → flat-surface-friendly face stocks). This sequence is completely opposite to that for cryogenic biobanks and is the core judgment of this article.
2. Four types of storage bottle liquids and their respective operating boundaries
"Storage bottle" is not a single category but four sub-scenarios with completely different failure mechanisms. Once the liquid in the bottle is classified, the selection conclusion becomes immediately clear: serum-containing complete medium fails on microbial contamination and glutamine degradation, basal medium fails on light and temperature fluctuations, serum fails on repeated freeze–thaw, and buffers and dissociation solutions fail on pH drift and precipitation.
| Category | Representative liquids | Storage conditions | Shelf-life basis | Main failure risks |
|---|---|---|---|---|
| Complete medium | DMEM, RPMI 1640, MEM with 5%–20% serum and 1% double antibiotics | 2–8 °C, protected from light, sealed | Use within 2 weeks of preparation, no longer than 1 month | Microbial contamination, glutamine degradation, inactivation of active components |
| Basal medium | DMEM, RPMI 1640 without serum or unstable additives | 2–8 °C, protected from light | For unopened bottles, refer to the expiry date on the bottle (commonly 12 months from manufacture) | Light and temperature fluctuations causing degradation of vitamins and amino acids |
| Serum | Fetal bovine serum, newborn calf serum | −20 °C or lower; storage at 4 °C no longer than 1 month | Aliquot by usage and freeze; avoid repeated freeze–thaw | Repeated freeze–thaw causing ice crystal damage to proteins and progressive loss of activity |
| Buffers and dissociation solutions | PBS, HBSS, trypsin-EDTA | 2–8 °C; trypsin can be aliquoted and frozen | Per product instructions; for those with additional unstable components, use within 48 hours or 4 weeks | pH drift, calcium carbonate crystallization, precipitate formation |
This table determines the label "replacement frequency": complete medium bottles need a new label every 2 weeks, serum aliquot bottles are typically frozen for at least six months, and basal medium bottles follow the expiry date on the bottle. Replacement frequency directly determines whether removable face stock is needed—this will be concluded in the material matrix in Section 6.
3. Temperature chain: from 2–8 °C to 56 °C, then to −20 °C
List all the temperature steps a bottle of storage bottle liquid may go through, take the highest moist-heat grade and the lowest freezing grade; once these two endpoints are set, the material grade is set. Among the five steps in the table below, the 56 °C water bath immersion in step 4 and the −20 °C freezing in step 5 are the key endpoints.
| Step | Temperature | Exposure medium | Typical duration | Requirements for the label |
|---|---|---|---|---|
| 1 Refrigerator storage | 2–8 °C | Air in the cabinet, condensate | Long term | Standard low-temperature resistance, moisture resistance, light protection |
| 2 Water bath preheating | 37 °C | Water bath immersion | No more than 30 min per session; prewarming of the same bottle is recommended to be kept to about 5 times or fewer | No detachment or ink bleeding under short-term hot water immersion |
| 3 Crystal redissolution | 45 °C | Water bath shaking | 15 min | Same as above, plus resistance to shaking shear |
| 4 Serum heat inactivation | 56 °C (±0.5 °C) | Water bath immersion (water level roughly level with the liquid level in the bottle) | 30 min (±3 min), gently shake every 5–10 min | Hot water grade face stock; no curling or detachment after immersion |
| 5 Aliquot freezing | −20 °C | Freezing | Long term | Material rated −40 °C or above is sufficient |
Three details that are easily overlooked: First, medium containing sodium bicarbonate taken from refrigeration and placed directly into a 37 °C water bath may form calcium carbonate crystals; it can be redissolved by shaking in a 45 °C water bath for 15 min, but never remove them by filtration—if the label covers the bottle body, the operator cannot see whether the crystals have fully dissolved. Second, frozen serum must first be thawed slowly in a 2–8 °C refrigerator (often overnight), then transferred to room temperature; never put frozen serum directly into a 37 °C water bath for rapid thawing, as this will darken the color, increase viscosity, and precipitate lipoprotein. Third, after heat inactivation is complete, immediately cool in an ice bath or cold water bath before aliquoting; inactivation temperatures above 58 °C or excessive time will destroy growth factors, vitamins, and amino acids, reducing the value of that batch of serum—so the label on the inactivation bottle must clearly record the "inactivated / not inactivated" status and the inactivation batch.
4. Bottle geometry: ample circumference, no need to compress barcodes
This is the most fundamental difference between storage bottles and thin-tube containers. Taking laboratory bottles with GL45 screw threads as an example, the official ordering table gives outer diameters of: 100 mL about 56 mm, 250 mL about 70 mm, 500 mL about 86 mm, 1000 mL about 101 mm, 2000 mL about 136 mm. Converted by circumference C = πd:
| Nominal capacity | Outer diameter d (mm) | Circumference C (mm) | Recommended maximum label width (mm) | Notes |
|---|---|---|---|---|
| 100 mL | 56 | 175.9 | 140 | Smallest size; still room for a 1D barcode |
| 250 mL | 70 | 219.9 | 175 | Standard preparation bottle |
| 500 mL | 86 | 270.2 | 216 | Main size |
| 1000 mL | 101 | 317.3 | 253 | Large-capacity basal solutions |
| 500 mL square bottle | 77 (outer) | Flat-surface labeling | Within single-face width | Polyester square bottle; saves 13%–20% shelf space compared with round bottles |
The recommended maximum label width is 80% of the circumference, leaving the remaining 20% for a longitudinal observation strip and a scale avoidance zone. This margin does not exist on thin-tube containers—a 13 mm blood collection tube has a circumference of only about 40.8 mm, and a 20-digit 1D barcode requires about 58 mm, which simply does not fit, so a 2D code must be used instead. On storage bottles, however, even the smallest 100 mL bottle (circumference 175.9 mm) has more than enough room for a 20-digit Code 128.
The module count of Code 128 is estimated as M = 11n + 35 (n is the number of data characters, including start, check, and stop). Taking a narrow module X = 0.19 mm and a total quiet zone of 10 mm on both sides, when n = 20 the total barcode width is 255 × 0.19 + 10 = 58.45 mm; increasing X to 0.33 mm (for long-distance scanning) gives 94.15 mm, and increasing to 0.50 mm gives only 137.5 mm. All three values fit within the 175.9 mm circumference of a 100 mL bottle. Conclusion: there is no pressure to compress digits on storage bottles; a 1D barcode can encode the full 20 digits; what really needs to be controlled is that the label height does not cross the bottle shoulder transition or the bottom arc.
The 2D code's place is elsewhere: after serum inactivation, aliquot by single-use volume into 50 mL microcentrifuge tubes, where the unfoldable width on the curved tube body is limited; at this point switch to DataMatrix 24×24, X = 0.30 mm, side length 7.2 mm, which saves more space than a 1D barcode; the same applies to the top surface of the cap.
5. Condensation and interfacial water film: the primary failure mechanism
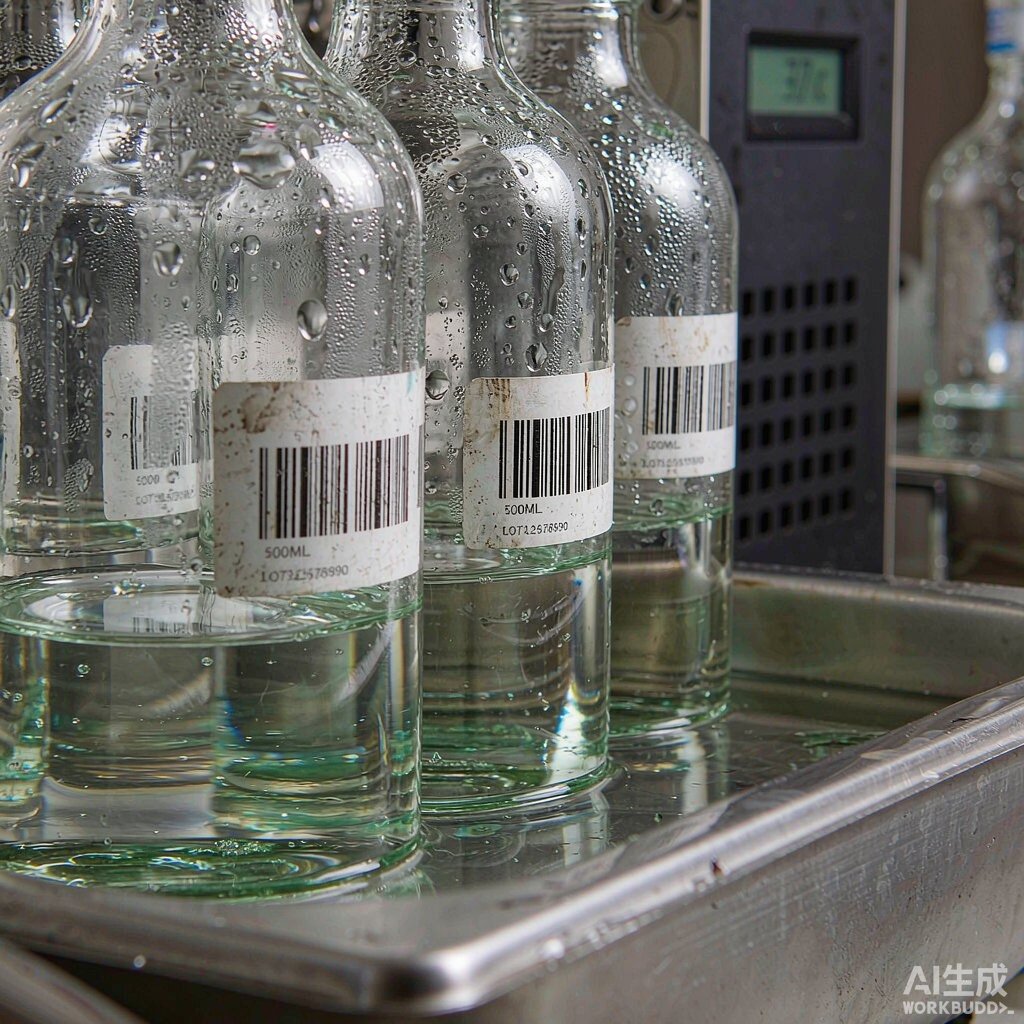
Adhesion between the adhesive layer and the adherend relies on wetting. When the bottle wall condenses, water molecules preferentially occupy the polar sites on the bottle wall surface, and the adhesive layer is effectively bonding the bottle "through a layer of water," with both initial tack and holding power decreasing simultaneously. Peel strength measured per GB/T 2792-2014 and holding tack per GB/T 4851-2014 both deteriorate significantly in the wet state; this is a set of criteria shared by all moist-heat scenarios.
There are four countermeasures, in order of execution:
First, do not label in a condensed state. Let bottles taken from the refrigerator warm to room temperature first, wipe the bottle wall dry with a lint-free cloth, and confirm there is no water film on the surface before labeling. This alone can prevent more than half of early detachments in storage bottle scenarios.
Second, surface preparation. Wipe with 75% ethanol and wait for it to fully evaporate; glass bottles can be further treated with anhydrous ethanol to remove residue; polyester bottles (PET / PETG) have higher surface energy than polypropylene but still need mold release agents and fingerprint oils removed.
Third, roll after labeling. Use a squeegee or roller to press from the center of the label toward both sides, squeezing out air bubbles, especially on the curved sides of round bottles where gaps are most likely to remain.
Fourth, choose face stocks with good conformability. The official material guide table describes T629 as "nylon cloth label, easy to apply, high and low temperature resistant, good conformability, for all places in the laboratory requiring identification"—the phrase "good conformability" corresponds exactly to the curved surface of round bottles; while T625 is a vinyl cloth label that is repositionable, removable, leaves no residue, and can be reapplied, suitable for reusable transfer bottles. These two are the two fundamental face stocks for storage bottle scenarios.
6. Temperature grades and the official material matrix
The table below follows verbatim the official material guide table of BradyLAB (BRD) Lab&HC laboratory medical labels; the checkmark columns follow the official table's criteria and are not altered to suit the scenarios. The grade selection logic for storage bottles is: bottles at standard 2–8 °C and 37 °C preheating fall in the ambient range; serum inactivation bottles that go into a 56 °C water bath fall in the hot water range; microcentrifuge tubes aliquoted at −20 °C fall in the −40 °C or above range.
| Material code | Material and features | LN₂ −196 °C | Freezer −80 °C | Hot water 100 °C | Autoclave 121 °C | Ambient | Cryovial/test tube |
|---|---|---|---|---|---|---|---|
| T629 | Nylon cloth label, easy to apply, high and low temperature resistant, good conformability | Applicable | Applicable | Applicable | Applicable | Applicable | Applicable |
| T459 | Ultra-thin polyester label, self-laminating label with transparent tail, protects printed content and leaves a transparent window for observing liquid level | Applicable | Applicable | Applicable | Applicable | — | Applicable |
| T429 | Ideal choice for labeling frozen flat surfaces; when applied to frozen tube surfaces, overlap at least 3 mm end to end | Applicable | Applicable | Applicable | Applicable | — | Applicable |
| T439 | 6-color cryogenic label, pre-printed color at the top of the label, for quick identification and differentiation of laboratory container category classification | Applicable | Applicable | Applicable | — | — | Applicable |
| T509 | Durable vinyl label, suitable for wrapping, good conformability; requires overlap when used in LN₂ environments | Applicable | Applicable | Applicable | — | — | — |
| T625 | Vinyl cloth label, repositionable, removable, no residue, reusable | — | — | — | — | Applicable | Applicable |
| T419 | Glossy white PET material, for cryovials and microcentrifuge tubes, resistant to −40 °C and above | — | — | — | — | Applicable | Applicable |
| T329 | Matte white / PP adhesive, −40 °C low-temperature freezer label | — | — | — | — | Applicable | Applicable |
Three reading notes. First, in the official table only four products are checked in the ambient column: T629, T625, T419, and T329; T459, T429, T439, and T509 are all unchecked in the ambient column—they are introduced for functional requirements such as self-laminating protection, overlap geometry, color-code zoning, and wrap-around conformability, not driven by temperature. Media bottles in standard 2–8 °C refrigerators should preferentially use the first four.
Second, bottles that need to go into a 56 °C water bath for serum heat inactivation fall between ambient and 100 °C. The official table has no intermediate grade; following the principle of not rounding down, models applicable in the hot water 100 °C column should be selected; T629 is the only model checked in all four columns of LN₂, freezer, hot water, and autoclave as well as ambient, microscope slide, cryovial/test tube, and conical tube—a reliable solution common to both inactivation bottles and standard bottles.
Third, serum tubes aliquoted at −20 °C are above the −40 °C threshold; T419 or T329 is sufficient, and LN₂-grade material is unnecessary. The most common mistake here is treating "low temperature" as "the lower the better"—in fact, one grade higher material is sufficient to cover the requirement, and over-specifying only adds cost.
7. Labeling exclusion zones: scales, liquid-level observation window, and bottle neck threads
Storage bottles have two types of built-in areas that cannot be occupied. The first is the silk-screen scale. Glass laboratory bottles use permanently fired white enamel for the scale and white marking area; polyester storage bottles use silk-screened white enamel scales with a large white marking area. The scale is used for estimating remaining volume and verifying preparation; when applying the label flat, it must not cross the scale lines horizontally; if the label is large, align the top edge above the highest scale mark or the bottom edge below the lowest scale mark.
The second is the liquid-level observation strip. Whether the medium has deteriorated relies on visual criteria: normal culture liquid is transparent and clear; turbidity, floccules, or abnormal color indicate contamination or deterioration. Therefore, the label must not wrap entirely around the bottle; a longitudinal transparent strip must be left for observing the liquid level and liquid state. This is consistent with the design concept of T459 in the official material table, which "leaves a transparent window for observing liquid level"—if printed content really needs to be covered, a self-laminating structure with a transparent window should be chosen rather than covering the entire observation area.
The other two exclusion zones are the bottle neck threads and cap body (labeling would affect cap sealing and pouring ring fit), and the bottom arc and shoulder transition (large curvature changes; flat face stocks are most prone to lifting at transitions). Label height should be kept within the straight cylindrical section of the bottle body.
8. Field set: liquid identity, expiry, batch, and aliquot number
The information carried on a storage bottle label is divided into a static layer and a dynamic layer. The static layer is the identity of the liquid itself: liquid name and catalog number, lot number, preparer; the dynamic layer is the current state of the liquid: preparation date, opening date, expiry date, aliquot number, inactivation status.
A directly reusable coding structure is "category-variety-date-serial number," for example MED-DMEM-20261009-A03 indicating the 3rd bottle of DMEM complete medium prepared on October 9, 2026. For serum, two additional fields are recommended in the dynamic layer: thaw date and inactivation status (not inactivated / inactivated at 56 °C for 30 min), because whether the same batch of serum has been inactivated directly affects the results of immune-related experiments.
Per ISO 20387:2018 requirements for biological sample preservation records and ISO/IEC 17025:2017 requirements for equipment and consumable identification, records should be traceable to batch and operator; as key inputs for cell culture, the lot number, expiry date, and aliquot number of media and serum should be directly referenceable in experimental records. ISO 13485:2016 sets quality management system requirements for manufacturers of media used as IVD or biopharmaceutical raw materials; aligning the bottle lot number with the COA during incoming inspection is the starting point for downstream traceability.
9. Printing and ribbon: thermal-transfer resin-based is the only reliable solution
Storage bottle labels must withstand three types of challenges—water bath immersion, ethanol wiping, and freezing—so there is essentially no second choice for printing method: thermal transfer with a resin-based ribbon. Direct thermal printing darkens overall under a 56 °C water bath, inkjet and handwriting spread after the water bath, and the toner layer of laser printing tends to crack when bent on curved surfaces.
BradyLAB (BRD) BRL-110-BK laboratory-specific cryogenic ribbon (110 mm × 300 m, black) is the matching consumable; adjust density and speed until barcode edges are clear without burrs, then verify the 1D symbol quality grade per ISO/IEC 15416 with a barcode verifier. A matte barcode surface is recommended—after the water bath, water clings to the bottle wall, and gloss surfaces reflecting under light will significantly reduce first-read rates.
10. Symbology and readability: 1D is sufficient; 2D for aliquot tubes
Per the calculation in Section 4, there is no digit-count pressure for 1D barcodes on storage bottles; a full 20-digit Code 128 is still far smaller than the circumference of the smallest bottle. It is recommended that the narrow module X be no less than 0.25 mm: water slightly swells the face stock, and too small an X will distort the bar width ratio in the wet state, causing the ISO/IEC 15416 grade to drop.
2D codes are used in two locations: first, the 50 mL microcentrifuge tubes aliquoted after serum inactivation—DataMatrix 24×24, X = 0.30 mm, side length 7.2 mm, verified per ISO/IEC 15415; second, the top surface of the cap—when round bottles are stacked in the refrigerator, the caps face outward, and a top-surface label makes it easy to scan without opening the door. Whether 1D or 2D, labels on the same batch of bottles should be applied at the same horizontal height so the handheld scanner does not have to hunt for the code each time.
11. Color-code zoning: quick differentiation of multiple liquid varieties
A cell culture laboratory typically has 6–12 liquids in use; finding a bottle in the refrigerator by text label alone is slow. In the official material guide table, T439 is positioned precisely for this: "6-color cryogenic label, pre-printed color at the top of the label, for quick identification and differentiation of laboratory container category classification."
The implementation is to assign a fixed color to each variety and write the color into the refrigerator zoning map, posted inside the refrigerator door. Example: DMEM red, RPMI 1640 blue, MEM green, DMEM/F12 yellow, PBS white, trypsin-EDTA orange. Color-code labels are applied to the bottle shoulder or top of the body, while the main label remains on the straight cylindrical section; the two do not conflict.
12. Biosafety and disposal: visual contamination criteria and waste liquid inactivation
Media bottles and serum bottles are both subject to biosafety management. Per GB 19489-2008 and WS 233-2002, operations involving unknown risks or potential pathogens should be conducted in biosafety laboratories of the appropriate level, and container exterior labeling should be clearly legible. The biohazard warning symbol is used per ISO 7010 W009 for secondary labeling of contaminated cultures and waste containers.
Two practical criteria are worth writing into the SOP: first, visual criteria—transparent and clear is normal; turbidity, floccules, or obvious discoloration is suspicious; for phenol red-containing media, color can also indicate whether pH has drifted; second, mycoplasma monitoring—perform mycoplasma testing on abnormal cultures, with additional bacterial and fungal testing if necessary. Confirmed contaminated cultures and serum-containing waste liquids should be disposed of after autoclaving per biosafety requirements, with a sterilization temperature of 121 °C; this is also one of the practical uses of the "autoclave 121 °C" column in the material guide table: labels that need to go into the autoclave together with waste bottles must use models applicable in that column.
13. Six-step implementation SOP
Step 1, classify the liquid. Per the table in Section 2, classify the liquid in the bottle into one of four categories—complete medium / basal medium / serum / buffer and dissociation solution—and write down the respective storage conditions and shelf life.
Step 2, determine temperature endpoints. Per the table in Section 3, identify the highest moist-heat grade (whether it goes into a 56 °C water bath) and the lowest freezing grade (whether it goes to −20 °C) that this bottle of liquid will experience.
Step 3, measure bottle geometry. Measure the outer diameter, calculate the circumference, and take 80% as the maximum label width; confirm the height of the straight cylindrical section so the label height does not cross the bottle shoulder or bottom arc; for square bottles, use the single-face width.
Step 4, prepare the adherend. Warm to no condensation → wipe dry with a lint-free cloth → wipe with 75% ethanol and let evaporate → apply label and roll press.
Step 5, thermal-transfer printing. Resin-based ribbon, X ≥ 0.25 mm, matte barcode surface, verify grade per ISO/IEC 15416 (1D) or ISO/IEC 15415 (2D) after application.
Step 6, build an expiry ledger. Enter preparation date, opening date, expiry date, and aliquot number into the ledger; set a 2-week expiry reminder for complete medium, review serum aliquot tubes by batch, and replace labels and recheck liquid status upon expiry.
14. Common failures and troubleshooting
| Symptom | Most likely cause | Troubleshooting and remedy |
|---|---|---|
| Label edges lifting, whole label detaching after water bath | Labeling in a condensed state; interfacial water film not eliminated | Warm and dry the bottle, then reapply; roll press after application; move the labeling step from beside the refrigerator to a dry bench |
| Label intact but barcode won't scan | Narrow module X too small, bar width distortion in wet state, or gloss surface reflection | Increase X to 0.25 mm or above; switch barcode surface to matte; retest grade per ISO/IEC 15416 |
| Label curling after 56 °C inactivation | Ambient-grade face stock used instead of hot water grade | Switch inactivation bottles to models applicable in the hot water column, and confirm the label does not cross the bottle shoulder transition |
| −20 °C aliquot tube labels brittle and cracked | Face stock does not cover −20 °C conditions, or not pressed firmly during application | Use material rated −40 °C or above; roll press to expel air after application; avoid labels crossing the tube neck threads |
| Cannot find a certain medium | Lack of color-code zoning | Introduce 6-color pre-printed labels for variety zoning; post a zoning map inside the refrigerator door |
Recommended Products
For the label materials and application scenarios covered in this article, the following BradyLAB (BRD) products are available for selection reference (click to view specifications and request a quote):
- Lab096-629 80 × 60 mm nylon cloth cryogenic label (¥999/roll) — applicable in all columns of the official table: LN₂, freezer, hot water, autoclave, and ambient; good conformability; fits 500 mL and 1000 mL round bottle bodies; also a reliable choice for serum heat inactivation bottles
- Lab014-629 50 × 30 mm nylon cloth cryogenic label (¥1890/roll) — size fits the straight cylindrical section of 250 mL and 500 mL bottles; suitable for standard 2–8 °C and 37 °C preheating conditions
- Lab084-439 30 × 15 mm six-color pre-printed classification label (price on request/roll) — pre-printed color at the top, for color-code zoning of media varieties and refrigerator zoning management
- BRL-110-BK laboratory-specific cryogenic ribbon 110 mm × 300 m (price on request/roll) — resin-based, for thermal-transfer printing, ensuring barcode readability under water bath immersion and ethanol wiping conditions
FAQ
Q1: Should storage bottle labels be selected to ultra-low temperature standards?
Generally no. The main operating conditions for storage bottles are 2–8 °C refrigeration and 37 °C water bath preheating, which fall in the ambient range; only two scenarios require upgrading—the 56 °C water bath immersion for serum heat inactivation requires the hot water grade, and the −20 °C freezing after serum aliquoting requires the −40 °C or above grade. Applying the LN₂ standards of cryogenic biobanks directly to storage bottles is over-specifying and only adds cost.
Q2: Why can't the label wrap all the way around the bottle?
Because a liquid-level observation strip must be left. Whether the medium has deteriorated relies on visual criteria—transparent and clear is normal; turbidity, floccules, or abnormal color is suspicious. Wrap-around labeling would cover the observation area, and the operator could not judge the liquid state without opening the cap.
Q3: How often should media bottle labels be replaced?
Follow the liquid, not the label. Complete medium is recommended to be used within 2 weeks of preparation, no longer than 1 month, so the label is replaced with each newly prepared bottle of medium; basal medium follows the expiry date on the bottle; serum aliquot tubes are checked against the aliquot number and batch after each use—the label itself can be retained long-term, but once repeated freeze–thaw exceeds the established number of cycles, the entire batch should be reviewed.
Q4: Will the label be washed off during serum heat inactivation?
Not if the correct grade is selected. Inactivation is a 56 °C water bath for 30 min, with the water level roughly level with the liquid level in the bottle—a typical hot water immersion condition. Models applicable in the hot water 100 °C column should be used, and during labeling, roll press to expel air and avoid crossing the bottle shoulder transition. Immediately cool in an ice bath or cold water bath after inactivation; after cooling, wipe the bottle dry and check label readability.
Q5: What is the difference between labeling glass bottles and polyester square bottles?
Glass round bottles (such as borosilicate glass bottles with GL45 screw